Introduzione
Are the buttons and switches on the top panel of your Marshall Woburn not responding? If so, here is the guide on how to take out the top control panel. All you need is the standard #1 Phillips Screwdriver head to remove the screws involved with this replacement.
Cosa ti serve
-
-
-
On a flat surface, orient the device so that the front grille is facing downward.
-
Using a Phillips #1 screwdriver, remove the ten outer 28.6 mm screws marked in red.
-
Remove the eight inner 28.6 mm screws with the Phillips #1 screwdriver.
 Chiedi a FixBot
-
-
-
Lift the back input board slightly above the back panel.
-
Rotate the input board so that you can slide it into the hole in the back panel that it came from.
-
Fully slide the input board through the back panel and set it down gently inside the speaker.
-
-
-
Grab the panel by the large hole and lift one side until you can fit your hand under.
-
Use your hand to fully remove the back panel from the rest of the frame.
-
-
-
-
-
-
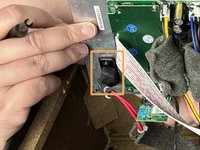
Disconnect the 5 wires circled in red from the back input board.
-
-
-
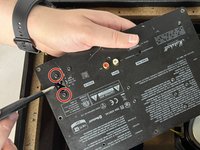
Remove the two 12.7 mm screws marked in red from the front of the back input panel with a Phillips #1 screwdriver.
-
Remove the power input from the back side of the panel.
-
-
-
-
-
Using a Philips #1 screwdriver, remove the eight 9.5 mm screws that are marked in red from the perimeter of the metal frame for the top control panel.
-
-
-
From the outside of the speaker, push down on the top control panel until you can feel the adhesive holding it to the frame start to loosen.
-
On the inside, make your way around the border of the top control panel and remove the adhesive until you can fully remove the panel from the frame.
-
-




To reassemble your device, follow these instructions in reverse order.

Team

UMass Dartmouth, Team 2-4, Gulbrandsen Fall 2023 Membro di UMass Dartmouth, Team 2-4, Gulbrandsen Fall 2023
UMASSD-GULBRANDSEN-F23S2G4
3 Membri
60 guide realizzate
1Commento della guida
Hi. The on off switch has broken on my Woburn 2. Any ideas how to replace it and where I could buy a new switch? Thank you.
