Salta al contenuto principale

Lenovo Legion 5 17ACH6H Back Cover Replacement

Cosa ti serve

  1. Lenovo Legion 5 17ACH6H Back Cover Replacement, Back cover removal: passo 1, immagine 1 di 2 Lenovo Legion 5 17ACH6H Back Cover Replacement, Back cover removal: passo 1, immagine 2 di 2
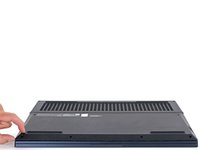
    • Use a Phillips #1 screwdriver to remove the following ten screws securing the back cover to the frame:

    • Six 12.8 mm PH1 screws

    • Four 4.6 mm PH1 screws

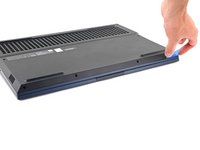
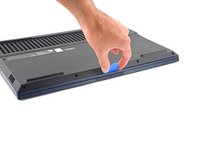
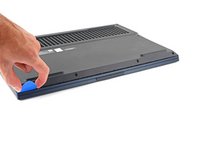
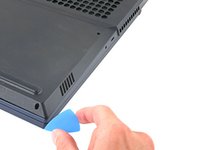
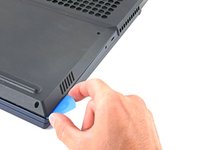
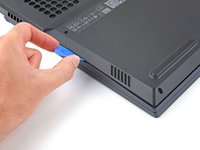
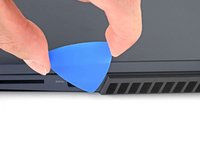
  2. Lenovo Legion 5 17ACH6H Back Cover Replacement, Release the front clips: passo 2, immagine 1 di 3 Lenovo Legion 5 17ACH6H Back Cover Replacement, Release the front clips: passo 2, immagine 2 di 3 Lenovo Legion 5 17ACH6H Back Cover Replacement, Release the front clips: passo 2, immagine 3 di 3
    • Insert the rounded edge of an opening pick between the back cover and the frame in the lower right corner.

    • Angle the pick to about 45˚.

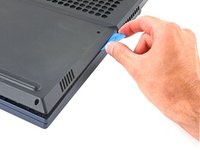
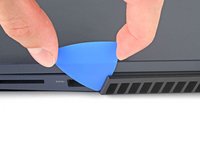
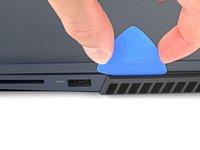
  3. Lenovo Legion 5 17ACH6H Back Cover Replacement: passo 3, immagine 1 di 3 Lenovo Legion 5 17ACH6H Back Cover Replacement: passo 3, immagine 2 di 3 Lenovo Legion 5 17ACH6H Back Cover Replacement: passo 3, immagine 3 di 3
    • Slide the pick along the front edge to release the clips securing the back cover to the frame.

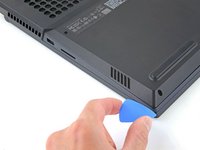
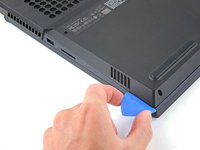
  4. Lenovo Legion 5 17ACH6H Back Cover Replacement, Release the right clips: passo 4, immagine 1 di 3 Lenovo Legion 5 17ACH6H Back Cover Replacement, Release the right clips: passo 4, immagine 2 di 3 Lenovo Legion 5 17ACH6H Back Cover Replacement, Release the right clips: passo 4, immagine 3 di 3
    • Insert the edge of an opening pick between the back cover and the frame on the right edge.

    • Angle the pick to about 30˚ and slide down the left edge to release the clips.

  5. Lenovo Legion 5 17ACH6H Back Cover Replacement, Release the left clips: passo 5, immagine 1 di 3 Lenovo Legion 5 17ACH6H Back Cover Replacement, Release the left clips: passo 5, immagine 2 di 3 Lenovo Legion 5 17ACH6H Back Cover Replacement, Release the left clips: passo 5, immagine 3 di 3
    • Repeat the same procedure on the left edge to release the clips.

  6. Lenovo Legion 5 17ACH6H Back Cover Replacement, Release the right vent clips: passo 6, immagine 1 di 3 Lenovo Legion 5 17ACH6H Back Cover Replacement, Release the right vent clips: passo 6, immagine 2 di 3 Lenovo Legion 5 17ACH6H Back Cover Replacement, Release the right vent clips: passo 6, immagine 3 di 3
    • Slide the opening pick between the frame and the plastic vents on the right side near the USB-A port.

    • Rotate the pick so that it is positioned on top of the plastic vents.

    • If the pick is difficult to insert, position the laptop vertically to reduce the weight on the back cover.

  7. Lenovo Legion 5 17ACH6H Back Cover Replacement: passo 7, immagine 1 di 2 Lenovo Legion 5 17ACH6H Back Cover Replacement: passo 7, immagine 2 di 2
    • Push the pick between the frame and plastic vents.

    • Slide the pick along the top edge of the plastic vents to release the clips.

  8. Lenovo Legion 5 17ACH6H Back Cover Replacement, Release the left vent clips: passo 8, immagine 1 di 3 Lenovo Legion 5 17ACH6H Back Cover Replacement, Release the left vent clips: passo 8, immagine 2 di 3 Lenovo Legion 5 17ACH6H Back Cover Replacement, Release the left vent clips: passo 8, immagine 3 di 3
    • Slide the opening pick between the frame and the plastic vents on the left side near the USB-C port.

    • Rotate the pick so that it is positioned on top of the plastic vents.

    • Push the pick between the frame and plastic vents.

    • Slide the pick along the top edge of the plastic vents to release the clips.

  9. Lenovo Legion 5 17ACH6H Back Cover Replacement, Remove the back cover: passo 9, immagine 1 di 3 Lenovo Legion 5 17ACH6H Back Cover Replacement, Remove the back cover: passo 9, immagine 2 di 3 Lenovo Legion 5 17ACH6H Back Cover Replacement, Remove the back cover: passo 9, immagine 3 di 3
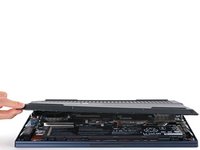
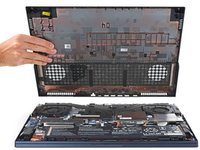
    • Lift the back cover up and remove it from the chassis.

    • During reassembly, this is a good point to power on your laptop and test all functions before sealing it up. Be sure to power your laptop back down before you continue working.

Conclusione

To reassemble your device, follow these instructions in reverse order.

Take your e-waste to an R2 or e-Stewards certified recycler.

Repair didn’t go as planned? Try some basic troubleshooting, or ask our Lenovo Legion answers community for help.

Altre 2 persone hanno completato questa guida.

Chayton Ritter

Membro da: 08/21/20

18.591 Reputazione

102 Guide realizzate

Team

Guide Team Membro di Guide Team

Staff

6 Membri

7.844 Guide realizzate

0 Commenti

Aggiungi Commento

Visualizza Statistiche:

Ultime 24 Ore: 12

Ultimi 7 Giorni: 60

Ultimi 30 Giorni: 235

Tutti i Tempi: 4,634