Salta al contenuto principale

Leapfrog My Own Leaptop Keyboard Buttons Replacement Guide

Cosa ti serve

  1. Leapfrog My Own Leaptop Keyboard Buttons Replacement Guide, Battery: passo 1, immagine 1 di 1
    • Flip over device so that back portion of the device is facing you.

  2. Leapfrog My Own Leaptop Keyboard Buttons Replacement Guide: passo 2, immagine 1 di 1
    • Unscrew the one 10mm screw that holds the battery cover in place with a a PH1 phillips head screwdriver.

    • Please note that the screw cannot be removed as it is attached to the battery cover.

  3. Leapfrog My Own Leaptop Keyboard Buttons Replacement Guide: passo 3, immagine 1 di 2 Leapfrog My Own Leaptop Keyboard Buttons Replacement Guide: passo 3, immagine 2 di 2
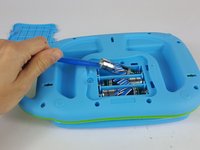
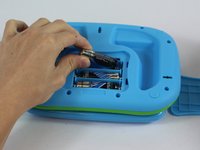
    • Carefully pry the batteries out with a plastic opening tool prying from the non spring side.

    • Remove the three AA batteries.

    • Note the direction of the batteries for when reassembling.

  4. Leapfrog My Own Leaptop Keyboard Buttons Replacement Guide, Keyboard Buttons: passo 4, immagine 1 di 1
    • Remove the eleven 10mm screws from the back of the device with a a PH1 phillips head screwdriver.

  5. Leapfrog My Own Leaptop Keyboard Buttons Replacement Guide: passo 5, immagine 1 di 1
    • Carefully remove back of the device.

    • Make sure not to rip the wires when lifting the cover off.

  6. Leapfrog My Own Leaptop Keyboard Buttons Replacement Guide: passo 6, immagine 1 di 2 Leapfrog My Own Leaptop Keyboard Buttons Replacement Guide: passo 6, immagine 2 di 2
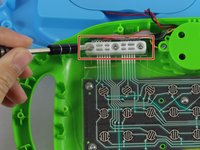
    • Remove the three 10mm screws from the upper left hand corner white plastic piece with a PH1 phillips head screwdriver.

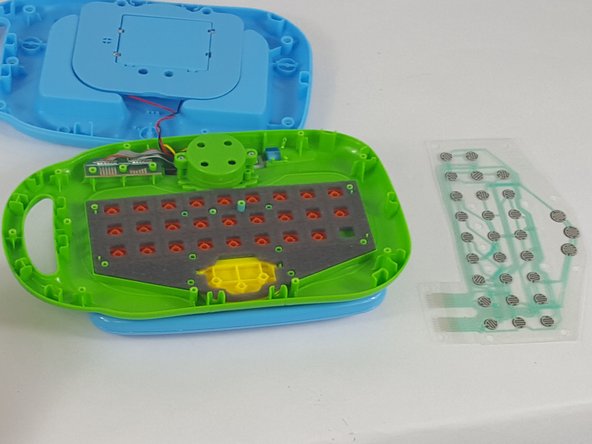
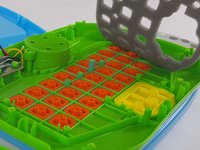
    • Unscrew the five 4mm screws from the plastic membrane with a PH1 phillips head screwdriver.

  7. Leapfrog My Own Leaptop Keyboard Buttons Replacement Guide: passo 7, immagine 1 di 1
    • Remove the white plastic piece and place it to the side.

  8. Leapfrog My Own Leaptop Keyboard Buttons Replacement Guide: passo 8, immagine 1 di 3 Leapfrog My Own Leaptop Keyboard Buttons Replacement Guide: passo 8, immagine 2 di 3 Leapfrog My Own Leaptop Keyboard Buttons Replacement Guide: passo 8, immagine 3 di 3
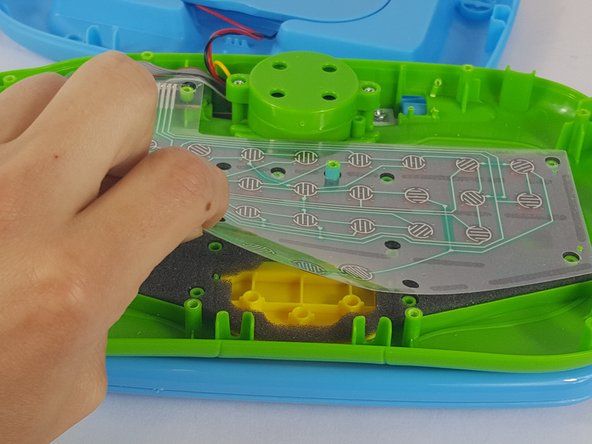
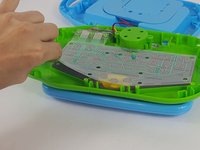
    • Gently grab the membrane and peal it upwards.

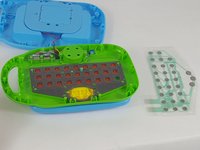
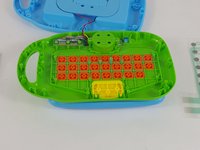
    • Carefully remove the membrane and set it to the side.

    • From this step you can also clean the membrane of any residue with a lightly dampened paper towel.

    • Ensure that the membrane is completely dry before reassembly.
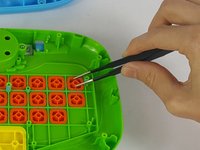
  9. Leapfrog My Own Leaptop Keyboard Buttons Replacement Guide: passo 9, immagine 1 di 2 Leapfrog My Own Leaptop Keyboard Buttons Replacement Guide: passo 9, immagine 2 di 2
    • Gently lift and remove the foam piece

  10. Leapfrog My Own Leaptop Keyboard Buttons Replacement Guide: passo 10, immagine 1 di 3 Leapfrog My Own Leaptop Keyboard Buttons Replacement Guide: passo 10, immagine 2 di 3 Leapfrog My Own Leaptop Keyboard Buttons Replacement Guide: passo 10, immagine 3 di 3
    Attrezzo utilizzato in questo passaggio:
    Tweezers
    $4.99
    Compra
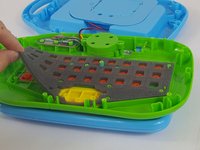
    • From here, each button is able to be removed for cleaning or replacement.

    • Using a tweezers or needle nose pliers, remove the necessary pieces from the device.

Conclusione

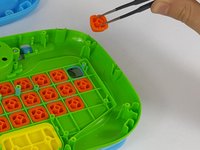
To reassemble your device, follow these instructions in reverse order.

Altre 2 persone hanno completato questa guida.

Team

USF Tampa, Team 14-6, Lacy Spring 2016 Membro di USF Tampa, Team 14-6, Lacy Spring 2016

USFT-LACY-S16S14G6

4 Membri

6 Guide realizzate

6 Commenti

Very useful. but where to get a new membrane? please help

Alina Timchenko - Replica

Didn't work. I'll buy a new toy.

victoria_nglover19 - Replica

Is the screen on this suppose to light up?

stewartmelinda41 - Replica

I was wondering if the screen is suppose to light up because the one I have doesnt

stewartmelinda41 - Replica

thank you very much

Njabulo Mbele - Replica

Aggiungi Commento

Visualizza Statistiche:

Ultime 24 Ore: 1

Ultimi 7 Giorni: 1

Ultimi 30 Giorni: 43

Tutti i Tempi: 5,192