Salta al contenuto principale
Lasko CD08200 Fan Replacement

Lasko CD08200 Fan Replacement

Yonatan Krapivsky

Yonatan Krapivsky e 2 altri collaboratori

Ultimo aggiornamento il September 8, 2023

15 minuti
Facile

Introduzione

Vai al passo 1

A working fan is vital to a fan-based space heater, like the Lasko CD08200. Sometimes, maintenance like fan cleaning or replacement may be required to keep the device functional or to improve performance.

Please refer to this Troubleshooting guide before beginning to make sure replacing the fan is the correct action to fix your device.

Please disconnect the device and let it sit for 10 minutes so any fuses can drain before beginning this guide.


Cosa ti serve

iFixit guadagna commissioni quando acquisti tramite questi link.
  1. Lasko CD08200 Fan Replacement, Lasko CD08200 Disassembly: passo 1, immagine 1 di 2 Lasko CD08200 Fan Replacement, Lasko CD08200 Disassembly: passo 1, immagine 2 di 2
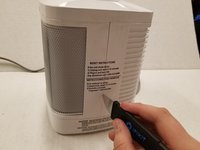
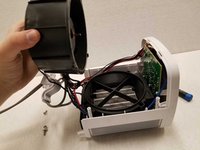
    • Turn over the device and place it on its head.

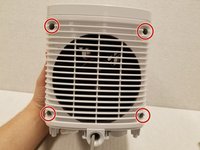
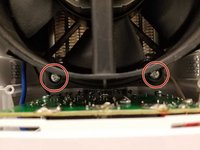
    • Remove the four 14mm screws holding the bottom using a TR15 screwdriver.

  2. Lasko CD08200 Fan Replacement: passo 2, immagine 1 di 1
    • Remove both 14mm screws from the power cord casing using a Phillips #2 screwdriver.

    • Remove the power cord casing from the device case.

  3. Lasko CD08200 Fan Replacement: passo 3, immagine 1 di 3 Lasko CD08200 Fan Replacement: passo 3, immagine 2 di 3 Lasko CD08200 Fan Replacement: passo 3, immagine 3 di 3
    • Cut the sticker on the right side of the device using a Jimmy.

    • Unscrew the four 14mm screws with a Phillips #2 bit on the back of the device.

    • If your screwdriver cannot reach the screw, you can use the metal spudger.

    • Remove the back casing from the device.

  4. Lasko CD08200 Fan Replacement: passo 4, immagine 1 di 3 Lasko CD08200 Fan Replacement: passo 4, immagine 2 di 3 Lasko CD08200 Fan Replacement: passo 4, immagine 3 di 3
    • Remove the four 14mm screws housing the fan using the Phillips #2 screwdriver.

    • Remove the top of the fan housing with the fan attached and place it on the table.

  5. Lasko CD08200 Fan Replacement, Fan: passo 5, immagine 1 di 2 Lasko CD08200 Fan Replacement, Fan: passo 5, immagine 2 di 2
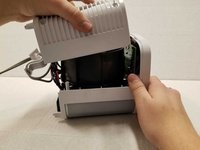
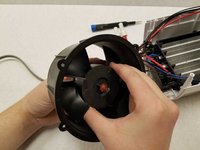
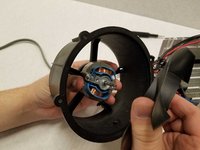
    • While holding onto the back of the fan housing with one hand and holding the center of the propeller, pull the propeller out.

    • During reassembly, push the propeller and red plate together into the metal shaft until you feel the plate click.

Conclusione

To reassemble your device, follow these instructions in reverse order.

0 Commenti

Aggiungi Commento

Visualizza Statistiche:

Ultime 24 Ore: 0

Ultimi 7 Giorni: 6

Ultimi 30 Giorni: 10

Tutti i Tempi: 814