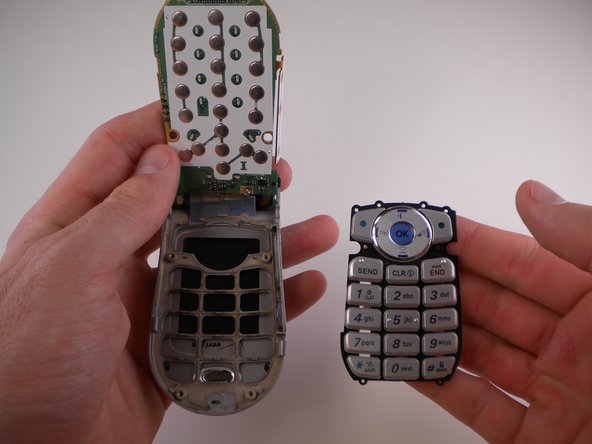
Salta al contenuto principale
Unisciti alla Community delle riparazioni - Crea un account

LG VX4500 Keypad Replacement

Cosa ti serve

  1. LG VX4500 Keypad Replacement, Battery: passo 1, immagine 1 di 1
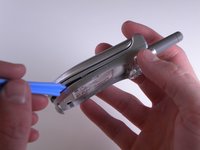
    • Turn the closed phone so that the back panel is facing you.

    • Press down and forward firmly on the gray tab in the middle of the phone.

    Chiedi a FixBot
  2. LG VX4500 Keypad Replacement: passo 2, immagine 1 di 2 LG VX4500 Keypad Replacement: passo 2, immagine 2 di 2
    • Now just lift up on the battery and remove it from the phone.

    Chiedi a FixBot
  3. LG VX4500 Keypad Replacement, Rear Cover: passo 3, immagine 1 di 1
    • Remove the rubber grommet using a spudger.

    Chiedi a FixBot
  4. LG VX4500 Keypad Replacement: passo 4, immagine 1 di 1
    • Be sure not to lose the screws. They are small!

    • Remove the five screws using a Phillips #00 Screwdriver.

    Chiedi a FixBot
  5. LG VX4500 Keypad Replacement: passo 5, immagine 1 di 3 LG VX4500 Keypad Replacement: passo 5, immagine 2 di 3 LG VX4500 Keypad Replacement: passo 5, immagine 3 di 3
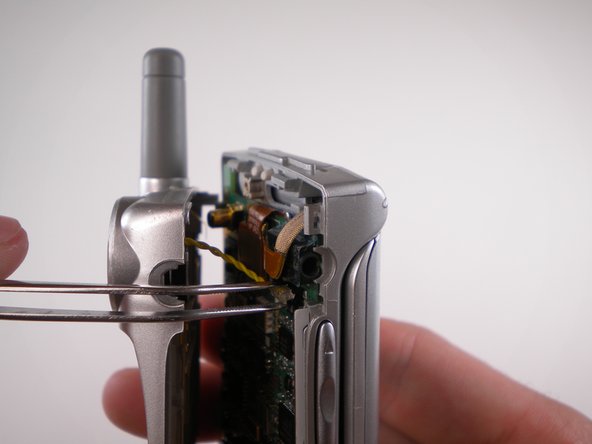
    Strumento utilizzato in questo passaggio:
    Tweezers
    $4.99
    • When removing back cover, be careful not to break the speaker wires.

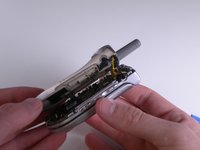
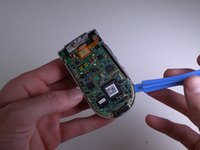
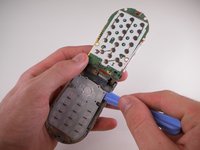
    • Using an Opening Tool, carefully pry off the back cover.

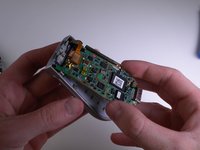
    • Using tweezers, gently pull the speaker wires out.

    Chiedi a FixBot
  6. LG VX4500 Keypad Replacement: passo 6, immagine 1 di 1
    • Separate the two halves.

    Chiedi a FixBot
  7. LG VX4500 Keypad Replacement, Keypad: passo 7, immagine 1 di 3 LG VX4500 Keypad Replacement, Keypad: passo 7, immagine 2 di 3 LG VX4500 Keypad Replacement, Keypad: passo 7, immagine 3 di 3
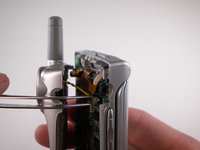
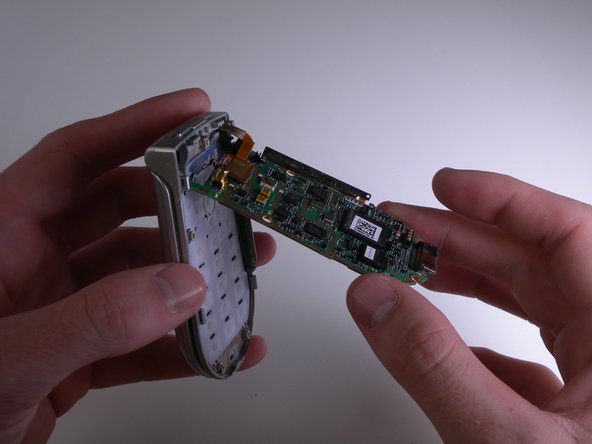
    • Carefully pry and lift up on the logic board using an iPod Opening Tool.

    Chiedi a FixBot
  8. LG VX4500 Keypad Replacement: passo 8, immagine 1 di 1
    • Carefully flip the logic board up and out of the way.

    Chiedi a FixBot
  9. LG VX4500 Keypad Replacement: passo 9, immagine 1 di 3 LG VX4500 Keypad Replacement: passo 9, immagine 2 di 3 LG VX4500 Keypad Replacement: passo 9, immagine 3 di 3
    • Use an iPod Opening Tool to lift up on the keypad and pull it out.

    Chiedi a FixBot
Conclusione

To reassemble your device, follow these instructions in reverse order.

Team

Cal Poly, Team 25-88, Amido Spring 2010 Membro di Cal Poly, Team 25-88, Amido Spring 2010

CPSU-AMIDO-S10S25G88

4 Membri

19 guide realizzate

0Commenti sulla guida

Aggiungi Commento

Visualizza statistiche:

Ultime 24 ore: 2

Ultimi 7 giorni: 6

Ultimi 30 giorni: 52

Tutti i Tempi: 1,240