Salta al contenuto principale

LCD screen Replacement

Cosa ti serve

  1. LCD screen Replacement, Battery: passo 1, immagine 1 di 3 LCD screen Replacement, Battery: passo 1, immagine 2 di 3 LCD screen Replacement, Battery: passo 1, immagine 3 di 3
    • Unlock the battery latch on the right.

    • Unlock the battery lock on the left.

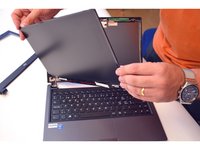
    • Remove the battery pack from its slot.

  2. LCD screen Replacement, LCD screen: passo 2, immagine 1 di 3 LCD screen Replacement, LCD screen: passo 2, immagine 2 di 3 LCD screen Replacement, LCD screen: passo 2, immagine 3 di 3
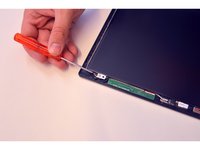
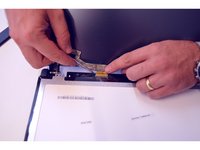
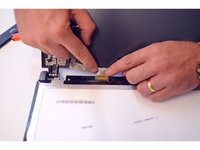
    • Gently insert the fingernail between the screen frame and the screen glass.

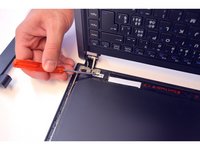
    • De-clipping one by one the fixing points of the frame surrounding the LCD screen

  3. LCD screen Replacement: passo 3, immagine 1 di 3 LCD screen Replacement: passo 3, immagine 2 di 3 LCD screen Replacement: passo 3, immagine 3 di 3
    • Completely detach the frame surrounding the LCD screen.

    • Mark the 2 upper fixing screws of the LCD screen. Unscrew them.

    • Mark the two lower fixing screws on the LCD screen. Unscrew them.

  4. LCD screen Replacement: passo 4, immagine 1 di 3 LCD screen Replacement: passo 4, immagine 2 di 3 LCD screen Replacement: passo 4, immagine 3 di 3
    • Gently lay the LCD screen on the keyboard.

    • Locate the connector on the LCD screen

    • Release the connection cable.

  5. LCD screen Replacement: passo 5, immagine 1 di 2 LCD screen Replacement: passo 5, immagine 2 di 2
    • Remove the connector.

    • Once the connector is removed, completely remove the LCD screen.

Conclusione

To reassemble your device follow the following instructions in reverse order

Un ringraziamento speciale a questi traduttori:

fr en

100%

irlanda ci sta aiutando ad aggiustare il mondo! Vuoi partecipare?
Inizia a tradurre ›

Felice Suglia

Membro da: 06/15/13

30.884 Reputazione

264 Guide realizzate

0 Commenti

Aggiungi Commento

Visualizza Statistiche:

Ultime 24 Ore: 4

Ultimi 7 Giorni: 27

Ultimi 30 Giorni: 94

Tutti i Tempi: 4,317