Salta al contenuto principale
Unisciti alla Community delle riparazioni - Crea un account

KitchenAid Professional 600 Drive Motor Replacement

Cosa ti serve

    1. KitchenAid Professional 600 Drive Motor Replacement, Top Cover: passo 1, immagine 1 di 1
      • Take out the screw which holds on the silver band using a Phillips #2 screwdriver.

      • Remove the silver band.

      Chiedi a FixBot

      Aggiungi Commento

    2. KitchenAid Professional 600 Drive Motor Replacement: passo 2, immagine 1 di 1
      • Remove the four Phillips #2 screws located around the mixer where the band was removed.

      • This picture only shows two of the screw that you need to remove. The other two are on the exact opposite side of the mixer.

      Chiedi a FixBot

      Aggiungi Commento

    3. KitchenAid Professional 600 Drive Motor Replacement: passo 3, immagine 1 di 1
      • Remove the top of the mixer to reveal the inner parts.

      • The top should lift off, but may not if it is stuck. A sharp strike from the back with the hand may unstick it. It will slide forward about a 3/8 of an inch. Push it back again from the front and it should be free enough to lift.

      Chiedi a FixBot

      Aggiungi Commento

    1. KitchenAid Professional 600 Drive Motor Replacement, Speed Selector: passo 4, immagine 1 di 1
      • Locate the selector switch.

      • Remove the two Phillips #2 screws holding the selector switch in place.

      Chiedi a FixBot

      Aggiungi Commento

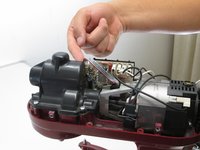
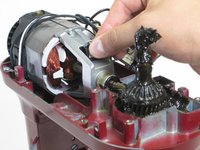
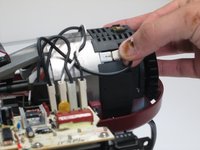
    2. KitchenAid Professional 600 Drive Motor Replacement: passo 5, immagine 1 di 3 KitchenAid Professional 600 Drive Motor Replacement: passo 5, immagine 2 di 3 KitchenAid Professional 600 Drive Motor Replacement: passo 5, immagine 3 di 3
      • Unplug the cords attaching the drive motor to the switch.

      • We suggest numbering them left from right so they are reattached to the replacement part in the right order.

      Chiedi a FixBot

      Aggiungi Commento

    3. KitchenAid Professional 600 Drive Motor Replacement: passo 6, immagine 1 di 1
      • Pull out the Selector Switch.

      Chiedi a FixBot

      Aggiungi Commento

    1. KitchenAid Professional 600 Drive Motor Replacement, Drive Motor: passo 7, immagine 1 di 1
      • Remove the two Phillips #2 screws holding the motor in place, located near the fan at the back of the motor.

      • The picture only shows one of the screws. The other screw is located on the exact opposite side of the motor.

      Chiedi a FixBot

      Aggiungi Commento

    2. KitchenAid Professional 600 Drive Motor Replacement: passo 8, immagine 1 di 1
      • Pull upward to remove the motor.

      Chiedi a FixBot

      Aggiungi Commento

Conclusione

To reassemble your device, follow these instructions in reverse order.

Annulla: non ho completato questa guida.

Altre 2 persone hanno completato questa guida.

Team

Cal Poly, Team 25-4, Maness Spring 2016 Membro di Cal Poly, Team 25-4, Maness Spring 2016

CPSU-MANESS-S16S25G4

4 Membri

27 guide realizzate

4Commenti sulla guida

anyone know where I can get the hall effect sensor receiver that is on the motor shaft? Somehow it's missing?

Barclay Berger - Rispondi Condividi

is there not a fusible link in series with the drive motor?

wa1shm - Rispondi Condividi

I accidentally pluged my 110v mixer to 220v. Now, what are the possible parts that i need to change? How can i check if the motor is busted?

hyalmar planta - Rispondi Condividi

Are the motor brushes serviceable on this model mixer and where are they located

Thanks

Gary Bell - Rispondi Condividi

Aggiungi Commento

Visualizza statistiche:

Ultime 24 ore: 3

Ultimi 7 giorni: 40

Ultimi 30 giorni: 112

Tutti i Tempi: 15,885