Questa traduzione potrebbe non riflettere gli aggiornamenti più recenti dalla guida originale. Aiuta ad aggiornare la traduzione o visualizza la guida d'origine.
Introduzione
È sorprendentemente facile da aprire, bastano le clip! Evvai! Volevo solo iniziare, sfornando la prima guida, in modo che gli altri possano continuare con le guide di riparazione. La prima parte è sempre la più difficile quando non sai in cosa ti stai cacciando, ma provaci, piano e con calma, la aprirai in un batter d'occhio!
Cosa ti serve
-
-
-
Utilizzando un attrezzo di leva tipo plettro per chitarra e/o un attrezzo di leva nero, inizia da uno degli angoli per staccare la cover posteriore dal display. Una volta che l'angolo è allentato, noterai che puoi staccare la cover posteriore e far scorrere il plettro all'angolo successivo
 Chiedi a FixBot
-
-
-
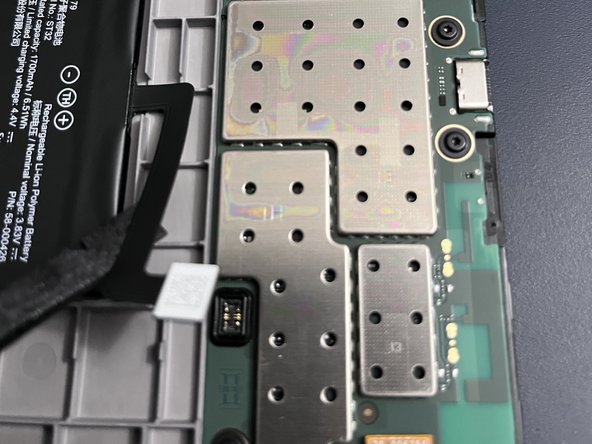
A questo punto, avendo uno o più angoli allentati, puoi quasi fare leva a mano, ma è meglio essere sicuri e non rompere la plastica continuando a far scorrere lo strumento attorno a ogni angolo (vedi la foto della custodia aperta per lo stile della clip).
-
-
-
-
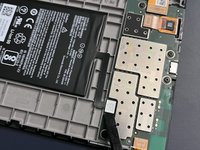
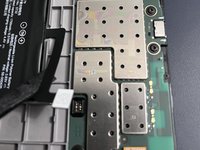
Ah, dolce Kindle aperto... proprio una bella sensazione. Più facile di quanto pensassimo. Niente adesivi disordinati. E niente cavi sul retro della custodia, basta sganciare, sganciare... snap, snap, snap.
-
-
-
Qualunque riparazione tu abbia in mente, inizia sempre scollegando la batteria, e per questo, il plettro è tuo amico. Divertiti.
-
-


Per riassemblare il dispositivo, segui le istruzioni nell'ordine inverso.
Annulla: non ho completato questa guida.
Altre 16 persone hanno completato questa guida.
Un ringraziamento speciale a questi traduttori:
33%

Acn0w ci sta aiutando ad aggiustare il mondo! Vuoi partecipare?
Inizia a tradurre ›


7Commenti sulla guida
Amazing. Thank you! I see my screen data ribbon is missing a pin (it snapped off) but I still have it. Not sure i can fix it but perhaps can get a new ribbon. Do you know the part number?
La placa esta pegada al marco? No sale facilmente. Te has quedado en como abrirlo pero luego habria que explicar como quitar la bateria o la placa para cambiar la pantalla
looks like the battery is stuck. Did you manage to remove it (I need to change the eink screen) ?