Introduzione
This guide will enable you to remove the buttons from the device in order to check, fix, or replace the connections between the buttons and the sensors.
Cosa ti serve
-
-
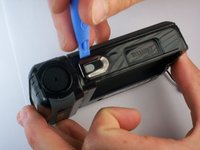
Press down on the grooved plastic with your thumbs.
-
Push the back cover in the direction indicated by the small arrow on the grooved plastic. The back cover should slide right off.
 Chiedi a FixBot
-
-
-
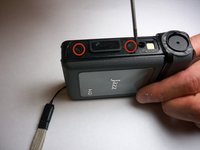
Once you have the back cover off, the camcorder should look like this.
-
Look on the battery for a model number to assure that you acquire the correct replacement part.
-
The camcorder model number is located in the red box. Verify that you have a Jazz HDV178.
-
-
-
Take the battery out by pulling up on the bottom of the battery. You should be pulling from the side of the camera where the wrist strap is attached.
-
-
-
Remove the camera mount by unscrewing the 4.5 mm screw in the hole.
-
This is the bottom of the camcorder near where the wrist strap connects.
-
-
-
-
Break the glue that attaches the lens cover to the camcorder by sliding the plastic prying tool beneath the circumference of the part.
-
After the glue is broken, remove the lens cover.
-
-
-
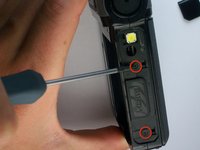
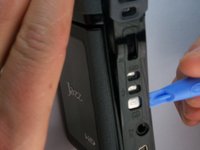
Use a small plastic pry tool to gently pry off the silver strip on the top of the camera.
-
Make sure to run the tool under the outline of the strip as you pry it off so the plastic does not snap.
-
-
-
Locate the side of the camcorder beneath the lens and on the opposite side of the wrist strap.
-
Remove the silver strip using the same process as the previous step.
-
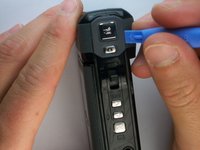
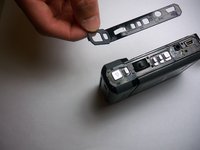
Remove the two 4 mm screws that were hidden under the cover.
-
-
-
Pry off the rubbery cap, which covers the buttons. Use the same process as the previous two steps.
-
-
-
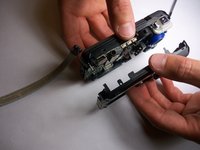
Using a firm hold on both sides of the camcorder, gently pull apart the two halves. Pressure should be evenly distributed across the entire device.
-
-
Strumento utilizzato in questo passaggio:Tweezers$4.99
-
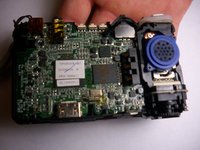
Use tweezers to remove the rubber button assembly.
-
Blow on the sensors underneath to remove any dust on the sensors.
-


To reassemble your device, follow these instructions in reverse order.
Annulla: non ho completato questa guida.
Altre 2 persone hanno completato questa guida.
Team

James Madison University, Team 1-1, Allen Fall 2012 Membro di James Madison University, Team 1-1, Allen Fall 2012
JMU-ALLEN-F12S1G1
3 Membri
1 guide realizzate