Salta al contenuto principale
Unisciti alla Community delle riparazioni - Crea un account

IBM Thinkpad T60 LCD Screen Replacement

Cosa ti serve

    1. IBM Thinkpad T60 LCD Screen Replacement, Battery: passo 1, immagine 1 di 1
      • Turn the computer over to see the small tab on the battery located near the top of the Thinkpad.

      • Use your finger to slide the tab to the right to unlock the battery.

      Chiedi a FixBot

      Aggiungi Commento

    2. IBM Thinkpad T60 LCD Screen Replacement: passo 2, immagine 1 di 2 IBM Thinkpad T60 LCD Screen Replacement: passo 2, immagine 2 di 2
      • Once the tab is in the unlocked position (far right), pull the battery outwards away from the Thinkpad.

      • The battery is now disconnected.

      Chiedi a FixBot

      Aggiungi Commento

    1. IBM Thinkpad T60 LCD Screen Replacement, LCD Screen: passo 3, immagine 1 di 3 IBM Thinkpad T60 LCD Screen Replacement, LCD Screen: passo 3, immagine 2 di 3 IBM Thinkpad T60 LCD Screen Replacement, LCD Screen: passo 3, immagine 3 di 3
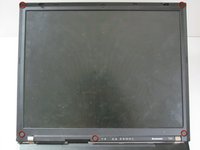
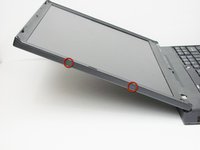
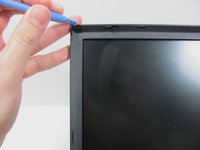
      • Open the laptop so that the screen is facing you.

      • Use a plastic opening tool to pry off the eight plastic screw covers around the display.

      • Note that there are screw covers on the sides (two on the left and one on the right).

      Chiedi a FixBot

      Aggiungi Commento

    2. IBM Thinkpad T60 LCD Screen Replacement: passo 4, immagine 1 di 1
      • Use a #0 Phillips screwdriver to remove the eight 3.25 mm screws uncapped from the previous step.

      Chiedi a FixBot

      Aggiungi Commento

    3. IBM Thinkpad T60 LCD Screen Replacement: passo 5, immagine 1 di 2 IBM Thinkpad T60 LCD Screen Replacement: passo 5, immagine 2 di 2
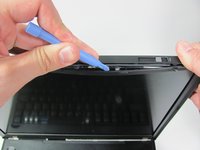
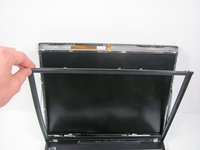
      • Carefully pry the plastic border away from the screen using the plastic opening tool.

      • Note that this step requires some force. There are plastic clips that help hold the border in place so do not worry about snapping sounds.

      Chiedi a FixBot

      Aggiungi Commento

    4. IBM Thinkpad T60 LCD Screen Replacement: passo 6, immagine 1 di 1
      • Use your fingers to pry the screen out of its housing far enough to gain access to the ribbon cables and small screws holding the screen in place.

      Chiedi a FixBot

      Aggiungi Commento

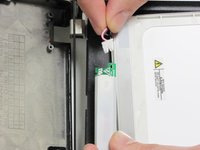
    5. IBM Thinkpad T60 LCD Screen Replacement: passo 7, immagine 1 di 1
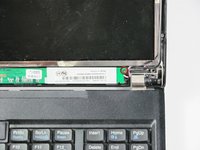
      • At the top of the screen, detach the small white clip by pulling it towards you with your finger.

      Chiedi a FixBot

      Aggiungi Commento

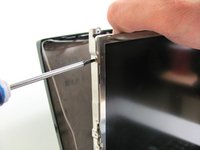
    6. IBM Thinkpad T60 LCD Screen Replacement: passo 8, immagine 1 di 2 IBM Thinkpad T60 LCD Screen Replacement: passo 8, immagine 2 di 2
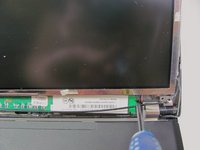
      • Using a #0 Phillips screwdriver, remove the 4 mm screw.

      Chiedi a FixBot

      Aggiungi Commento

    7. IBM Thinkpad T60 LCD Screen Replacement: passo 9, immagine 1 di 2 IBM Thinkpad T60 LCD Screen Replacement: passo 9, immagine 2 di 2
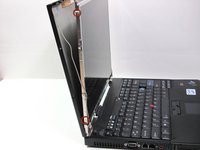
      • Using a #0 Phillips screwdriver, remove the four 3.25 mm screws

      • The other two screws are in the same position on the opposite side of the display.

      Chiedi a FixBot

      Aggiungi Commento

    8. IBM Thinkpad T60 LCD Screen Replacement: passo 10, immagine 1 di 2 IBM Thinkpad T60 LCD Screen Replacement: passo 10, immagine 2 di 2
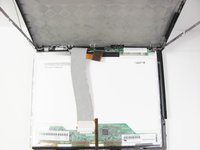
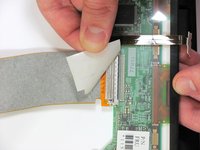
      • The screen should be free to move now. Let the display rest on the keyboard with the screen facing down.

      • Peel the tape off to expose the LCD connection.

      Chiedi a FixBot

      Aggiungi Commento

    9. IBM Thinkpad T60 LCD Screen Replacement: passo 11, immagine 1 di 2 IBM Thinkpad T60 LCD Screen Replacement: passo 11, immagine 2 di 2
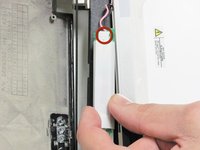
      • Turn the inverter over to expose the white clip.

      • Squeeze and pull the wires with your fingers to detach the white clip.

      Chiedi a FixBot

      Aggiungi Commento

    10. IBM Thinkpad T60 LCD Screen Replacement: passo 12, immagine 1 di 1
      • Disconnect the video cable by pulling the grey flat wire. Now the screen is completely separate from the ThinkPad.

      Chiedi a FixBot

      Aggiungi Commento

Conclusione

To reassemble your device, follow these instructions in reverse order.

Annulla: non ho completato questa guida.

Altre 6 persone hanno completato questa guida.

Team

Cal Poly, Team 7-9, Maness Winter 2013 Membro di Cal Poly, Team 7-9, Maness Winter 2013

CPSU-MANESS-W13S7G9

4 Membri

32 guide realizzate

1Commento della guida

Thanks for the info! ☼

Stck Flw - Rispondi Condividi

Aggiungi Commento

Visualizza statistiche:

Ultime 24 ore: 0

Ultimi 7 giorni: 16

Ultimi 30 giorni: 79

Tutti i Tempi: 13,858