Salta al contenuto principale
Unisciti alla Community delle riparazioni - Crea un account

Hamilton Beach 51101BA Power Button Replacement

Cosa ti serve

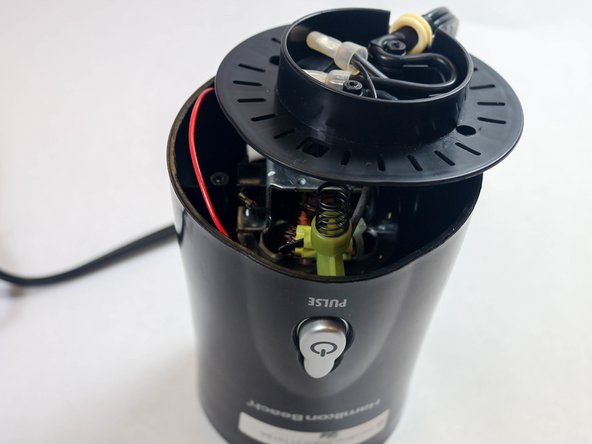
    1. Hamilton Beach 51101BA Power Button Replacement, Power Button: passo 1, immagine 1 di 3 Hamilton Beach 51101BA Power Button Replacement, Power Button: passo 1, immagine 2 di 3 Hamilton Beach 51101BA Power Button Replacement, Power Button: passo 1, immagine 3 di 3
      • Remove the container from the base.

      • Hold the blender and the container, then twist the container in a clockwise motion.

      • Make sure to follow the lock and unlock markings on the container.

      Chiedi a FixBot

      Aggiungi Commento

    2. Hamilton Beach 51101BA Power Button Replacement: passo 2, immagine 1 di 1
      • Turn the blender so the bottom is facing you.

      • Using a Phillips #2 screwdriver, remove the two 5 mm Phillips screws from the base.

      Chiedi a FixBot

      Aggiungi Commento

    3. Hamilton Beach 51101BA Power Button Replacement: passo 3, immagine 1 di 1
      • Using a Phillips #2 screwdriver, remove the two 5 mm Phillips screws from the motor platform.

      Chiedi a FixBot

      Aggiungi Commento

    4. Hamilton Beach 51101BA Power Button Replacement: passo 4, immagine 1 di 2 Hamilton Beach 51101BA Power Button Replacement: passo 4, immagine 2 di 2
      • Unhinge the motor platform from the blender.

      • You may need a plastic spudger to unhinge the plastic bottom piece from the base of the blender.

      • You do not need to completely remove this piece from the base.

      Chiedi a FixBot

      Aggiungi Commento

    5. Hamilton Beach 51101BA Power Button Replacement: passo 5, immagine 1 di 1
      • Pull out the rectangular green piece.

      • This is the actual power button.

      Chiedi a FixBot

      Aggiungi Commento

    6. Hamilton Beach 51101BA Power Button Replacement: passo 6, immagine 1 di 1
      • Some experience in soldering is required!

      • On the back of the power button, desolder the red and grey wires that are connected to the piece.

      Chiedi a FixBot

      Aggiungi Commento

Conclusione

To reassemble your device, follow these instructions in reverse order.

Annulla: non ho completato questa guida.

Altre 2 persone hanno completato questa guida.

Team

USF Tampa, Team 2-5, Sullivan Fall 2015 Membro di USF Tampa, Team 2-5, Sullivan Fall 2015

USFT-SULLIVAN-F15S2G5

4 Membri

15 guide realizzate

0Commenti sulla guida

Aggiungi Commento

Visualizza statistiche:

Ultime 24 ore: 1

Ultimi 7 giorni: 6

Ultimi 30 giorni: 30

Tutti i Tempi: 4,051