Salta al contenuto principale

HP Mini 210 Keyboard Replacement

Cosa ti serve

  1. HP Mini 210 Keyboard Replacement, Battery: passo 1, immagine 1 di 2 HP Mini 210 Keyboard Replacement, Battery: passo 1, immagine 2 di 2
    • Turn off and unplug the netbook before replacing the battery.

    • Hold the netbook top-side down with the lid closed.

    • Slide the plastic battery release latches towards the lock symbols.

    • The left tab unlocks completely, but you will need to hold the right tab towards the lock symbol as you remove the battery.

  2. HP Mini 210 Keyboard Replacement: passo 2, immagine 1 di 1
    • Slide the battery out from the netbook.

  3. HP Mini 210 Keyboard Replacement, Disassembling HP Mini 210 Back Case: passo 3, immagine 1 di 1
    • Turn the netbook to view its edge.

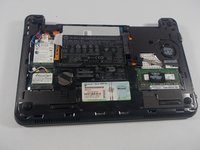
    • Press both orange eject buttons simultaneously, and use a spudger to pry off the back case.

  4. HP Mini 210 Keyboard Replacement: passo 4, immagine 1 di 1
    • If the back case does not separate from the netbook easily, use the spudger to pry off the back case by the edge near the battery compartment, and work your way to the sides. The case will then pivot along the front edge.

  5. HP Mini 210 Keyboard Replacement: passo 5, immagine 1 di 1
    • Pull the back case off from the front edge.

  6. HP Mini 210 Keyboard Replacement, Keyboard: passo 6, immagine 1 di 3 HP Mini 210 Keyboard Replacement, Keyboard: passo 6, immagine 2 di 3 HP Mini 210 Keyboard Replacement, Keyboard: passo 6, immagine 3 di 3
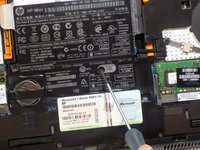
    • Using a screwdriver, remove the three 6.6 mm screws highlighted with the red circles in the first picture above.

  7. HP Mini 210 Keyboard Replacement: passo 7, immagine 1 di 2 HP Mini 210 Keyboard Replacement: passo 7, immagine 2 di 2
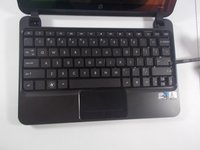
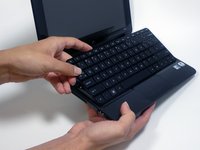
    • Once you have removed the screws, flip the netbook over so that the keyboard is now facing upwards. Open the screen as far back as the netbook allows.

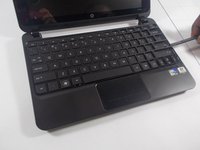
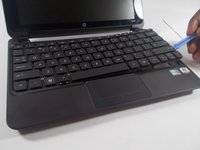
    • Using a prying tool, lift upwards and remove the plastic casing that covers the spaces around the keys of the keyboard.

    • Be careful when removing the plastic casing.

  8. HP Mini 210 Keyboard Replacement: passo 8, immagine 1 di 3 HP Mini 210 Keyboard Replacement: passo 8, immagine 2 di 3 HP Mini 210 Keyboard Replacement: passo 8, immagine 3 di 3
    • After removing the plastic casing surrounding the keys, carefully lift the full keyboard from the netbook using a plastic opening tool.

    • Do not yank the keyboard out. The keyboard is attached to the netbook through a ribbon cable, which needs to remain undamaged in order for the new keyboard to properly connect with the netbook.

  9. HP Mini 210 Keyboard Replacement: passo 9, immagine 1 di 3 HP Mini 210 Keyboard Replacement: passo 9, immagine 2 di 3 HP Mini 210 Keyboard Replacement: passo 9, immagine 3 di 3
    • Be very gentle with the ZIF connector! It is designed to be locked into the motherboard, so make sure you lift the retaining latch before attempting to disconnect it.

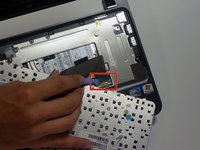
    • Lift the latch on the ZIF (zero insertion-force) connector using a plastic opening tool. The ZIF connector is located on the motherboard and is connected to the keyboard through the ribbon cable.

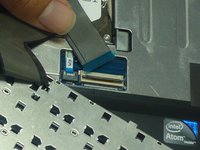
    • Disconnect the ribbon cable from the ZIF connector on the motherboard by lifting it up and out; this completely removes the keyboard.

Conclusione

To reassemble your device, follow these instructions in reverse order.

Altre 11 persone hanno completato questa guida.

Team

Cal Poly, Team 9-17, Amido Fall 2012 Membro di Cal Poly, Team 9-17, Amido Fall 2012

CPSU-AMIDO-F12S9G17

3 Membri

8 Guide realizzate

0 Commenti

Aggiungi Commento

Visualizza Statistiche:

Ultime 24 Ore: 2

Ultimi 7 Giorni: 3

Ultimi 30 Giorni: 14

Tutti i Tempi: 14,935