Salta al contenuto principale
Unisciti alla Community delle riparazioni - Crea un account

HP Compaq nc6400 Screen Replacement

Cosa ti serve

    1. HP Compaq nc6400 Screen Replacement, Battery: passo 1, immagine 1 di 1
      • Turn off and unplug laptop.

      Chiedi a FixBot
      Aggiungi Commento

    2. HP Compaq nc6400 Screen Replacement: passo 2, immagine 1 di 1
      • Locate the battery lock below the battery labeled one.

      • Slide the lock all the way to the left to release the left lock of the battery.

      Chiedi a FixBot

      Aggiungi Commento

    3. HP Compaq nc6400 Screen Replacement: passo 3, immagine 1 di 1
      • Locate the lock labeled two at the bottom right corner below the battery.

      • Slide and hold the lock to the left.

      Chiedi a FixBot

      Aggiungi Commento

    4. HP Compaq nc6400 Screen Replacement: passo 4, immagine 1 di 1
      • Once both the battery locks are unlocked, slide the battery out to remove.

      Chiedi a FixBot
      Aggiungi Commento

    1. HP Compaq nc6400 Screen Replacement, Screen: passo 5, immagine 1 di 1
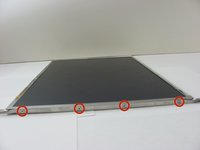
      • Remove the four 1.2mm Philips #1 screws attaching the plastic cover to the monitor.

      • The screws may have a small, black plastic cover that lays flush with the screen. Remove these using a pointed tool such as the spudger or philips head screwdriver by prying them out.

      Chiedi a FixBot
      Aggiungi Commento

    2. HP Compaq nc6400 Screen Replacement: passo 6, immagine 1 di 1
      • Remove the four 1.2 Philips #1 screws attaching the face plate to the body.

      Chiedi a FixBot

      Aggiungi Commento

    3. HP Compaq nc6400 Screen Replacement: passo 7, immagine 1 di 3 HP Compaq nc6400 Screen Replacement: passo 7, immagine 2 di 3 HP Compaq nc6400 Screen Replacement: passo 7, immagine 3 di 3
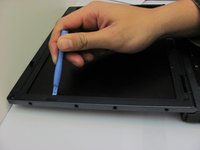
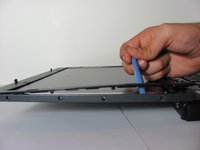
      • Pry up the plastic screen cover using a pry tool.

      • Keeping the pry tool under the trim, slide it around the entire screen until the the cover has completely detached from the base.

      • You might need to slide the display clip on the top of the screen in order to fully remove the plastic cover.

      Chiedi a FixBot

      Aggiungi Commento

    4. HP Compaq nc6400 Screen Replacement: passo 8, immagine 1 di 2 HP Compaq nc6400 Screen Replacement: passo 8, immagine 2 di 2
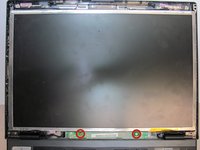
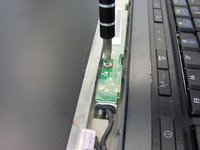
      • Remove the two 1.2 Philips #1 screws holding down the sensor board at the bottom of the monitor.

      Chiedi a FixBot
      Aggiungi Commento

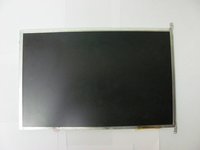
    5. HP Compaq nc6400 Screen Replacement: passo 9, immagine 1 di 1
      • Remove the right-most 1.2mm Philips #1 screw on the bottom of the monitor.

      Chiedi a FixBot
      Aggiungi Commento

    6. HP Compaq nc6400 Screen Replacement: passo 10, immagine 1 di 2 HP Compaq nc6400 Screen Replacement: passo 10, immagine 2 di 2
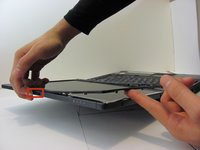
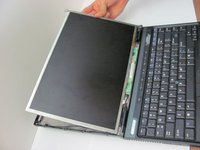
      • Without lifting the bottom of the monitor, gently flip the screen and lay it face down on the keyboard.

      Chiedi a FixBot

      Aggiungi Commento

    7. HP Compaq nc6400 Screen Replacement: passo 11, immagine 1 di 2 HP Compaq nc6400 Screen Replacement: passo 11, immagine 2 di 2
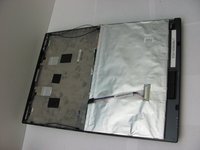
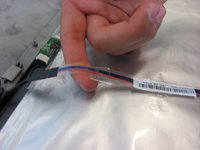
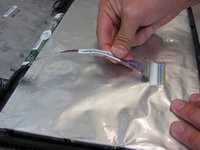
      • Remove the tape holding down the video cable to the monitor.

      • Gently pull out the video cable from the monitor.

      Chiedi a FixBot

      Aggiungi Commento

    8. HP Compaq nc6400 Screen Replacement: passo 12, immagine 1 di 2 HP Compaq nc6400 Screen Replacement: passo 12, immagine 2 di 2
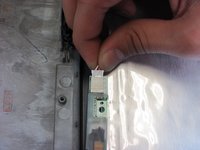
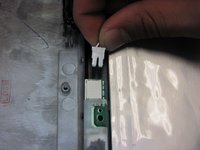
      • Remove the monitor's power cable from the sensor board.

      • This is the cable on the farthest right of the sensor board.

      Chiedi a FixBot

      Aggiungi Commento

    9. HP Compaq nc6400 Screen Replacement: passo 13, immagine 1 di 2 HP Compaq nc6400 Screen Replacement: passo 13, immagine 2 di 2
      • Once all cables attaching the casing to the monitor have been disconnected, remove the entire screen from the computer and lay it on a flat surface.

      • Remove the four 1.2 Philips #1 screws attaching the bezel to the right side of the monitor.

      • Attach bezel to replacement screen.

      Chiedi a FixBot

      Aggiungi Commento

Conclusione

To reassemble your device, follow these instructions in reverse order.

Annulla: non ho completato questa guida.

Altre 4 persone hanno completato questa guida.

Team

Cal Poly, Team 14-6, Forte Fall 2013 Membro di Cal Poly, Team 14-6, Forte Fall 2013

CPSU-FORTE-F13S14G6

5 Membri

5 guide realizzate

1Commento della guida

Nicely done. Thanks?

Peter Q. - Rispondi Condividi

Aggiungi Commento

Visualizza statistiche:

Ultime 24 ore: 1

Ultimi 7 giorni: 8

Ultimi 30 giorni: 32

Tutti i Tempi: 5,915