Salta al contenuto principale
Unisciti alla Community delle riparazioni - Crea un account

Gateway Lt4004u Keyboard Replacement

Cosa ti serve

    1. Gateway Lt4004u Keyboard Replacement, Battery: passo 1, immagine 1 di 3 Gateway Lt4004u Keyboard Replacement, Battery: passo 1, immagine 2 di 3 Gateway Lt4004u Keyboard Replacement, Battery: passo 1, immagine 3 di 3
      • Place the laptop face down in front of you.

      • Locate the battery lock switches on the left and right top corners of the bottom of the device indicated by the red circles.

      • Pinch the switches and slide toward the edges of the computer to unlock.

      Chiedi a FixBot

      Aggiungi Commento

    2. Gateway Lt4004u Keyboard Replacement: passo 2, immagine 1 di 2 Gateway Lt4004u Keyboard Replacement: passo 2, immagine 2 di 2
      • Once the switches have both been unlocked, push the battery upwards away from the rest of the laptop.

      • Remove the battery from the laptop.

      Chiedi a FixBot

      Aggiungi Commento

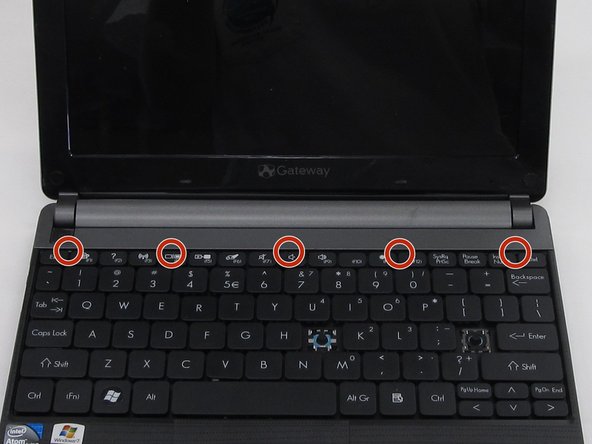
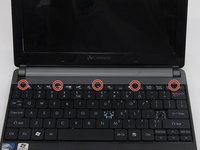
    1. Gateway Lt4004u Keyboard Replacement, Keyboard: passo 3, immagine 1 di 3 Gateway Lt4004u Keyboard Replacement, Keyboard: passo 3, immagine 2 di 3 Gateway Lt4004u Keyboard Replacement, Keyboard: passo 3, immagine 3 di 3
      • Open the laptop so that the screen and keyboard are facing you.

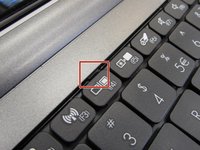
      • Identify the 5 tabs above the function keys in the crevice that attaches the keyboard to the main frame.

      Chiedi a FixBot

      Aggiungi Commento

    2. Gateway Lt4004u Keyboard Replacement: passo 4, immagine 1 di 3 Gateway Lt4004u Keyboard Replacement: passo 4, immagine 2 di 3 Gateway Lt4004u Keyboard Replacement: passo 4, immagine 3 di 3
      • Use an opening pick to push each tab away from you.

      • Use an opening tool to push the middle tab until you hear a click. Begin to push the tool downward into the computer and slide the card along the length of the keyboard, as you overcome the five tabs.

      • A clicking sound is normal and no cause for alarm.

      Chiedi a FixBot

      Aggiungi Commento

    3. Gateway Lt4004u Keyboard Replacement: passo 5, immagine 1 di 3 Gateway Lt4004u Keyboard Replacement: passo 5, immagine 2 di 3 Gateway Lt4004u Keyboard Replacement: passo 5, immagine 3 di 3
      Strumento utilizzato in questo passaggio:
      Plastic Cards
      $2.99
      • Begin to slide the plastic card under the top edge of the keyboard. You will hear popping sounds and the keyboard will eventually be released.

      • Carefully pry the keyboard from the main frame, starting at the top section.

      • Look at the intel sticker in this step and the next to orient your computer with the pictures.

      Chiedi a FixBot

      Aggiungi Commento

    4. Gateway Lt4004u Keyboard Replacement: passo 6, immagine 1 di 2 Gateway Lt4004u Keyboard Replacement: passo 6, immagine 2 di 2
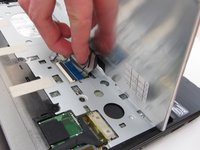
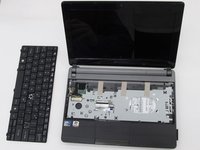
      • Look at the intel sticker in this step and the previous step to orient your computer with the pictures.

      • Unplug the thin blue connection piece beneath the keyboard. It may pop off on its own while you are prying off the keyboard.

      • The popping noise will not hurt the computer.

      • Once the thin blue plastic has been detached, remove the keyboard from the rest of the laptop.

      Chiedi a FixBot

      Aggiungi Commento

Conclusione

To reassemble your device, follow these instructions in reverse order.

Annulla: non ho completato questa guida.

Team

Clemson, Team 6-5, Benson Spring 2016 Membro di Clemson, Team 6-5, Benson Spring 2016

CLEM-BENSON-S16S6G5

4 Membri

32 guide realizzate

0Commenti sulla guida

Aggiungi Commento

Visualizza statistiche:

Ultime 24 ore: 2

Ultimi 7 giorni: 9

Ultimi 30 giorni: 22

Tutti i Tempi: 915