Salta al contenuto principale
Unisciti alla Community delle riparazioni - Crea un account

Front Panel Assembly Replacement

Solo Prerequisita
Questa è una guida che contiene solo i prerequisiti! Questa guida fa parte di un'altra procedura e non è destinata ad essere utilizzata da sola.

Cosa ti serve

  1. Front Panel Assembly Replacement, Front Panel Assembly: passo 1, immagine 1 di 1
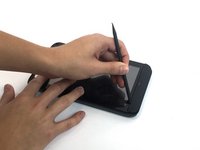
    • Insert the spudger under the capacitive button panel, and slide the spudger all the way around.

    • You will want to heat up the screen edges with the iOpener to help facilitate removal.

    Chiedi a FixBot
  2. Front Panel Assembly Replacement: passo 2, immagine 1 di 1
    • Remove the button cover by lifting the cover away from the tablet.

    Chiedi a FixBot
  3. Front Panel Assembly Replacement: passo 3, immagine 1 di 1
    • Using the Torx screwdriver, remove the 4mm screws.

    Chiedi a FixBot
  4. Front Panel Assembly Replacement: passo 4, immagine 1 di 1
    • With the Torx screwdriver, remove the two 5mm screws.

    Chiedi a FixBot
  5. Front Panel Assembly Replacement: passo 5, immagine 1 di 2 Front Panel Assembly Replacement: passo 5, immagine 2 di 2
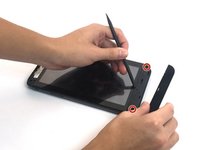
    • Using the spudger, insert it under the black side panel. Slide the spudger all the way around until the cover piece comes off.

    • With the Torx screwdriver, remove the two 4mm screws.

    Chiedi a FixBot
  6. Front Panel Assembly Replacement: passo 6, immagine 1 di 1
    • Use the spudger to go along the edges of the device and pop out the latches securing the display to the case.

    Chiedi a FixBot
  7. Front Panel Assembly Replacement: passo 7, immagine 1 di 2 Front Panel Assembly Replacement: passo 7, immagine 2 di 2
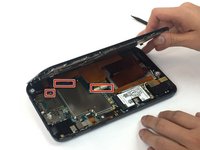
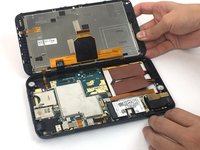
    • Ribbon cables are very sensitive and prone to breaking

    • Disconnect the ribbon cables by unlocking the connector and pulling the cable out slowly.

    • Make sure all the cables are unplugged before opening the device completely. Failure to do so might lead to broken or torn cables.

    Chiedi a FixBot
Conclusione

To reassemble your device, follow these instructions in reverse order.

Un'altra persona ha completato questa guida.

Carlos Salas

Membro da: 09/30/16

194 Reputazione

Una guida realizzata

Team

USF Tampa, Team 4-6, Passmore Fall 2016 Membro di USF Tampa, Team 4-6, Passmore Fall 2016

USFT-PASSMORE-F16S4G6

3 Membri

12 guide realizzate

0Commenti sulla guida

Aggiungi Commento

Visualizza statistiche:

Ultime 24 ore: 3

Ultimi 7 giorni: 9

Ultimi 30 giorni: 46

Tutti i Tempi: 210