Salta al contenuto principale
Unisciti alla Community delle riparazioni - Crea un account

Ematic Genesis Camera Replacement

Cosa ti serve

    1. Ematic Genesis Camera Replacement, Ematic Genesis Casing: passo 1, immagine 1 di 3 Ematic Genesis Camera Replacement, Ematic Genesis Casing: passo 1, immagine 2 di 3 Ematic Genesis Camera Replacement, Ematic Genesis Casing: passo 1, immagine 3 di 3
      • Unscrew the two (2) 1.3mm Phillips #00 screws found on the bottom edge of the tablet, where the power and volume buttons are located.

      Chiedi a FixBot

      Aggiungi Commento

    2. Ematic Genesis Camera Replacement: passo 2, immagine 1 di 3 Ematic Genesis Camera Replacement: passo 2, immagine 2 di 3 Ematic Genesis Camera Replacement: passo 2, immagine 3 di 3
      • Insert plastic opening tool into the edge between the screen plate and the back plate to create a separation between the casings.

      • Insert the flat end of the spudger next to the plastic opening tool and carefully pry the edges apart. Continue this all around the edges until the casings separate.

      • There may be cracking sounds when prying them apart. If carefully done, this is only the locks coming apart and is not harmful.

      • Be careful when separating the two plates as they are connected by the speaker wires and could be disconnected during this process.

      Chiedi a FixBot

      Aggiungi Commento

    3. Ematic Genesis Camera Replacement: passo 3, immagine 1 di 1
      • Remove back plate from screen plate and lay both down flat next to each other.

      • Be careful when separating the two plates as they are connected by the speaker wires and could be disconnected during this process.

      Chiedi a FixBot

      Aggiungi Commento

    1. Ematic Genesis Camera Replacement, Camera: passo 4, immagine 1 di 2 Ematic Genesis Camera Replacement, Camera: passo 4, immagine 2 di 2
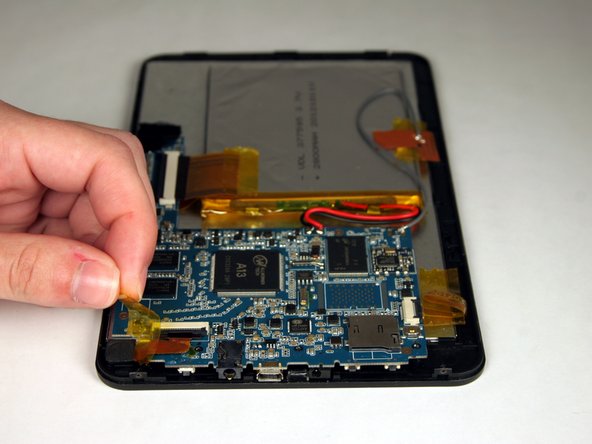
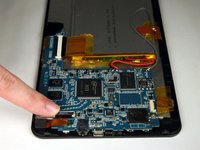
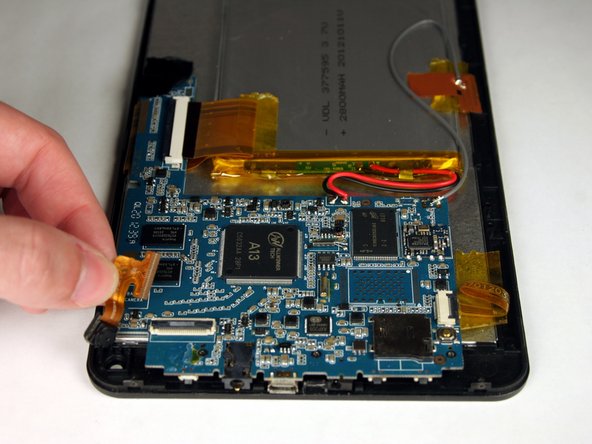
      • Once the panels are separated, remove the tape holding down the ribbon connector that is connecting the camera to the motherboard.

      Chiedi a FixBot

      Aggiungi Commento

    2. Ematic Genesis Camera Replacement: passo 5, immagine 1 di 2 Ematic Genesis Camera Replacement: passo 5, immagine 2 di 2
      • Lift up the black lever of the connector that holds the camera ribbon in place.

      Chiedi a FixBot

      Aggiungi Commento

    3. Ematic Genesis Camera Replacement: passo 6, immagine 1 di 2 Ematic Genesis Camera Replacement: passo 6, immagine 2 di 2
      • Gently pull the ribbon out of the connector and lift the camera out of the casing.

      • There is adhesive holding the camera in the case. Pull up strong enough to separate the camera from the casing without damaging the components.

      Chiedi a FixBot

      Aggiungi Commento

Conclusione

To reassemble your device, follow these instructions in reverse order.

Annulla: non ho completato questa guida.

Team

Baylor, Team 4-3, Williams Spring 2015 Membro di Baylor, Team 4-3, Williams Spring 2015

BU-WILLIAMS-S15S4G3

3 Membri

12 guide realizzate

0Commenti sulla guida

Aggiungi Commento

Visualizza statistiche:

Ultime 24 ore: 1

Ultimi 7 giorni: 7

Ultimi 30 giorni: 32

Tutti i Tempi: 454