Salta al contenuto principale
Unisciti alla Community delle riparazioni - Crea un account

Disassembling Motorola i90c Keypad

Cosa ti serve

  1. Disassembling Motorola i90c Keypad, Battery: passo 1, immagine 1 di 3 Disassembling Motorola i90c Keypad, Battery: passo 1, immagine 2 di 3 Disassembling Motorola i90c Keypad, Battery: passo 1, immagine 3 di 3
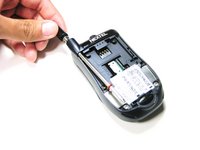
    • Slide the notch downward while pulling the back cover off to remove it.

    Chiedi a FixBot
  2. Disassembling Motorola i90c Keypad: passo 2, immagine 1 di 3 Disassembling Motorola i90c Keypad: passo 2, immagine 2 di 3 Disassembling Motorola i90c Keypad: passo 2, immagine 3 di 3
    • Use your fingers to push the battery upward from the bottom.

    • Lift upwards to remove the battery.

    Chiedi a FixBot
  3. Disassembling Motorola i90c Keypad, Antenna: passo 3, immagine 1 di 2 Disassembling Motorola i90c Keypad, Antenna: passo 3, immagine 2 di 2
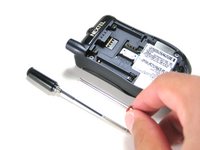
    • Unscrew the antenna in a counter-clockwise fashion.

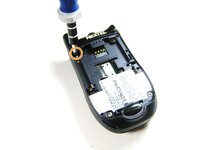
    • Remove the aluminum cover.

    Chiedi a FixBot
  4. Disassembling Motorola i90c Keypad, Midframe: passo 4, immagine 1 di 3 Disassembling Motorola i90c Keypad, Midframe: passo 4, immagine 2 di 3 Disassembling Motorola i90c Keypad, Midframe: passo 4, immagine 3 di 3
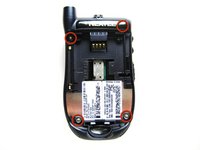
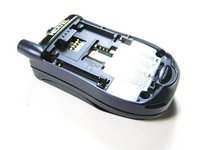
    • Unscrew the 3 screws shown.

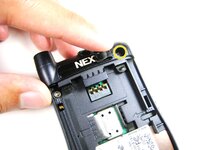
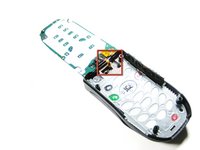
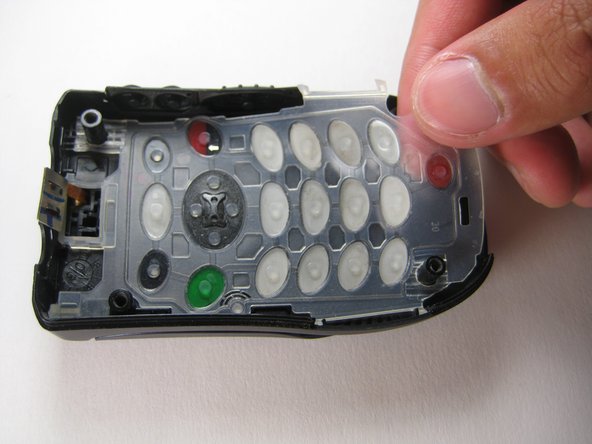
    • Lift the right part of the Nextel logo

    • Remove the screw underneath.

    Chiedi a FixBot
  5. Disassembling Motorola i90c Keypad: passo 5, immagine 1 di 2 Disassembling Motorola i90c Keypad: passo 5, immagine 2 di 2
    • Forcing the cover off could damage the ribbon cable, so be careful when doing so.

    • Gently lift the back cover off.

    Chiedi a FixBot
  6. Disassembling Motorola i90c Keypad: passo 6, immagine 1 di 3 Disassembling Motorola i90c Keypad: passo 6, immagine 2 di 3 Disassembling Motorola i90c Keypad: passo 6, immagine 3 di 3
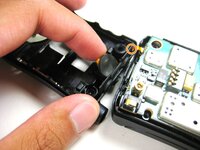
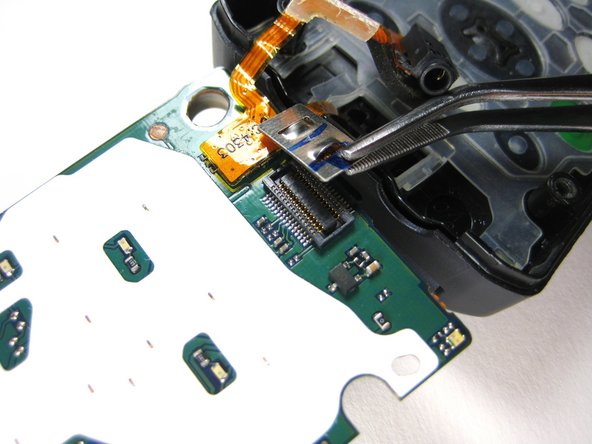
    • Find the connection between the headphone jack and logic board.

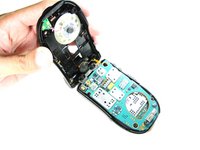
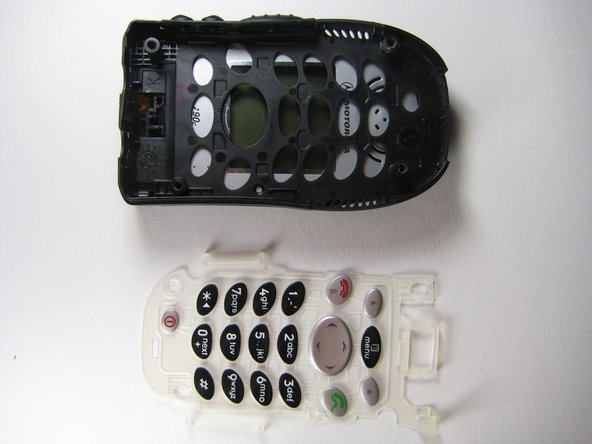
    • Begin separating the two pieces, slowly and carefully.

    Chiedi a FixBot
  7. Disassembling Motorola i90c Keypad, Logic Board: passo 7, immagine 1 di 2 Disassembling Motorola i90c Keypad, Logic Board: passo 7, immagine 2 di 2
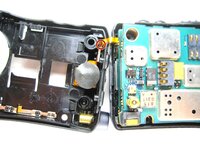
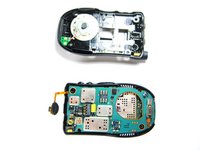
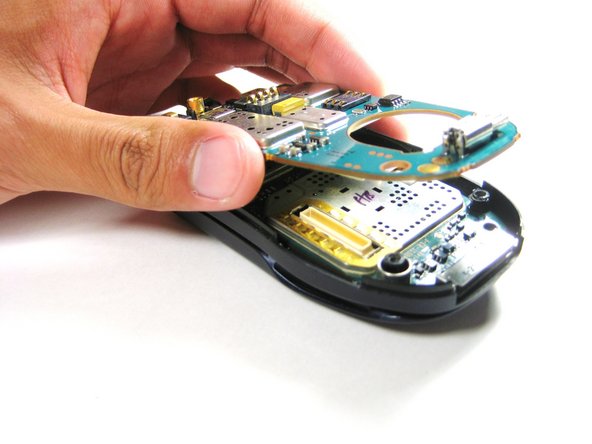
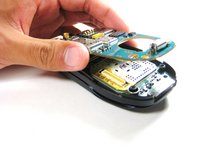
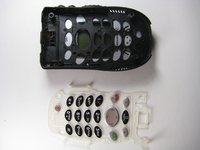
    • Lift the first logic board off of the rest of the device.

    Chiedi a FixBot
  8. Disassembling Motorola i90c Keypad: passo 8, immagine 1 di 1
    • Gently lift the second logic board from the rest of the device.

    • DO NOT force the board straight off as it could damage the ribbon cable!

    Chiedi a FixBot
  9. Disassembling Motorola i90c Keypad: passo 9, immagine 1 di 2 Disassembling Motorola i90c Keypad: passo 9, immagine 2 di 2
    Strumento utilizzato in questo passaggio:
    Tweezers
    $4.99
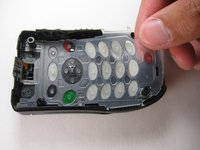
    • Using tweezers, carefully pull off the connector shown.

    Chiedi a FixBot
  10. Disassembling Motorola i90c Keypad, Keypad: passo 10, immagine 1 di 3 Disassembling Motorola i90c Keypad, Keypad: passo 10, immagine 2 di 3 Disassembling Motorola i90c Keypad, Keypad: passo 10, immagine 3 di 3
    • Remove the keypad buttons off the front cover of the phone.

    Chiedi a FixBot
Conclusione

To reassemble your device, follow these instructions in reverse order.

Jorge

Membro da: 04/14/10

4 Reputazione

4 guide realizzate

Team

Cal Poly, Team 29-61, Johann Spring 2010 Membro di Cal Poly, Team 29-61, Johann Spring 2010

CPSU-JOHANN-S10S29G61

4 Membri

6 guide realizzate

0Commenti sulla guida

Aggiungi Commento

Visualizza statistiche:

Ultime 24 ore: 4

Ultimi 7 giorni: 12

Ultimi 30 giorni: 67

Tutti i Tempi: 1,646