Salta al contenuto principale
Unisciti alla Community delle riparazioni - Crea un account

Dell Vostro 1710 RAM Replacement

Cosa ti serve

  1. Dell Vostro 1710 RAM Replacement, Battery: passo 1, immagine 1 di 2 Dell Vostro 1710 RAM Replacement, Battery: passo 1, immagine 2 di 2
    • Make certain that the power to your laptop is off.

    • Press and slide the two buttons outwards and away from the battery.

    Chiedi a FixBot

    Aggiungi Commento

  2. Dell Vostro 1710 RAM Replacement: passo 2, immagine 1 di 1
    • Slide the battery away and parallel from the laptop.

    Chiedi a FixBot

    Aggiungi Commento

  3. Dell Vostro 1710 RAM Replacement: passo 3, immagine 1 di 1
    • Remove the battery from the slot.

    Chiedi a FixBot

    Aggiungi Commento

  4. Dell Vostro 1710 RAM Replacement, Back Panel: passo 4, immagine 1 di 2 Dell Vostro 1710 RAM Replacement, Back Panel: passo 4, immagine 2 di 2
    • Unscrew the eight 6mm screws with a Philips #1 screw driver.

    Chiedi a FixBot

    Aggiungi Commento

  5. Dell Vostro 1710 RAM Replacement: passo 5, immagine 1 di 1
    • Lift back cover from the groove on the left side of the cover next to the symbol.

    Chiedi a FixBot

    Aggiungi Commento

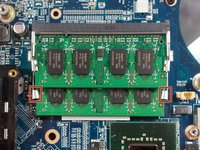
  6. Dell Vostro 1710 RAM Replacement, RAM: passo 6, immagine 1 di 2 Dell Vostro 1710 RAM Replacement, RAM: passo 6, immagine 2 di 2
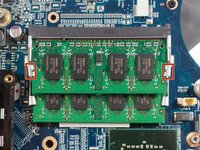
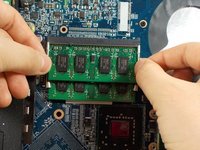
    • Push the metal tabs outward and away from the RAM.

    Chiedi a FixBot

    Aggiungi Commento

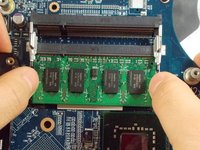
  7. Dell Vostro 1710 RAM Replacement: passo 7, immagine 1 di 2 Dell Vostro 1710 RAM Replacement: passo 7, immagine 2 di 2
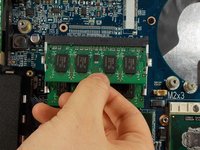
    • Pull the top piece straight out of the socket.

    Chiedi a FixBot

    Aggiungi Commento

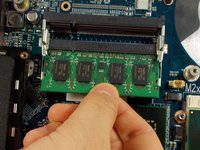
  8. Dell Vostro 1710 RAM Replacement: passo 8, immagine 1 di 2 Dell Vostro 1710 RAM Replacement: passo 8, immagine 2 di 2
    • Repeat the same process by pushing the bottom metal tabs outward and away from the RAM.

    Chiedi a FixBot

    Aggiungi Commento

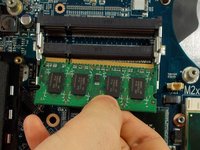
  9. Dell Vostro 1710 RAM Replacement: passo 9, immagine 1 di 2 Dell Vostro 1710 RAM Replacement: passo 9, immagine 2 di 2
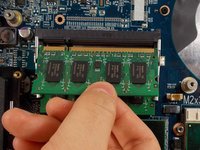
    • Pull the bottom piece straight out of the socket.

    Chiedi a FixBot

    Aggiungi Commento

Conclusione

To reassemble your device, follow these instructions in reverse order.

Annulla: non ho completato questa guida.

Sarah Dulac

Membro da: 03/19/18

270 Reputazione

Una guida realizzata

Team

0Commenti sulla guida

Aggiungi Commento

Visualizza statistiche:

Ultime 24 ore: 0

Ultimi 7 giorni: 3

Ultimi 30 giorni: 13

Tutti i Tempi: 742