Salta al contenuto principale
Unisciti alla Community delle riparazioni - Crea un account

Dell Inspiron 9100 Memory Replacement

Cosa ti serve

    1. Dell Inspiron 9100 Memory Replacement, Battery: passo 1, immagine 1 di 3 Dell Inspiron 9100 Memory Replacement, Battery: passo 1, immagine 2 di 3 Dell Inspiron 9100 Memory Replacement, Battery: passo 1, immagine 3 di 3
      • Unplug the laptop from the power adapter and turn the power off.

      • Failure to unplug laptop before proceeding could result in risk of electric shock!

      Chiedi a FixBot

      Aggiungi Commento

    2. Dell Inspiron 9100 Memory Replacement: passo 2, immagine 1 di 3 Dell Inspiron 9100 Memory Replacement: passo 2, immagine 2 di 3 Dell Inspiron 9100 Memory Replacement: passo 2, immagine 3 di 3
      • Slide the battery-lock tab and hold.

      • Flip the battery away from the chassis to remove it.

      Chiedi a FixBot

      Aggiungi Commento

    1. Dell Inspiron 9100 Memory Replacement, Memory: passo 3, immagine 1 di 2 Dell Inspiron 9100 Memory Replacement, Memory: passo 3, immagine 2 di 2
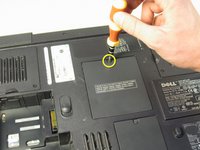
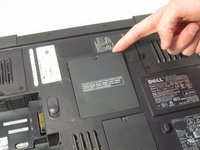
      • Using the Philips #00 screwdriver, undo the screw on the memory module cover, labeled "M."

      • This screw will remain in the panel.

      • Pull the cover away from the laptop using your finger.

      Chiedi a FixBot

      Aggiungi Commento

    2. Dell Inspiron 9100 Memory Replacement: passo 4, immagine 1 di 3 Dell Inspiron 9100 Memory Replacement: passo 4, immagine 2 di 3 Dell Inspiron 9100 Memory Replacement: passo 4, immagine 3 di 3
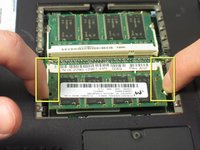
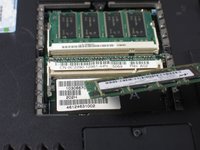
      • Use your fingertips to carefully spread apart the plastic white tabs.

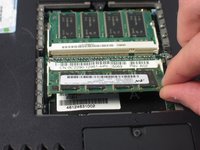
      • Flip the RAM up at a 45 degree angle and remove it.

      • Hold the RAM by the edges only.

      • Ground yourself while dealing with RAM. Static shock can damage the memory. Store the RAM in an anti-static bag while it is not in use.

      Chiedi a FixBot

      Aggiungi Commento

    3. Dell Inspiron 9100 Memory Replacement: passo 5, immagine 1 di 1
      • Repeat step four with the second RAM.

      Chiedi a FixBot

      Aggiungi Commento

Conclusione

To reassemble your device, follow these instructions in reverse order.

Annulla: non ho completato questa guida.

Team

Cal Poly, Team 13-2, Forte Winter 2011 Membro di Cal Poly, Team 13-2, Forte Winter 2011

CPSU-FORTE-W11S13G2

5 Membri

93 guide realizzate

0Commenti sulla guida

Aggiungi Commento

Visualizza statistiche:

Ultime 24 ore: 6

Ultimi 7 giorni: 30

Ultimi 30 giorni: 100

Tutti i Tempi: 4,095