Introduzione
If the drill does not switch rotational direction, this guide will help you disassemble and replace the switch.
Cosa ti serve
-
-
There should be 7 screws that are 21 mm long, remove them with a TorxT15 bit.
-
There should be 1 screw that is 18 mm long, remove it with a Torx T10 bit.
 Chiedi a FixBot
-
-
-
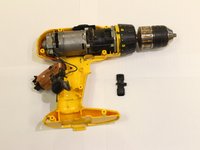
Once all screws are removed, remove the plastic siding by slowly prying open the two sides all the way around.
-
-
-
-
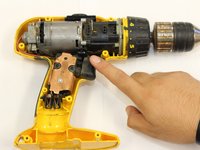
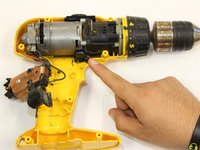
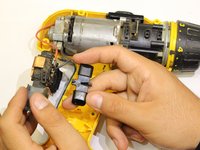
Locate the forward/reverse switch above the trigger. Lift up the copper colored trigger assembly and lift up the switch with two fingers.
-
-
-
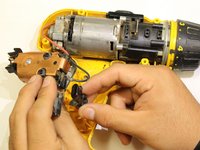
Take the replacement switch and place it in the trigger assembly that the faulty switch was removed from. The new switch has two legs on one side, the bigger triangular shaped leg should be towards the front of the drill.
-


To reassemble your device, follow these instructions in reverse order.
Annulla: non ho completato questa guida.
Un'altra persona ha completato questa guida.

Team

Western Carolina University, Team 1-2, Virtue Fall 2016 Membro di Western Carolina University, Team 1-2, Virtue Fall 2016
WCU-VIRTUE-F16S1G2
4 Membri
9 guide realizzate