Salta al contenuto principale

Core Assembly Removal

Cosa ti serve

  1. Core Assembly Removal, Unfasten the screws: passo 1, immagine 1 di 1
    • Before starting repairs, take your watch off the charger and power it down.

    • Remove the four 3.9 mm-long Torx T3 screws.

    • Depending on the condition of your driver, a Torx T4 bit may fit better.

    • Don't try to detach the back cover yet. It is still connected to the watch assembly.

  2. Core Assembly Removal, Open the watch: passo 2, immagine 1 di 2 Core Assembly Removal, Open the watch: passo 2, immagine 2 di 2
    • Be careful not to strain the sensor flex cable during this procedure.

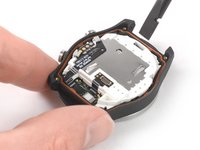
    • Carefully lift the back cover by the watch crown edge and swing it open to an upward position.

  3. Core Assembly Removal, Disconnect the sensor cable: passo 3, immagine 1 di 2 Core Assembly Removal, Disconnect the sensor cable: passo 3, immagine 2 di 2
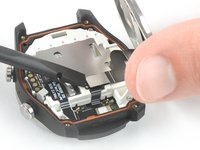
    • Use the flat end of a spudger to pry up and disconnect the sensor flex cable.

  4. Core Assembly Removal, Remove the back cover: passo 4, immagine 1 di 1
    • Remove the back cover.

  5. Core Assembly Removal, Core Assembly Removal: passo 5, immagine 1 di 1
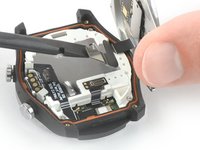
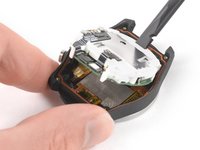
    • Remove the three 3.7 mm-long Phillips #00 screws.

  6. Core Assembly Removal: passo 6, immagine 1 di 3 Core Assembly Removal: passo 6, immagine 2 di 3 Core Assembly Removal: passo 6, immagine 3 di 3
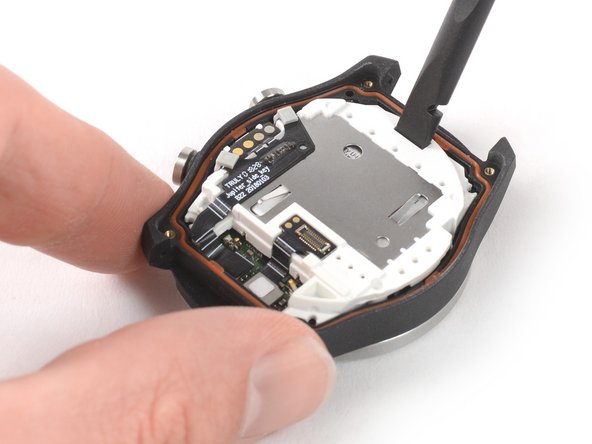
    • Insert the flat end of a spudger into the notch at the upper end of the white plastic frame.

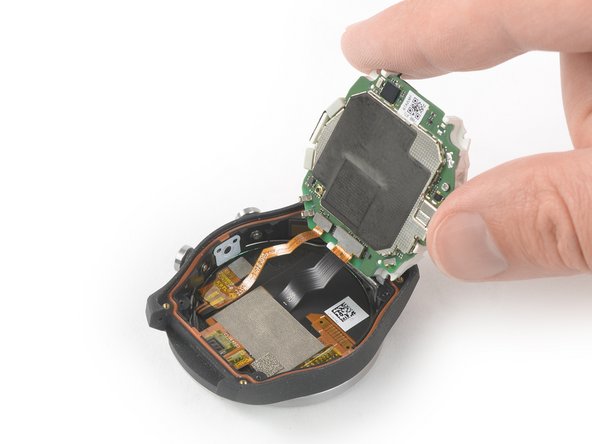
    • Use your spudger as a lever and pry up the core assembly.

    • Don't try to remove the core assembly all the way yet—it is still connected to the watch body.

  7. Core Assembly Removal: passo 7, immagine 1 di 2 Core Assembly Removal: passo 7, immagine 2 di 2
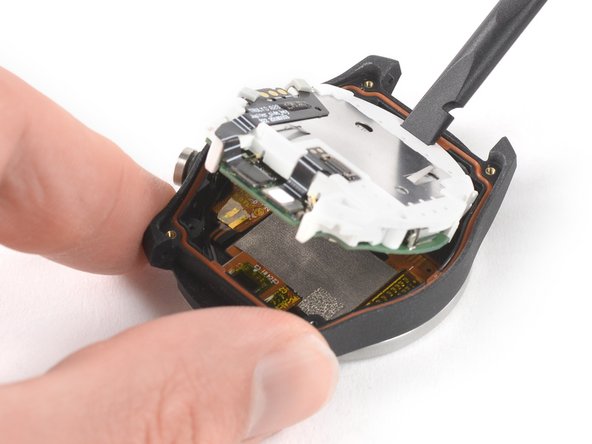
    • Carefully lift the loose edge of the core assembly up and swing it to a 100-degree angle.

    • Be careful not to strain the display and sensor flex cables during this procedure.

  8. Core Assembly Removal: passo 8, immagine 1 di 2 Core Assembly Removal: passo 8, immagine 2 di 2
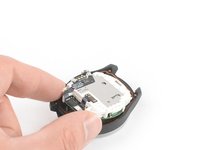
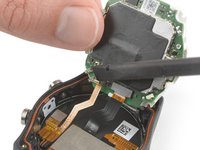
    • Use the flat end of a spudger to pry up and disconnect the sensor flex cable from the core assembly.

  9. Core Assembly Removal: passo 9, immagine 1 di 2 Core Assembly Removal: passo 9, immagine 2 di 2
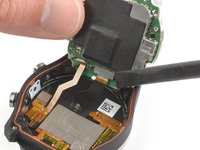
    • Use the flat end of a spudger to pry up and disconnect the display flex cable from the core assembly.

  10. Core Assembly Removal: passo 10, immagine 1 di 1
    • Remove the core assembly.

Conclusione

To reassemble your device, follow these instructions in reverse order.

Repair didn’t go as planned? Check out our Answers community for help.

Altre 4 persone hanno completato questa guida.

Team

iFixit Membro di iFixit

Staff

136 Membri

17.410 Guide realizzate

Un commento

Hello... in the event that you have submerged the smartwatch in salt water and it does not work, is there a solution?

luciano.alonso84@gmail.com - Replica

Aggiungi Commento

Visualizza Statistiche:

Ultime 24 Ore: 2

Ultimi 7 Giorni: 2

Ultimi 30 Giorni: 16

Tutti i Tempi: 1,182