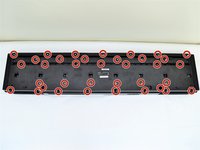
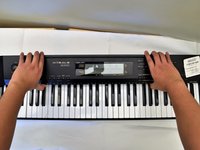
Salta al contenuto principale
Unisciti alla Community delle riparazioni - Crea un account

CASIO CDP-230R Key Replacement

Cosa ti serve

  1. CASIO CDP-230R Key Replacement, Panels: passo 1, immagine 1 di 3 CASIO CDP-230R Key Replacement, Panels: passo 1, immagine 2 di 3 CASIO CDP-230R Key Replacement, Panels: passo 1, immagine 3 di 3
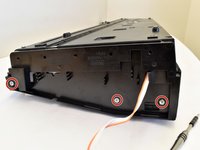
    • Flip the keyboard upside down, with the keys on a flat surface.

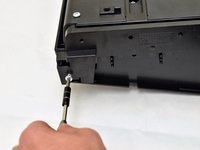
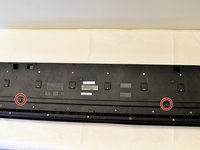
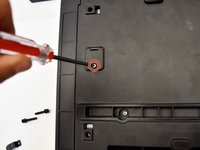
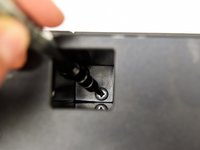
    • Remove the three black 14mm Japanese Industrial Standard (J) head screws using a J1 screwdriver on the top half of the outermost side panel.

    Chiedi a FixBot

    Aggiungi Commento

  2. CASIO CDP-230R Key Replacement: passo 2, immagine 1 di 3 CASIO CDP-230R Key Replacement: passo 2, immagine 2 di 3 CASIO CDP-230R Key Replacement: passo 2, immagine 3 di 3
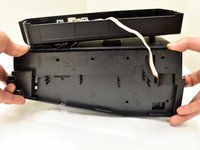
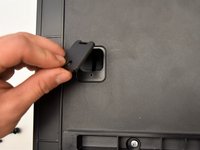
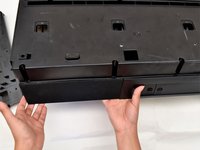
    • Use two hands to grab the side panel from both sides.

    • Pull the panel apart from the device one side at a time.

    • There will be popping sounds when you remove this panel.

    • One side panel will not have an orange & white cable connected to it.

    Chiedi a FixBot

    Aggiungi Commento

  3. CASIO CDP-230R Key Replacement: passo 3, immagine 1 di 3 CASIO CDP-230R Key Replacement: passo 3, immagine 2 di 3 CASIO CDP-230R Key Replacement: passo 3, immagine 3 di 3
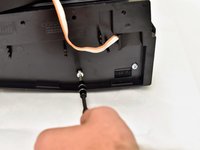
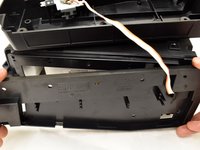
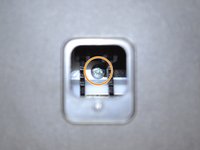
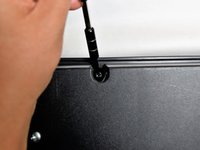
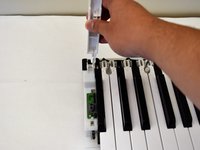
    • Remove the three silver 10mm screws with a J1 screwdriver on the bottom half of the innermost side panel of the device.

    • One side panel will not have an orange & white cable running through.

    Chiedi a FixBot

    Aggiungi Commento

  4. CASIO CDP-230R Key Replacement: passo 4, immagine 1 di 3 CASIO CDP-230R Key Replacement: passo 4, immagine 2 di 3 CASIO CDP-230R Key Replacement: passo 4, immagine 3 di 3
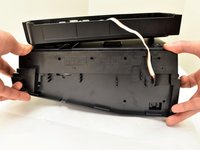
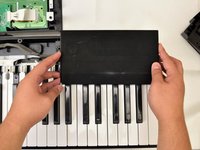
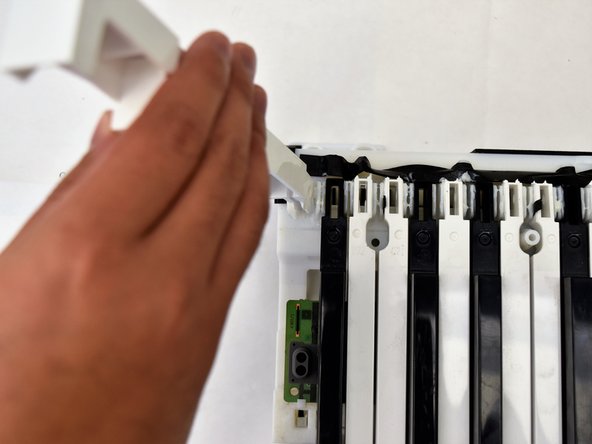
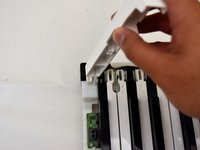
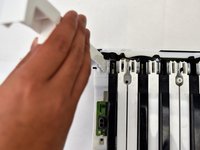
    • Remove the innermost side panel by pinching the top and bottom of the panel and pulling the panel off with both hands.

    • There will be popping sounds when you remove this panel.

    • Repeat steps one through four to remove the other side panel of the keyboard.

    Chiedi a FixBot

    Aggiungi Commento

  5. CASIO CDP-230R Key Replacement: passo 5, immagine 1 di 3 CASIO CDP-230R Key Replacement: passo 5, immagine 2 di 3 CASIO CDP-230R Key Replacement: passo 5, immagine 3 di 3
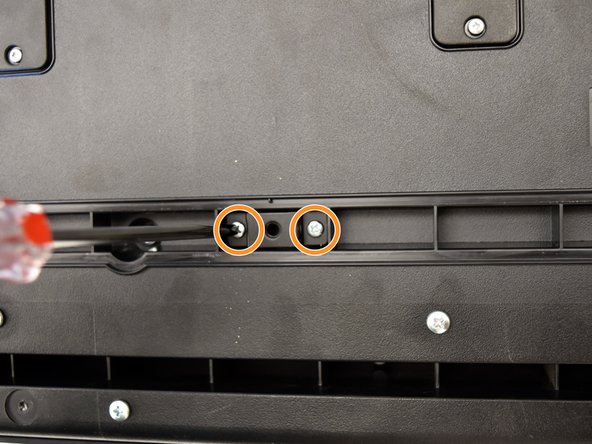
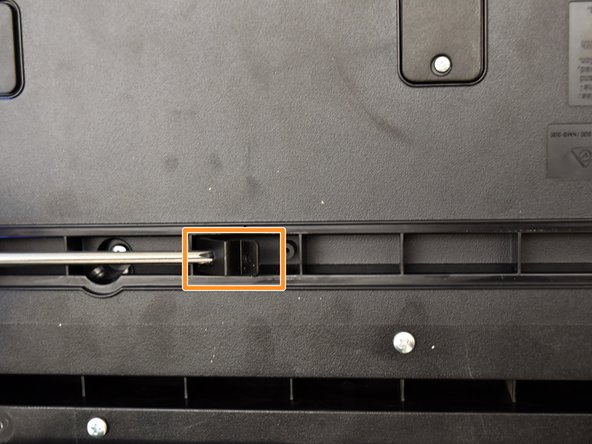
    • Remove the two black 30 mm J head screws with a J1 screwdriver to remove the long black bar.

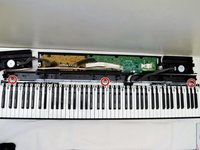
    • Remove the four silver 8mm x 2mm J head screws with a J1 screwdriver and the two brackets from the back panel.

    • There will be two screws per bracket.

    Chiedi a FixBot

    Aggiungi Commento

  6. CASIO CDP-230R Key Replacement: passo 6, immagine 1 di 3 CASIO CDP-230R Key Replacement: passo 6, immagine 2 di 3 CASIO CDP-230R Key Replacement: passo 6, immagine 3 di 3
    • Remove the eight silver 10mm x 1.5mm J head screws with a J1 screwdriver and the square tabs from the back panel.

    • Remove the eight silver 10mm J head screws with a J1 screwdriver underneath the square tabs.

    Chiedi a FixBot

    Aggiungi Commento

  7. CASIO CDP-230R Key Replacement: passo 7, immagine 1 di 3 CASIO CDP-230R Key Replacement: passo 7, immagine 2 di 3 CASIO CDP-230R Key Replacement: passo 7, immagine 3 di 3
    • Remove the 36 silver 10mm J head screws with a J1 screwdriver from the back panel.

    Chiedi a FixBot

    Aggiungi Commento

  8. CASIO CDP-230R Key Replacement: passo 8, immagine 1 di 3 CASIO CDP-230R Key Replacement: passo 8, immagine 2 di 3 CASIO CDP-230R Key Replacement: passo 8, immagine 3 di 3
    • Place a hand on the front panel and speakers and carefully flip the keyboard over with the keys facing up.

    • Having a extra pair of hands will be useful.

    • Grab the center of the front panel with two hands and lift to remove panel.

    • Grab the speakers from the sides and lift to remove. Once you have done this for the first speaker, repeat with the second speaker.

    Chiedi a FixBot

    Aggiungi Commento

  9. CASIO CDP-230R Key Replacement, Key: passo 9, immagine 1 di 3 CASIO CDP-230R Key Replacement, Key: passo 9, immagine 2 di 3 CASIO CDP-230R Key Replacement, Key: passo 9, immagine 3 di 3
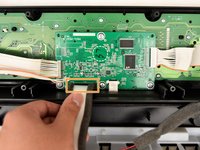
    • Locate the three screws behind the keys (left, center, and right).

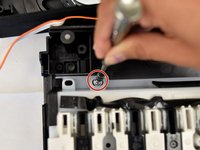
    • Remove these 10mm J screws using a J1 screwdriver.

    • Grasp the white ribbon lined with foam and pull up to remove from the main circuit board.

    Chiedi a FixBot

    Aggiungi Commento

  10. CASIO CDP-230R Key Replacement: passo 10, immagine 1 di 1
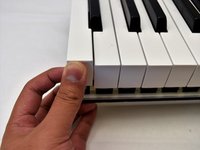
    • Place one hand on the side with fingers underneath the keys and one hand on the upper edge and lift off of the back panel.

    • Having an extra pair of hands will be useful.

    Chiedi a FixBot

    Aggiungi Commento

  11. CASIO CDP-230R Key Replacement: passo 11, immagine 1 di 3 CASIO CDP-230R Key Replacement: passo 11, immagine 2 di 3 CASIO CDP-230R Key Replacement: passo 11, immagine 3 di 3
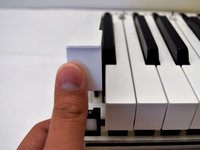
    • Pull up on the white key from the side nearest to you until the key lifts up.

    • Pull up on the two surrounding white keys before pulling up on the black key.

    Chiedi a FixBot

    Aggiungi Commento

  12. CASIO CDP-230R Key Replacement: passo 12, immagine 1 di 3 CASIO CDP-230R Key Replacement: passo 12, immagine 2 di 3 CASIO CDP-230R Key Replacement: passo 12, immagine 3 di 3
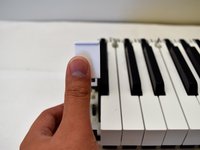
    • Wiggle the white key from side to side and pull up to detach it from the rest of the board.

    Chiedi a FixBot

    Aggiungi Commento

  13. CASIO CDP-230R Key Replacement: passo 13, immagine 1 di 3 CASIO CDP-230R Key Replacement: passo 13, immagine 2 di 3 CASIO CDP-230R Key Replacement: passo 13, immagine 3 di 3
    • To reattach the white key, snap the key back in place.

    • Flip the keyboard so the keys are laying on a flat surface.

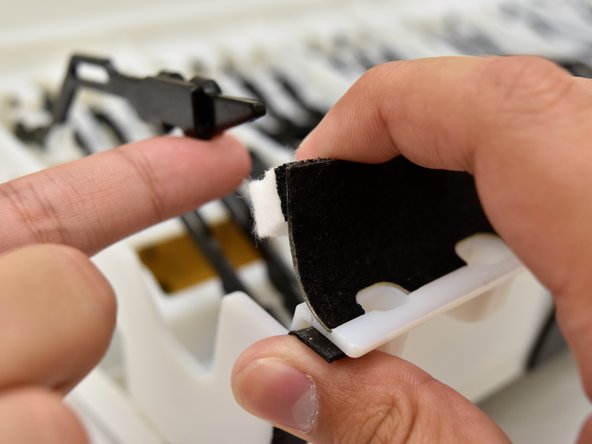
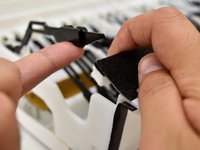
    • Pull up on the black and white felt to dislodge the black shank.

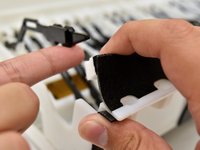
    • Push up on the white key while pulling the felt up to reposition the black shank underneath the felt.

    Chiedi a FixBot

    Aggiungi Commento

Conclusione

To reassemble your device, follow step 13 and then the rest of the instructions in reverse order.

Annulla: non ho completato questa guida.

Altre 13 persone hanno completato questa guida.

Team

Cal Poly, Team S4-G2, Livingston Fall 2017 Membro di Cal Poly, Team S4-G2, Livingston Fall 2017

CPSU-LIVINGSTON-F17S4G2

4 Membri

6 guide realizzate

11Commenti sulla guida

Thankyou very much - I have a CDP-200R that I had to pull apart - yours was the only post I could find that helped me decode what it took!

rooster0001 - Rispondi Condividi

Me too, I have 200R need to replace the keys, but afraid to dismantle , now you save us all.thank you

Rus Azdy Ezzat Mohd Idrus - Rispondi Condividi

Searched everywhere on how to fix my Casio CDP-220RBK and this was all I could find that actually helped! Awesome and very helpful guide!!!

albert einstien - Rispondi Condividi

Thanks a lot. This manual is very detailed, and the only one I've found in the whole Internet.

Владимир Белявский - Rispondi Condividi

Hello,

One of my kids lifted a black key from my piano. It won't come down fully and doesn't play when pressed. It's also harder to press, with more resistance.

Will I be able to put it back in place by following these instructions?

Many thanks.

Bernard Déry - Rispondi Condividi

Aggiungi Commento

Visualizza statistiche:

Ultime 24 ore: 1

Ultimi 7 giorni: 48

Ultimi 30 giorni: 142

Tutti i Tempi: 14,695