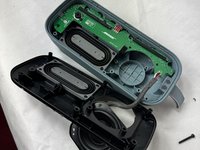
Salta al contenuto principale
Unisciti alla Community delle riparazioni - Crea un account

Bose Soundlink Flex Radiator Replacement

Cosa ti serve

  1. Bose Soundlink Flex Radiator Replacement, Grille: passo 1, immagine 1 di 1
    • Use a heat gun to warm up the device.

    • This will allow for an easier removal of the grille and prevent damage to the device during the replacement. If you do not have access to a heat gun, a hair dryer works as well.

  2. Bose Soundlink Flex Radiator Replacement: passo 2, immagine 1 di 1
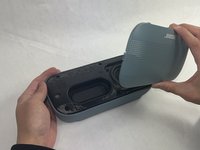
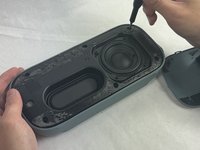
    • Use an iFixit opening tool to pop off the eight clips on the grille.

    • Be patient and do not rush this process as you may otherwise damage the device.

  3. Bose Soundlink Flex Radiator Replacement: passo 3, immagine 1 di 2 Bose Soundlink Flex Radiator Replacement: passo 3, immagine 2 di 2
    • Once the clips have been released, the only thing holding the grille on is glue.

    • Apply minimal force and the grille should pop right off the device.

    • Reheat the device to warm up the glue if there is difficulty in removing.

  4. Bose Soundlink Flex Radiator Replacement, Radiator: passo 4, immagine 1 di 3 Bose Soundlink Flex Radiator Replacement, Radiator: passo 4, immagine 2 di 3 Bose Soundlink Flex Radiator Replacement, Radiator: passo 4, immagine 3 di 3
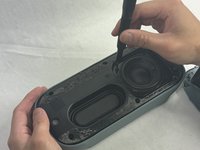
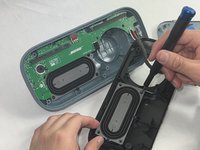
    • Remove the four 2.3 mm screws holding the driver in place using a TR8 Torx screwdriver.

    • Lift the driver out, being cautious of the wires still connected to the device.

  5. Bose Soundlink Flex Radiator Replacement: passo 5, immagine 1 di 2 Bose Soundlink Flex Radiator Replacement: passo 5, immagine 2 di 2
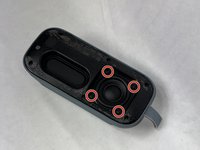
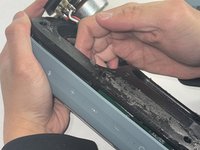
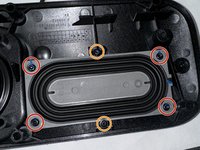
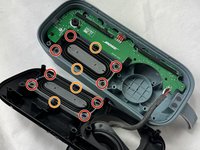
    • Remove the six 2.3 mm screws around the edge with a TR8 Torx screwdriver.

  6. Bose Soundlink Flex Radiator Replacement: passo 6, immagine 1 di 3 Bose Soundlink Flex Radiator Replacement: passo 6, immagine 2 di 3 Bose Soundlink Flex Radiator Replacement: passo 6, immagine 3 di 3
    • Pull the backplate off to expose both sides of the radiator.

  7. Bose Soundlink Flex Radiator Replacement: passo 7, immagine 1 di 3 Bose Soundlink Flex Radiator Replacement: passo 7, immagine 2 di 3 Bose Soundlink Flex Radiator Replacement: passo 7, immagine 3 di 3
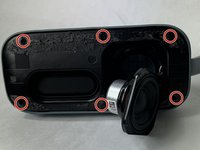
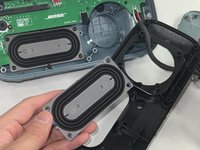
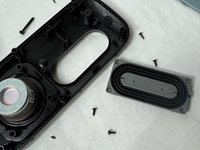
    • Remove the four 2.3 mm corner screws using a TR8 Torx screwdriver.

    • Remove the two 1.7 mm screws using a TR6 Torx screwdriver.

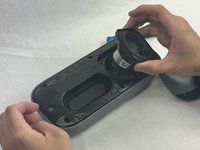
    • Follow this step for both radiators.

  8. Bose Soundlink Flex Radiator Replacement: passo 8, immagine 1 di 2 Bose Soundlink Flex Radiator Replacement: passo 8, immagine 2 di 2
    • Remove the radiator and replace with the new radiator.

Conclusione

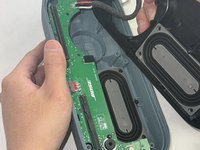
To reassemble your device, follow these instructions in reverse order.

Un'altra persona ha completato questa guida.

Monica Silva

Membro da: 03/19/24

262 Reputazione

1 Guida realizzata

Team

0Commenti sulla guida

Aggiungi Commento

Visualizza Statistiche:

Ultime 24 Ore: 0

Ultimi 7 Giorni: 17

Ultimi 30 Giorni: 59

Tutti i Tempi: 844