Salta al contenuto principale
Unisciti alla Community delle riparazioni - Crea un account

Audiovox CDM-8910 Keyboard Replacement

Cosa ti serve

  1. Audiovox CDM-8910 Keyboard Replacement, Antenna: passo 1, immagine 1 di 1
    • Locate the antenna (shown in red box) at the top of the phone when closed.

    Chiedi a FixBot

    Aggiungi Commento

  2. Audiovox CDM-8910 Keyboard Replacement: passo 2, immagine 1 di 1
    • Using your thumb and index finger, grip the antenna near its base and unscrew counter clockwise. Once loose, remove the antenna by pulling it from its insert hole.

    Chiedi a FixBot

    Aggiungi Commento

  3. Audiovox CDM-8910 Keyboard Replacement, Battery: passo 3, immagine 1 di 1
    • Locate the back side of the phone.

    • The battery is the large main compartment (red box).

    Chiedi a FixBot

    Aggiungi Commento

  4. Audiovox CDM-8910 Keyboard Replacement: passo 4, immagine 1 di 1
    • Use your finger to slide the latch (circled) upwards.

    • While holding the latch up, pull the battery off the phone.

    Chiedi a FixBot

    Aggiungi Commento

  5. Audiovox CDM-8910 Keyboard Replacement: passo 5, immagine 1 di 1
    • The back of the phone will look like this when the battery is correctly removed.

    Chiedi a FixBot

    Aggiungi Commento

  6. Audiovox CDM-8910 Keyboard Replacement, Rear Case: passo 6, immagine 1 di 1
    • Peel the rubber indicated toward the top of the phone

    Chiedi a FixBot

    Aggiungi Commento

  7. Audiovox CDM-8910 Keyboard Replacement: passo 7, immagine 1 di 1
    • Remove the screw that sits underneath the rubber covering.

    Chiedi a FixBot

    Aggiungi Commento

  8. Audiovox CDM-8910 Keyboard Replacement: passo 8, immagine 1 di 1
    • Remove the five (5) total screws using a Philips head screwdriver.

    Chiedi a FixBot

    Aggiungi Commento

  9. Audiovox CDM-8910 Keyboard Replacement: passo 9, immagine 1 di 1
    • Use spudger and insert it towards the bottom of the phone as pictured.

    • Carefully working yourself around the phone with the spudger, pry it open. This may require a bit of force.

    • The volume control button will be loose, so make sure to take it out once the rear case is fully removed.

    Chiedi a FixBot

    Aggiungi Commento

  10. Audiovox CDM-8910 Keyboard Replacement: passo 10, immagine 1 di 1
    • The back case should now be completely removed and the motherboard will be visible.

    Chiedi a FixBot

    Aggiungi Commento

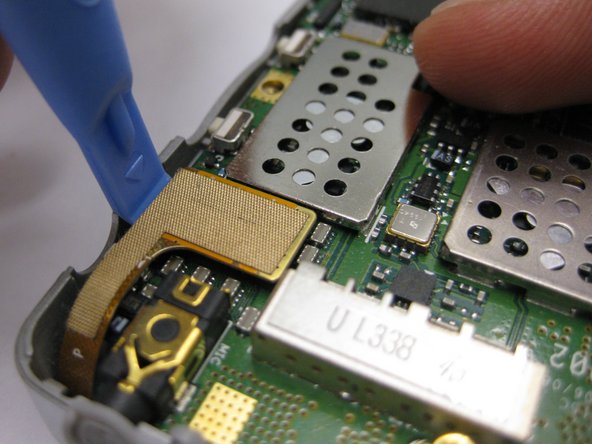
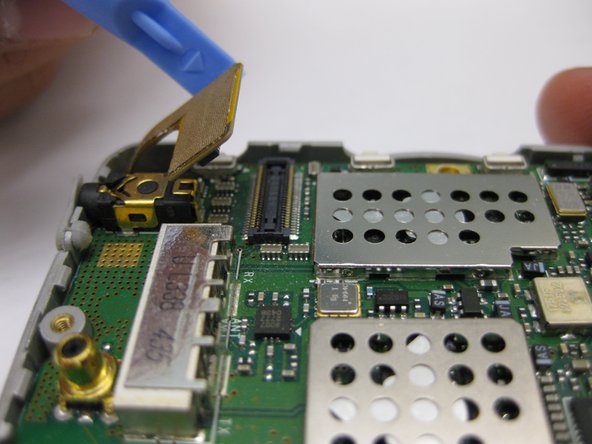
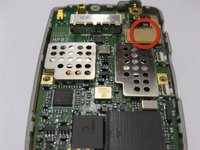
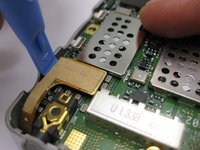
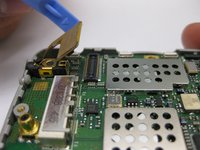
  11. Audiovox CDM-8910 Keyboard Replacement, Motherboard: passo 11, immagine 1 di 3 Audiovox CDM-8910 Keyboard Replacement, Motherboard: passo 11, immagine 2 di 3 Audiovox CDM-8910 Keyboard Replacement, Motherboard: passo 11, immagine 3 di 3
    • Disconnect the gold connection patch

    • Use a spudger or finger to disconnect the piece.

    Chiedi a FixBot

    Aggiungi Commento

  12. Audiovox CDM-8910 Keyboard Replacement: passo 12, immagine 1 di 1
    • Using a spudger, lift the motherboard out of the phone case as pictured.

    Chiedi a FixBot

    Aggiungi Commento

  13. Audiovox CDM-8910 Keyboard Replacement: passo 13, immagine 1 di 1
    • The motherboard should now be completely removed from the phone.

    Chiedi a FixBot

    Aggiungi Commento

  14. Audiovox CDM-8910 Keyboard Replacement, Keyboard: passo 14, immagine 1 di 1
    • Once the motherboard has been removed, peel the keyboard as pictured.

    Chiedi a FixBot

    Aggiungi Commento

Conclusione

To reassemble your device, follow these instructions in reverse order.

Annulla: non ho completato questa guida.

Team

Cal Poly, Team 3-24, Regan Fall 2010 Membro di Cal Poly, Team 3-24, Regan Fall 2010

CPSU-REGAN-F10S3G24

4 Membri

18 guide realizzate

0Commenti sulla guida

Aggiungi Commento

Visualizza statistiche:

Ultime 24 ore: 4

Ultimi 7 giorni: 9

Ultimi 30 giorni: 30

Tutti i Tempi: 1,776