Introduzione
This guide will will walk you through the process of removing and replacing a faulty DVD Drive.
Cosa ti serve
-
-
With the screen closed, place your laptop upside-down with the front facing you.
-
Remove the six 14.6mm Phillips #00 screws.
-
Remove the four 6.6mm Phillips #00 screws.
 Chiedi a FixBot
-
-
-
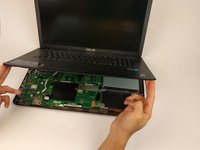
Flip the laptop over and open the lid.
-
Pry around the edges of the laptop base using the plastic opening tool.
-
-
-
-
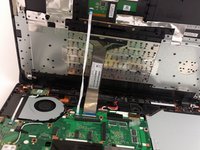
Carefully lift the keyboard up.
-
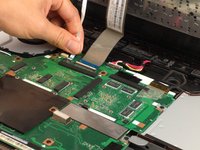
Disconnect the two ZIF connectors from the motherboard using your fingernail to lift the cream-colored tab.
-
-
-
With the keyboard panel open, face the laptop with the internal components facing towards you.
-
Remove the single 4.6mm Phillips #00 screw.
-


To reassemble your device, follow these instructions in reverse order.
Annulla: non ho completato questa guida.
Altre 2 persone hanno completato questa guida.
Team

USF Tampa, Team 17-2, Blackwell Spring 2017 Membro di USF Tampa, Team 17-2, Blackwell Spring 2017
USFT-BLACKWELL-S17S17G2
4 Membri
5 guide realizzate