Salta al contenuto principale
Unisciti alla Community delle riparazioni - Crea un account

Asus Q525U RAM Replacement

Cosa ti serve

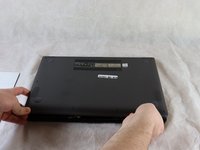
    1. Asus Q525U RAM Replacement, Back Cover: passo 1, immagine 1 di 3 Asus Q525U RAM Replacement, Back Cover: passo 1, immagine 2 di 3 Asus Q525U RAM Replacement, Back Cover: passo 1, immagine 3 di 3
      • Begin by powering off the device and flipping the device over.

      • Carefully remove the two longer 9.5 mm screws on the corners with a Phillips #1 screwdriver.

      • Remove the eight 7.5 mm Phillips #1 screws on the back of the device.

      Chiedi a FixBot

      Aggiungi Commento

    2. Asus Q525U RAM Replacement: passo 2, immagine 1 di 3 Asus Q525U RAM Replacement: passo 2, immagine 2 di 3 Asus Q525U RAM Replacement: passo 2, immagine 3 di 3
      • Use an opening pick to separate the back cover from the device.

      • For easiest removal, begin by prying at one of the front corners and sliding the tool under the cover in a counter-clockwise motion (to the left) toward the laptop hinge.

      Chiedi a FixBot

      Aggiungi Commento

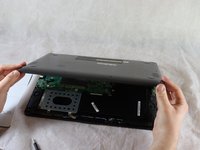
    3. Asus Q525U RAM Replacement: passo 3, immagine 1 di 3 Asus Q525U RAM Replacement: passo 3, immagine 2 di 3 Asus Q525U RAM Replacement: passo 3, immagine 3 di 3
      • Once the cover has been separated from the device, carefully lift the back cover off the device (begin by lifting from the front of the cover first).

      • The back cover should be easily removable, allowing full access to all of the internal components.

      Chiedi a FixBot

      Aggiungi Commento

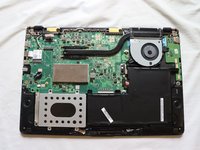
    1. Asus Q525U RAM Replacement, RAM: passo 4, immagine 1 di 1
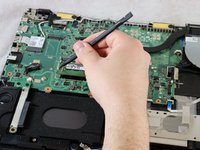
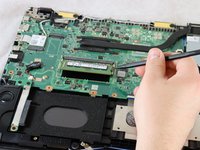
      • Position the flat end of the Spudger under one of the corners on the RAM cover and pry it up slightly.

      • Move the spudger around the periphery of the cover to lift the cover up.

      Chiedi a FixBot

      Aggiungi Commento

    2. Asus Q525U RAM Replacement: passo 5, immagine 1 di 1
      • Lift the RAM cover off.

      • The RAM should now be fully exposed.

      Chiedi a FixBot

      Aggiungi Commento

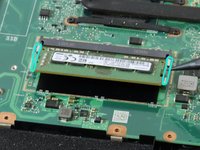
    3. Asus Q525U RAM Replacement: passo 6, immagine 1 di 3 Asus Q525U RAM Replacement: passo 6, immagine 2 di 3 Asus Q525U RAM Replacement: passo 6, immagine 3 di 3
      • Using a spudger or your fingers, gently pull the metal brackets away from the RAM.

      • After pulling both brackets away from the component, the RAM should release at an upward angle (allowing for removal and replacement).

      Chiedi a FixBot

      Aggiungi Commento

    4. Asus Q525U RAM Replacement: passo 7, immagine 1 di 1
      • Slide the RAM stick out of the socket.

      Chiedi a FixBot

      Aggiungi Commento

Conclusione

To reassemble your device, follow these instructions in reverse order.

Annulla: non ho completato questa guida.

Un'altra persona ha completato questa guida.

Team

Clemson, Team 2-5, Hunter Spring 2022 Membro di Clemson, Team 2-5, Hunter Spring 2022

CLEM-HUNTER-S22S2G5

4 Membri

12 guide realizzate

0Commenti sulla guida

Aggiungi Commento

Visualizza statistiche:

Ultime 24 ore: 1

Ultimi 7 giorni: 5

Ultimi 30 giorni: 25

Tutti i Tempi: 1,603