Introduzione
This guide demonstrates how to remove and replace the battery of the device in the case of a dead or malfunctioning battery.
Cosa ti serve
-
-
Unscrew the two 2.70 mm Phillips #00 screws on the side of the tablet that has the buttons and the headphone jack (bottom side when holding upright).
 Chiedi a FixBot
-
-
-
Slide a plastic opening tool in between the edge of the back panel and the the top edge of the device.
-
Run the plastic opening tool along the sides of the tablet while keeping it in the crack between the tablet and the back panel to create an opening.
-
-
-
Apply pressure using your hand to pop the back panel off slowly, taking extra care around the speaker connection.
-
-
-
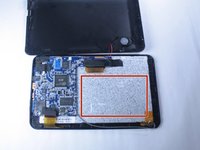
The back panel should now be disconnected from the device. This provides access to the components of the device for repairing and replacing parts of the tablet.
-
-
-
Strumento utilizzato in questo passaggio:Tweezers$4.99
-
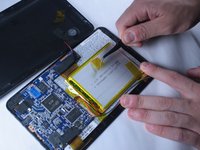
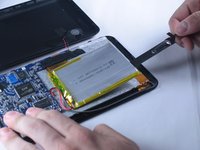
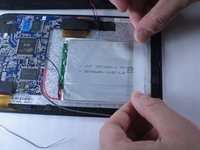
Using tweezers or your fingers, begin removing the yellow tape holding the battery down to the device.
-
-
-
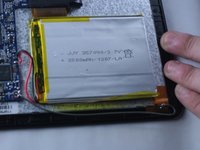
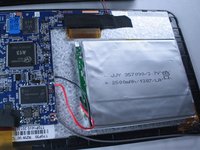
The battery is held to the back of the device by an adhesive under the battery. Use a ruler or spudger to slowly separate the battery from the glue underneath.
-
-
-
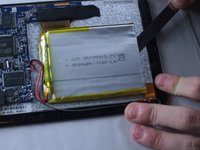
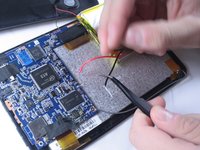
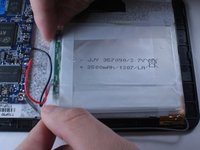
Now you will need to disconnect the red and black leads from the battery to the circuit board.
-
This can be done by desoldering the tips using a hot soldering iron tip.
-
-
-
Apply heat to the solder holding each of the black and red wires to the circuit board while gently pulling with tweezers. When hot enough, the wire should pull away freely from the joint.
-
-
-
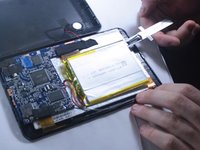
Once disconnected, lift the old battery from the device and remove it.
-
You are now left with a space to insert the new replacement battery.
-
-
-
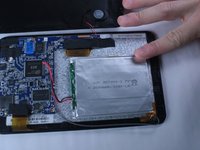
Obtain your replacement battery.
-
Place it centered on the device where the old battery was located.
-
-
-
Find the red and black wires coming from the battery. You will now need to solder the tips back onto the circuit board where you removed the old connections.
-
The red wire connects to positive (+) and the black wire connects to negative (-), as shown in the picture.
-
-
-
Place the red wire tip on the positive terminal. Hold the solder strand so that it is touching the terminal and tip, and apply heat with the soldering iron until the two fuse together and produce a small amount of smoke.
-
Repeat the procedure for the black wire tip to the negative terminal.
-
-
-
Finally, use a heat-resistant tape to secure the battery in place to the device. Center the battery in the middle and apply strips of tape until it sits securely mounted to the device.
-
Your battery is now connected and secured to your tablet
-


Annulla: non ho completato questa guida.
Altre 4 persone hanno completato questa guida.
Team

Baylor, Team 2-2, Grigsby Spring 2015 Membro di Baylor, Team 2-2, Grigsby Spring 2015
BU-GRIGSBY-S15S2G2
4 Membri
10 guide realizzate