Introduzione
In the age of evolving cell phone technology, the cameras each has is a huge factor point when buying the phone. These cameras are becoming so advanced, they are replacing the need for handheld digital cameras. Because of this, owners rely greatly on a functioning camera in their phones. This guide will provide users with information needed access and replace the camera in an Alcatel OneTouch Evolve in the case of a malfunctioning, damaged or dirty camera.
Cosa ti serve
-
-
This will be an opening with enough space to insert the flat head of the plastic opening tool.
-
It will be located on the bottom right of the phone
 Chiedi a FixBot
-
-
-
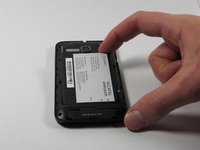
Rotate the pry tool 90 degrees until the panel lifts up.
-
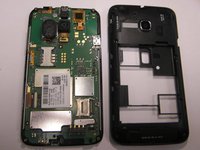
With your thumb nail, lift the rest of the panel up around the perimeter of the phone.
-
-
-
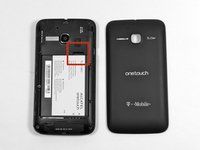
This is the battery for the Alcatel One Touch Evolve. Look for this component when the back panel has been removed.
-
-
-
Place finger in the tab on the top right corner of the battery indicated by a black arrow. With slight pressure, push battery down and out of the slot until the battery is removed
-
-
-
-
There will be eight 4.5mm screws that fit your Phillips head PH00 screwdriver notated by the red circles in the image.
-
-
Strumento utilizzato in questo passaggio:Tweezers$4.99
-
Unscrew each screw, counter-clockwise (left), until each one has been removed.
-
If necessary, use tweezers to fully remove the screws from the device.
-
-
-
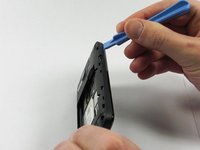
Access the small pry tool in the tool kit
-
Place flat head in the crease between the phone and panel where the matte finish meets the shiny finish of the front of the phone.
-
Rotate the pry tool 90 degrees until part of the panel lifts up
-
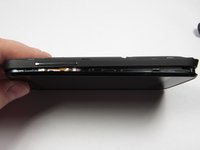
All areas need to be fully risen off before the panel can be removed.
-
-
-
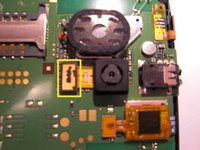
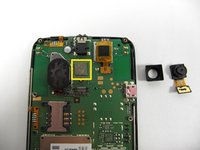
See yellow square for the location of the camera on the mother board.
-
-
-
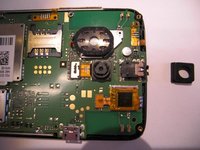
By gently lifting the bottom rectangular piece of the camera component upwards and away from the device, the connection will come free.
-
Remove the rubber casing from the camera, this piece is simply resting over the camera and can easily be removed.
-
-
-
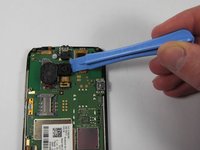
Place your plastic opening tool underneath the bottom of the camera and rotate the tool to lift the camera. This will take a slight amount of force.
-
You will start to see the silver sticky patch between the camera and the mother board - leave this on the mother board.
-
Keep separating the camera from the sticky patch until completely removed.
-
To replace camera, use the yellow lines on the motherboard as your guide.
-


To reassemble your device, follow these instructions in reverse order.
Annulla: non ho completato questa guida.
Altre 6 persone hanno completato questa guida.
Team

UMass Dartmouth, Team 4-5, Miles Fall 2014 Membro di UMass Dartmouth, Team 4-5, Miles Fall 2014
UMASSD-MILES-F14S4G5
3 Membri
18 guide realizzate
1Commento della guida
Thank you kindly for your time to write the tutorial.