Introduzione
If your Acer Spin 5 SP515-51GN-807G laptop is failing to power on or you are experiencing symptoms of an old battery such as faster than normal discharge, use this guide to replace the battery.
It is important to have a healthy, functioning battery to ensure your laptop runs efficiently. If you notice after a long period of time that your laptop battery is draining faster than normal, you may want to consider replacing the battery.
When replacing a battery it is important to take several precautions. Make sure to avoid puncturing the battery, as that can cause a fire. Also, make sure to take appropriate precautions with a swollen battery. Always remember to power down the device before beginning replacement.
After replacement, please make sure to follow proper procedures when disposing of the battery.
Cosa ti serve
-
-
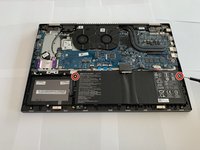
Remove the eleven 6.5 mm screws that secure the back case using a Phillips #1 screwdriver.
-
-
-
Attrezzo utilizzato in questo passaggio:Tweezers$4.99
-
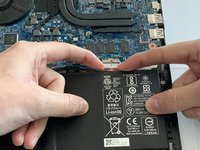
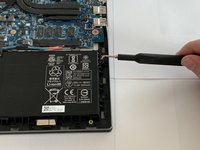
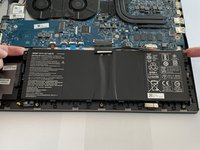
Using tweezers, remove the piece of black tape over the battery cable connector.
-


To reassemble your device, follow these instructions in reverse order.
To reassemble your device, follow these instructions in reverse order.
Annulla: non ho completato questa guida.
Un'altra persona ha completato questa guida.
Team

Embry-Riddle Aeronautical University, Team S3-G4, Watkins Spring 2020 Membro di Embry-Riddle Aeronautical University, Team S3-G4, Watkins Spring 2020
ERAU-WATKINS-S20S3G4
4 Membri
6 Guide realizzate