Questa traduzione è stata generata automaticamente e non è stata ancora revisionata da una persona. Parli questa lingua? Dai un’occhiata.
Introduzione
La ventola aiuta a eliminare il calore in eccesso dal portatile. Una ventola danneggiata può causare surriscaldamento e prestazioni scadenti. Questa guida spiega come sostituirla.
Cosa ti serve
-
-
-
Posiziona il portatile su una superficie piana con il lato inferiore rivolto verso l'alto.
-
Utilizzando il cacciavite a croce Phillips, rimuovi le quattro viti a croce Phillips da 4 mm dal pannello posteriore.
-
Utilizzando entrambe le mani, fai scorrere orizzontalmente il pannello posteriore per allontanarlo dal portatile.
 Chiedi a FixBot
-
-
-
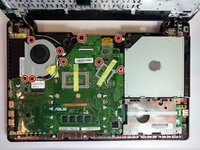
Utilizzando il cacciavite a croce Phillips #0, rimuovi le dieci viti da 2 mm nelle posizioni contrassegnate.
-
-
-
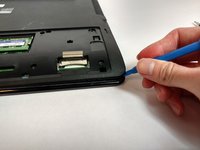
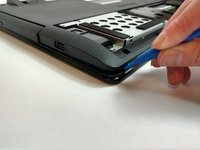
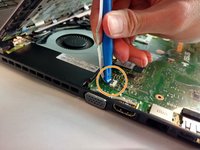
Utilizzando lo strumento di apertura in plastica, apri la cover posteriore del portatile.
-
-
-
-
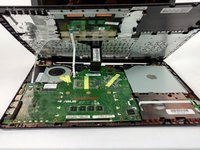
Individua i tre connettori a nastro.
-
Utilizzando lo strumento di apertura in plastica, solleva tutte e tre le linguette grigie e scollega i connettori a nastro dalla scheda madre.
-
-
-
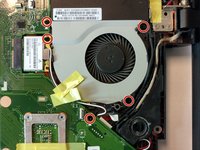
Utilizzando il cacciavite a croce Phillips #0, rimuovi le nove viti da 2 mm nelle posizioni contrassegnate.
-
-
-
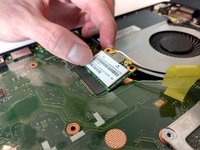
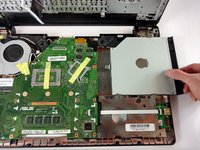
Scollega la scheda WLAN dalla scheda madre tirando il connettore verso l'alto.
-
Scollega l'unità disco ottico dalla scheda madre facendola scorrere verso destra.
-
-
Strumento utilizzato in questo passaggio:Tweezers$4.99
-
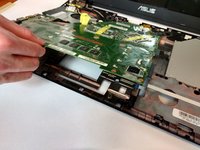
Capovolgi la scheda madre per mostrare il lato inferiore.
-
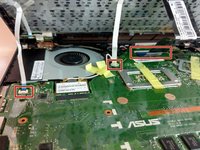
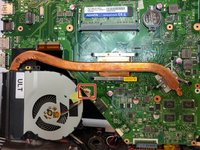
Individua il connettore quadrato della ventola collegato alla scheda madre.
-
Scollegalo utilizzando le pinzette smussate.
-
-
-
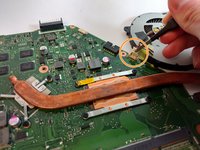
Rimuovi il nastro adesivo nero dalla ventola, come indicato nella posizione contrassegnata.
-
-











Per rimontare il dispositivo, segui queste istruzioni in ordine inverso.
Annulla: non ho completato questa guida.
Un'altra persona ha completato questa guida.
Un ringraziamento speciale a questi traduttori:
100%

Translation Bot ci sta aiutando ad aggiustare il mondo! Vuoi partecipare?
Inizia a tradurre ›

Team

USF Tampa, Team S16-G1, Eyestone Fall 2017 Membro di USF Tampa, Team S16-G1, Eyestone Fall 2017
USFT-EYESTONE-F17S16G1
4 Membri
25 guide realizzate
1Commento della guida
my mouse of laptop not working pls guide to repaire
