
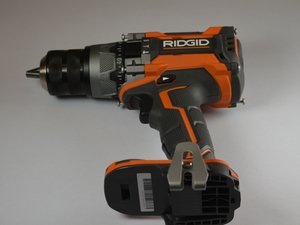
Wiki con Collaborazione Studenti
Un fantastico team di studenti del nostro programma educativo ha realizzato questo wiki.
Forward/Reverse Switch Locking
The selector switch is stuck in the forward or reverse setting.
Dirt Buildup Around Switch
There may be an excess amount of dirt built up around the switch of the drill. First, remove the face of the drill to expose the motor and its inner components. Next, use a can of compressed air to dislodge dirt and dust around the switch.
Switch is Broken
The switch of the drill may be broken. Therefore, the switch will need to be completely replaced. Follow our guide on how to replace the selector switch.
Trigger is Not Engaging Properly
The trigger is unable to properly engage.
Safety is On
The Rigid 5X Drill comes with a safety locking mechanism that prevents the trigger from firing. When the selector switch is set in between forward and reverse, it is in "safety" mode and can not be pulled. Push the selector switch completely to the forward or reverse setting.
Trigger is Jammed
There is a foreign object blocking the trigger, preventing it from being pulled. To remedy this, remove the face of the drill. Then, remove and clean the trigger and its surrounding components.
Faulty Trigger Mechanism
A damaged trigger can cause issues when attempting to engage the drill. If this is the case, the trigger will need to be removed and replaced. Follow our guide on removing and replacing the trigger.
Gears Not Working Properly
The drill is making a grinding noise when firing and the chuck is not properly engaging.
Broken Gears
Gears used to operate the motor of the drill have been chipped or worn down. The gears will need to be removed and replaced. Follow our guide on how to replace the gears.
Loose Gears
The gears have fallen out of their proper alignment. The gears will need to be removed and realigned within the drill. Our guide will show you how to properly remove the gears.
Blocked Gears
The gears have some form of blockage preventing them from working properly. Dirt and dust can pile up within the drill, causing the gears to behave in this way. Remove the gears, looking for any pieces of debris. Place the gears into a bowl with water and dish soap. Then, wipe and clean the gears, removing any visible buildup with a rag.
Light Switch is not activating
The light switch does not turn the light on.
Jammed Light Switch
The light switch is stuck in the on or off position and is unable to be moved. First, remove the face of the drill to expose the inner components and light switch. Next, remove the light switch and clean it with a rag to remove any foreign debris that is causing the jam.
Burnt out or Broken light bulb
If the light switch is being engaged and the light will not turn on, the light may be burnt out or broken. If so, remove the face of the drill and locate the light. Then, remove and replace the light.
Broken Switch
The light switch is being engaged, but the light is not turning on. If the light bulb has already been replaced, then there might be an issue with the light switch. See our Broken light switch guide for help.
Faulty Wiring
The wiring connecting from the light bulb to the light switch may have a short. If so, remove the face of the drill and replace the wiring.
Speed Selector Switch Locking
The speed switch will not slide between different speed settings.
Dirt Buildup Around Switch
There may be an excess of dirt built up around the speed selector switch of the drill. First, remove the face of the drill to expose the motor and its inner components. Then, use a can of compressed air to dislodge dirt and dust around the switch.
Switch is Broken
The speed switch of the drill may be broken. Therefore, the switch will need to be completely replaced. Follow our guide on how to replace the speed switch.
Team

Appalachian State University, Team S2-G4, Menagarishvili Spring 2019 Membro di Appalachian State University, Team S2-G4, Menagarishvili Spring 2019
APSU-MENAGARISHVILI-S19S2G4
3 Membri
12 Guide realizzate
0 Commenti