Salta al contenuto principale

Cosa ti serve

Questo smontaggio non è una guida di riparazione. Per riparare il tuo Wiko Pulp 4G Phone, usa il nostro manuale di assistenza.

  1. Wiko Pulp 4G Teardown, Wiko Pulp 4G Teardown: passo 1, immagine 1 di 3 Wiko Pulp 4G Teardown, Wiko Pulp 4G Teardown: passo 1, immagine 2 di 3 Wiko Pulp 4G Teardown, Wiko Pulp 4G Teardown: passo 1, immagine 3 di 3
    • So, what do we have here? This affordable smartphone offers some impressive specs at first glance:

    • Qualcomm® Snapdragon Quad-Core with 1.2 GHz

    • 2 GB RAM and 16 GB ROM (and additional Micro SD for up to 64 GB)

    • 5 inch IPS Display with 1280x720 pixels

    • 13 megapixels camera with 1080P video recording at 30 fps

    • USB OTG connection, a standard 3.5mm headphone jack, and an integrated Stereo FM Radio receiver

    • Android​ 5.1 Lollipop

    • Dual sim: 1 micro SIM + 1 nano SIM

  2. Wiko Pulp 4G Teardown: passo 2, immagine 1 di 3 Wiko Pulp 4G Teardown: passo 2, immagine 2 di 3 Wiko Pulp 4G Teardown: passo 2, immagine 3 di 3
    • We line a shift5.1 (left) up next to our Wiko Pulp 4G and see some similarities in their designs.

    • With the Wiko's official length measuring 143.9 mm from top to bottom, it is only 0.1 mm shorter than the shift5.1.

    • We played a very simple game of smart phone Jenga with the phones to see how their widths and thickness...stack up to each other.

    • Both have the same width: 72 mm. The Pulp4G, on top, is 8.8 mm thick, yet it appears thinner than the 7 mm of the shift 5.1, possibly due to its curved edges.

    • The back cover has a different look but is the same kind of snap off.

  3. Wiko Pulp 4G Teardown: passo 3, immagine 1 di 2 Wiko Pulp 4G Teardown: passo 3, immagine 2 di 2
    • Starting with the easily removable back cover we begin our journey towards the inside of this smartphone.

  4. Wiko Pulp 4G Teardown: passo 4, immagine 1 di 3 Wiko Pulp 4G Teardown: passo 4, immagine 2 di 3 Wiko Pulp 4G Teardown: passo 4, immagine 3 di 3
    • The user-removable Li-Po battery pops out with the move of a finger.

    • With 9.5 Wh (2500 mAh @ 3.8 V), it finds its place ahead of the iPhone 6 with 6.91 Wh (1810 mAh @ 3.82 V) and close behind the Galaxy S5 with 10.7 Wh (2800 mAh @ 3.85 V).

  5. Wiko Pulp 4G Teardown: passo 5, immagine 1 di 3 Wiko Pulp 4G Teardown: passo 5, immagine 2 di 3 Wiko Pulp 4G Teardown: passo 5, immagine 3 di 3
    Attrezzo utilizzato in questo passaggio:
    Phillips #000 Screwdriver
    $5.49
    Compra
    • The mid frame is held in place by eleven Phillips screws.

    • Having removed those screws we use our trusty plastic opening tool to pry away the mid frame.

  6. Wiko Pulp 4G Teardown: passo 6, immagine 1 di 2 Wiko Pulp 4G Teardown: passo 6, immagine 2 di 2
    • The only thing that remains inside the midframe is the rear facing loud speaker.

    • We are happy to see that it connects to the motherboard via spring contacts, allowing easy replacements in the future.

  7. Wiko Pulp 4G Teardown: passo 7, immagine 1 di 3 Wiko Pulp 4G Teardown: passo 7, immagine 2 di 3 Wiko Pulp 4G Teardown: passo 7, immagine 3 di 3
    • On the back of the display assembly we find the motherboard at the top section.

    • We take a moment to rejoice when we see all those ZIF connectors and bracket-covered press connectors. Then, start swiftly unlocking and unplugging them one by one.

  8. Wiko Pulp 4G Teardown: passo 8, immagine 1 di 3 Wiko Pulp 4G Teardown: passo 8, immagine 2 di 3 Wiko Pulp 4G Teardown: passo 8, immagine 3 di 3
    • First thing to come out is the small front facing camera which offers 5 megapixels.

    • Second in line is the big brother for the rear facing side which provides 13 megapixels for full HD video recording.

  9. Wiko Pulp 4G Teardown: passo 9, immagine 1 di 2 Wiko Pulp 4G Teardown: passo 9, immagine 2 di 2
    • One of the display cables still clings to the motherboard but can be peeled off easily.

    • Just two more Phillips screws to unscrew and we can take the board out for a close inspection.

  10. Wiko Pulp 4G Teardown: passo 10, immagine 1 di 2 Wiko Pulp 4G Teardown: passo 10, immagine 2 di 2
  11. Wiko Pulp 4G Teardown: passo 11, immagine 1 di 2 Wiko Pulp 4G Teardown: passo 11, immagine 2 di 2
    • IC Identification, Continued:

    • Qorvo RF1496A SP12T Antenna Switch

    • Skyworks SKY13416-485LF SP6T Antenna Switch

    • Texas Instruments TPD1S414 USB Charger OVP Switch w/ ESD Protection

    • ON Semiconductor NCP114AMX310T 300 mA/3.1 V LDO Regulator

    • Silergy DC-DC Converters

    • Likely Maxscend GNSS LNA

  12. Wiko Pulp 4G Teardown: passo 12, immagine 1 di 2 Wiko Pulp 4G Teardown: passo 12, immagine 2 di 2
    • Sensor identification:

    • TDK Invensense MPU-6881 3-Axis Accelerometer/Gyroscope

    • AKM Semiconductor AK09911 3-Axis Electronic Compass

    • Rohm BU52021HFV Hall Sensor

    • Proximity Sensor

  13. Wiko Pulp 4G Teardown: passo 13, immagine 1 di 3 Wiko Pulp 4G Teardown: passo 13, immagine 2 di 3 Wiko Pulp 4G Teardown: passo 13, immagine 3 di 3
    • Behind the mother board we remove a rubber gasket that goes around the headphone jack and holds the lens for the LED flash.

    • Last part at the top section is the earpiece speaker.

  14. Wiko Pulp 4G Teardown: passo 14, immagine 1 di 3 Wiko Pulp 4G Teardown: passo 14, immagine 2 di 3 Wiko Pulp 4G Teardown: passo 14, immagine 3 di 3
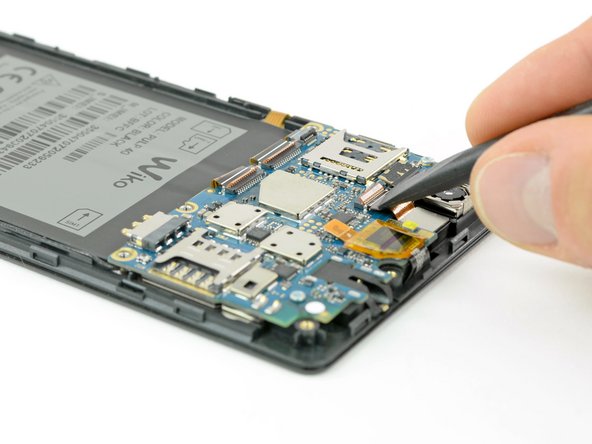
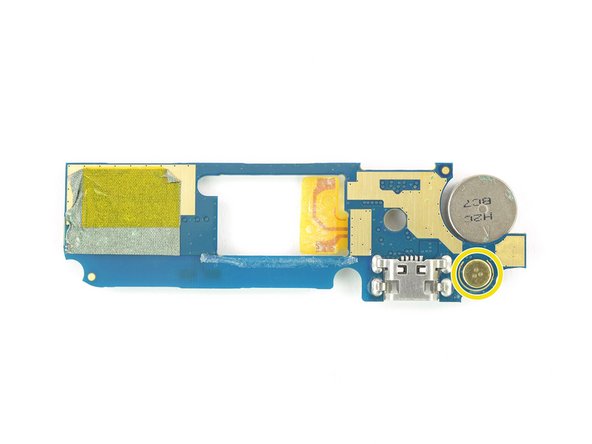
    • At the bottom of the display assembly we find a daughter board with some components.

    • First we disconnect the cable coming from the motherboard and pry out the vibrator.

    • Next we peel off a small connector plate and disconnect the antenna cable.

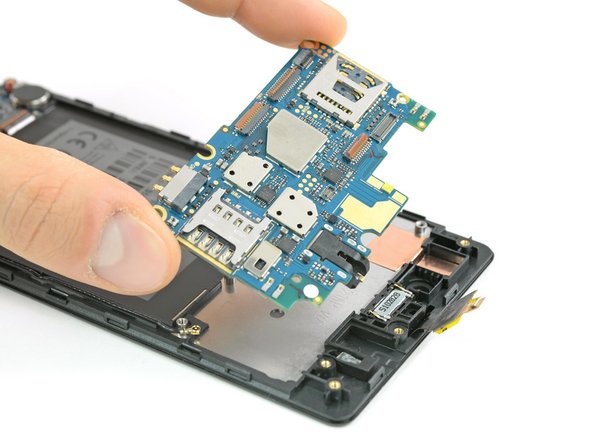
    • Now we are ready to carefully pry out the daughter board itself which is glued in with some double sided tape.

  15. Wiko Pulp 4G Teardown: passo 15, immagine 1 di 2 Wiko Pulp 4G Teardown: passo 15, immagine 2 di 2
    • Being able to detach the daughter board completely from the cable (and therefore from the mother board) is a big advantage over the shift5.1.

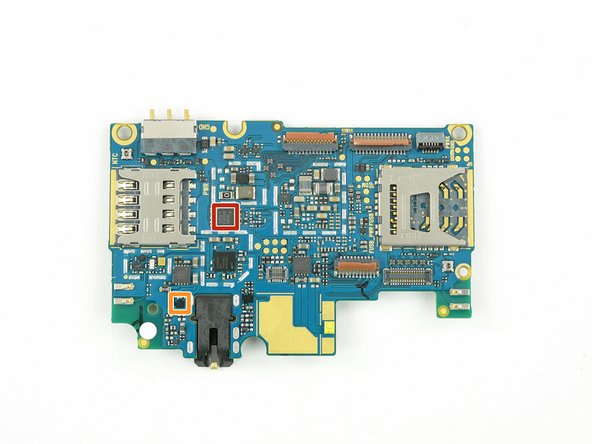
    • On the other hand, all of the components are soldered to the board, which makes repairing them individually a bit trickier.
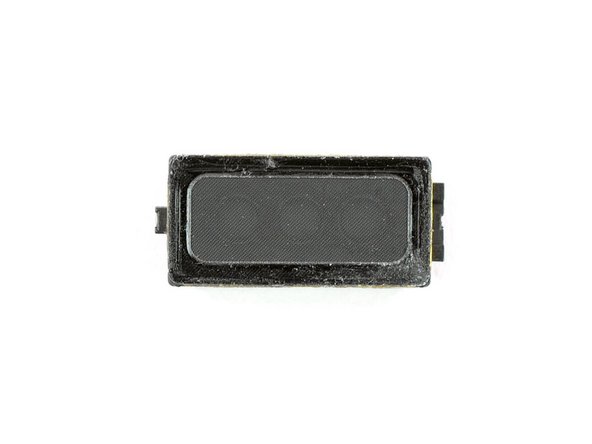
    • USB port

    • Vibrator

    • Microphone

  16. Wiko Pulp 4G Teardown: passo 16, immagine 1 di 2 Wiko Pulp 4G Teardown: passo 16, immagine 2 di 2
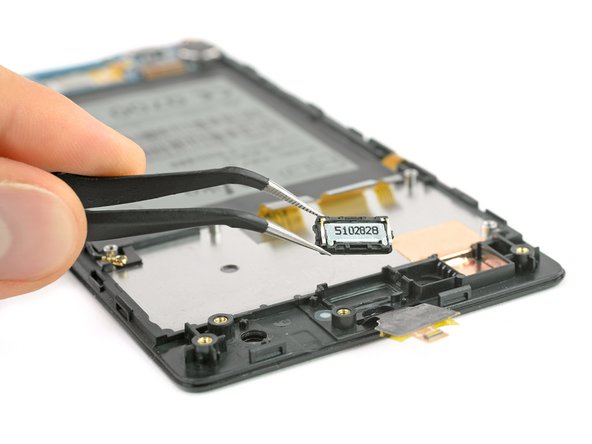
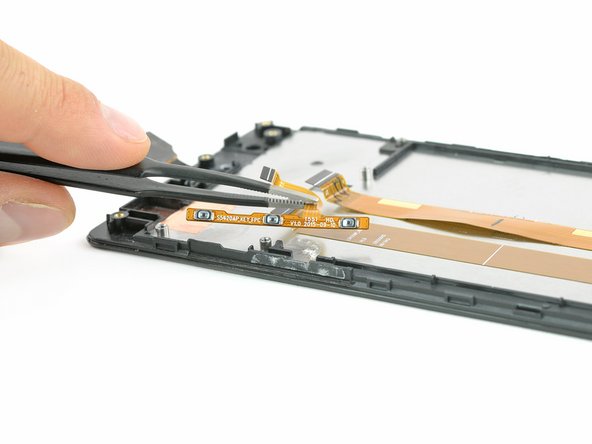
    • Speaking of the connection cable, we peel off the big sticker and find the second display cable running underneath and directly into the display itself.

    • With the sticker gone it is possible to also take away the power and volume buttons.

    • We stop here, leaving the connector cable in place.

  17. Wiko Pulp 4G Teardown: passo 17, immagine 1 di 1
    • We take a moment and sum up what we've discovered.

  18. Considerazioni Finali
    • Replacing the battery is easy as pie with the swappable back cover.
    • This phone doesn't use excessive glue nor proprietary screws—we found only Phillips throughout the entirety.
    • Most of the components can be replaced separately.
    • The motherboard and daughterboard are connected via a detachable cable.
    • Unfortunately, the components on the daughterboard are soldered on, making a repair on an individual component difficult.
    Punteggio Riparabilità
    7
    Riparabilità 7 su 10
    (10 è il più facile da riparare)

Tobias Isakeit

Membro da: 03/31/14

116.760 Reputazione

188 Guide realizzate

Team

Master Techs Membro di Master Techs

Community

322 Membri

2.506 Guide realizzate

0 Commenti

Aggiungi Commento

Visualizza Statistiche:

Ultime 24 Ore: 0

Ultimi 7 Giorni: 1

Ultimi 30 Giorni: 20

Tutti i Tempi: 10,304