Introduzione
The device that makes walking look pedestrian: the much-blogged-about “hoverboard.” You may have seen those super cool kids, effortlessly gliding around the supermarket while you’re stuck walking the produce section—like a chump. You may have thought to yourself, “Should I get one of those highly advanced, futuristic wheeled-transport platforms? And if I do, will it spontaneously combust, as I’ve seen so many times on YouTube?” Only teardown will tell if this self-balancing scooter will be up to snuff on safety, and repairability.
Peek into the near future of tech by following us on Instagram, Twitter, and Facebook.
Cosa ti serve
-
-
Just how much "swag" does this Swagway pack? The specs are a good place to start looking:
-
Hard ABS outer body casing
-
Aluminum wheels with rubber tires
-
10 MPH top speed
-
23" x 7.3" x 7.3"
-
"Top Quality Brand" lithium battery
-
-
-
Phillips #2 screws secure the two bottom covers, so it's not long before we're well within the belly of the beast.
-
Things look… not bad! Given these boards' reputation, we weren't expecting clean insides.
-
Each foot pad has two infrared sensors. Stepping down on the pad pushes a peg between emitter and receiver; when all four sensors are blocked, you are ready to roll.
-
Those sensor switches live on the backs of the two gyro boards—one for each wheel. Each board is home to:
-
Invensense MPU6050 6-axis gyroscope+accelerometer
-
Changjiang Electronics Technology Co., LTD (JCET) CJ78M05 0.5 A / 5 V voltage regulator
-
-
-
-
The real star of the show here is the
firestarterlithium ion battery pack. -
Looks like we’ve got a “Shilly-car” lithium battery operating at 36 V with 4.4 Ah (that works out to 158 Wh—just over four times the capacity of an iPad Pro).
-
Inside, we find a tidy block of 20 LG ICR18650B4 batteries with their own protection board. We’re glad to see a reputable brand in here!
-
Their nominal voltage is much higher than the 158 Wh listed on the shrinkwrap. Li-ion batteries shouldn't be fully discharged, so the battery protection board probably limits the pack to the label's specs.
-
-
-
The motor power lines have some interesting (read: completely mismatched) color coordination going on—fixers take note.
-
Here's what we found on a quick tour of the main board:
-
GigaDevice GD32F103 ARM Cortex-M3
-
Six half-H bridge motor drivers, made up of two large MOSFETs each
-
Changjiang Electronics Technology Co., LTD CJ78M05 0.5A/5V voltage regulator
-
Two pairs of 0.007 ohm resistors by the power inlet (R007).
-
-
-
Saving the best for last(ish), we cracked open one of the mysteriously heavy wheels to get a look at the brushless DC motor.
-
Inside we find oodles of coiled copper wire, three large power leads (one for each of the three phases) and five leads for Hall effect sensors (for position tracking).
-
The motor control board will let the motor know when to switch across those wires, making for a nice smooth ride.
-
-
-
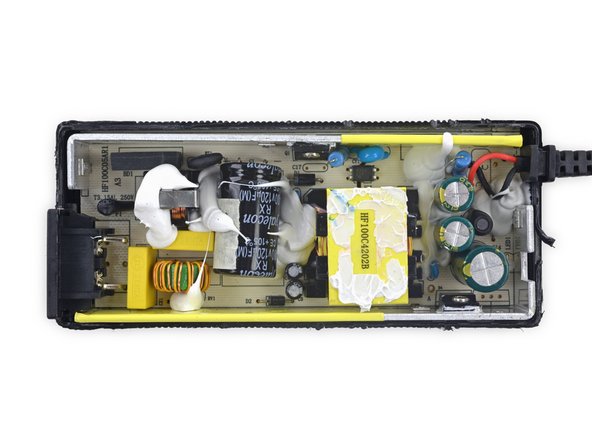
Real quick though, let's take a peek at the UL-certified charger. After all, house fires from charging hoverboards have been reported...
-
To be honest, it looks pretty messy, but we don't like to judge a charger by its... random epoxy? So we consulted charger guru Ken Shiriff of Righto.com, who said:
-
"Looks like a straightforward flyback switching power supply. I don’t see any cause for complaints...The charger looks solid. I don’t see any corners cut. The design is ‘unchallenging’—they didn’t try to make it as small as possible; Apple probably would have made it half the size."
-
So hey, as long as you have a real Swagway, with a real UL-certified charger, you should be fine? Probably.
-
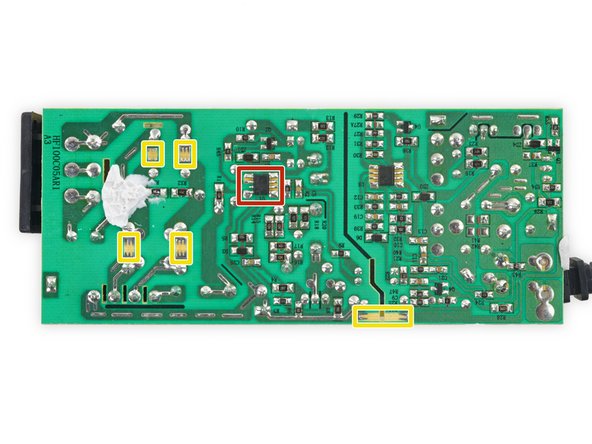
Board-wise, we note:
-
A Leadtrend LD7575 green-mode PWM controller
-
Jaw-like etches that are PCB spark gaps, which protect circuitry from voltage surges
-
- Modular design with good use of connectors means many components can be easily replaced.
- Only Phillips #2 screws are used—nothing proprietary.
- The battery is easy to replace.
- Inconsistent wire colors makes reassembly tricky.
- We couldn't get the tire off—replacing a worn-out tire will probably mean a new wheel and hub motor.


Considerazioni Finali
Punteggio Riparabilità


(10 è il più facile da riparare)
10 Commenti
Thank you for learn
My problem is I fix my swag way and I changed the sensor then it's start putting own Weel drive forword and ether own drove back side
I hope slovenly this problem with you
Thank you again
Does anyone have a scheme or a photo for the assembly of the whole device? I've got the electronics disassembled and am not sure if the parts are complete.