Salta al contenuto principale

Cosa ti serve

Questo smontaggio non è una guida di riparazione. Per riparare il tuo Lenovo ThinkPad X1 Yoga, usa il nostro manuale di assistenza.

  1. Lenovo ThinkPad X1 Yoga Display Assembly Teardown, Introduction: passo 1, immagine 1 di 3 Lenovo ThinkPad X1 Yoga Display Assembly Teardown, Introduction: passo 1, immagine 2 di 3 Lenovo ThinkPad X1 Yoga Display Assembly Teardown, Introduction: passo 1, immagine 3 di 3
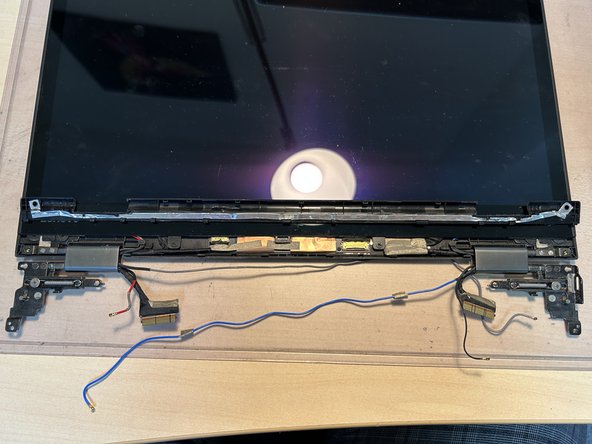
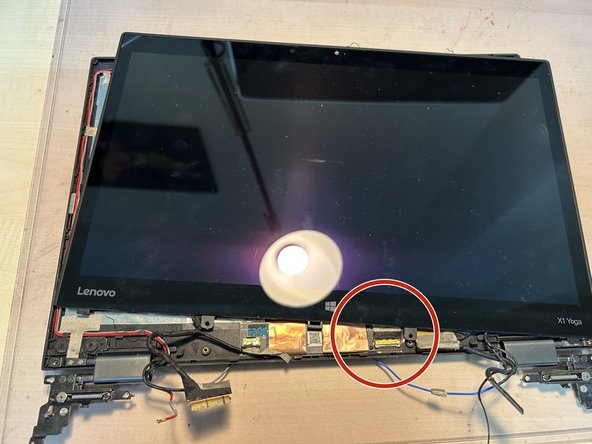
    • Here we have the screen as just removed from our Thinkpad.

    • In the lower corners you will find two rubber caps with hidden screws.

    • Remove the caps and unscrew the first screw.

  2. Lenovo ThinkPad X1 Yoga Display Assembly Teardown, Display screws: passo 2, immagine 1 di 3 Lenovo ThinkPad X1 Yoga Display Assembly Teardown, Display screws: passo 2, immagine 2 di 3 Lenovo ThinkPad X1 Yoga Display Assembly Teardown, Display screws: passo 2, immagine 3 di 3
    • You have to remove the screws on the right and left side to proceed.

  3. Lenovo ThinkPad X1 Yoga Display Assembly Teardown, Screen cover: passo 3, immagine 1 di 3 Lenovo ThinkPad X1 Yoga Display Assembly Teardown, Screen cover: passo 3, immagine 2 di 3 Lenovo ThinkPad X1 Yoga Display Assembly Teardown, Screen cover: passo 3, immagine 3 di 3
    • The screws secured this rubbery, bendy cover which is removed easily by using your fingernails or a spudger.

    • When you have removed the cover store it away somewhere safe.

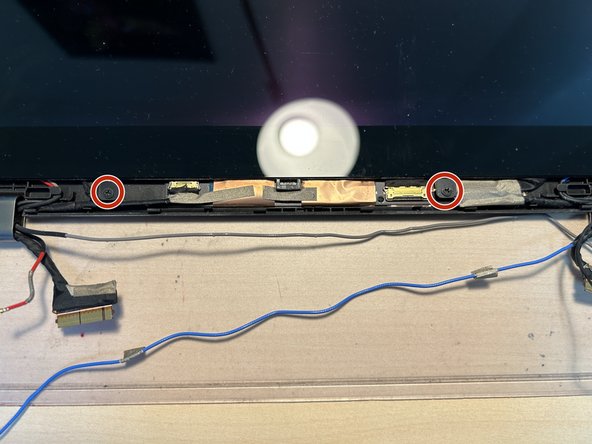
    • Remove the two PH1 screws marked with red circles.

  4. Lenovo ThinkPad X1 Yoga Display Assembly Teardown, Hinges and wiring: passo 4, immagine 1 di 3 Lenovo ThinkPad X1 Yoga Display Assembly Teardown, Hinges and wiring: passo 4, immagine 2 di 3 Lenovo ThinkPad X1 Yoga Display Assembly Teardown, Hinges and wiring: passo 4, immagine 3 di 3
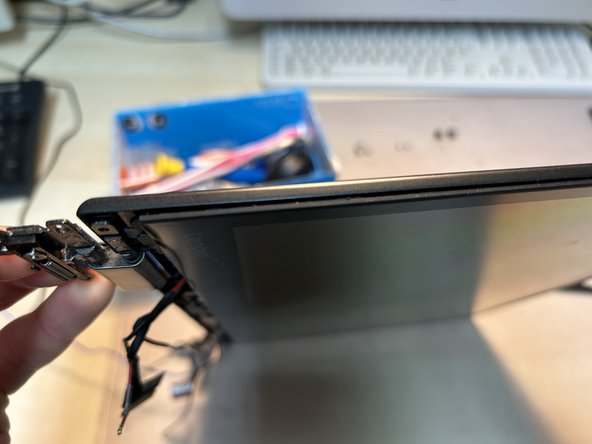
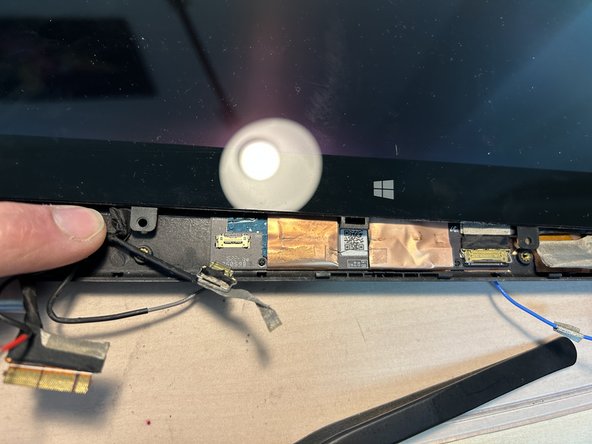
    • Flip the display on the side. This way it is easier to pull out the plastic caps holding the display wires in place.

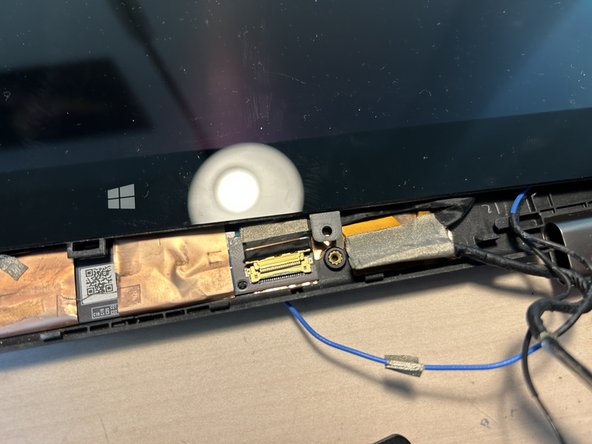
    • Use some tweezers to lever out the plastic cap and store it somewhere safe.

    • Gently pull out the cables from the hinge.

  5. Lenovo ThinkPad X1 Yoga Display Assembly Teardown, Right display hinge: passo 5, immagine 1 di 3 Lenovo ThinkPad X1 Yoga Display Assembly Teardown, Right display hinge: passo 5, immagine 2 di 3 Lenovo ThinkPad X1 Yoga Display Assembly Teardown, Right display hinge: passo 5, immagine 3 di 3
    • To the right you'll have to repeat the steps.

    • Free the cables from their prison in the hinge.

  6. Lenovo ThinkPad X1 Yoga Display Assembly Teardown, Rubber frame: passo 6, immagine 1 di 2 Lenovo ThinkPad X1 Yoga Display Assembly Teardown, Rubber frame: passo 6, immagine 2 di 2
    • The screen is secured by a rubber frame which is glued onto the display cover.

    • Use a guitar pick or a spuder to lift it off. In my case the glue was not really strong and required no heat.

  7. Lenovo ThinkPad X1 Yoga Display Assembly Teardown, Flex connector and removal: passo 7, immagine 1 di 3 Lenovo ThinkPad X1 Yoga Display Assembly Teardown, Flex connector and removal: passo 7, immagine 2 di 3 Lenovo ThinkPad X1 Yoga Display Assembly Teardown, Flex connector and removal: passo 7, immagine 3 di 3
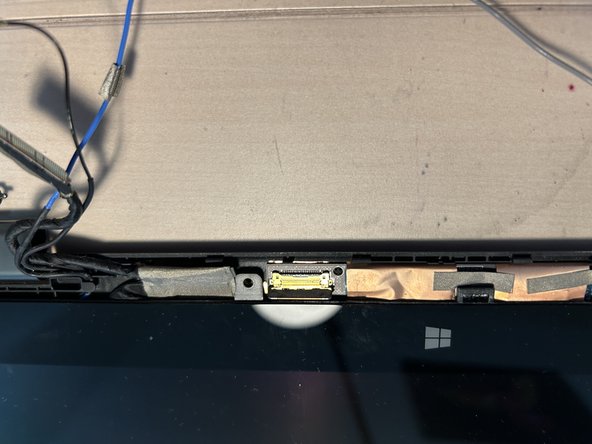
    • One flex connector is reachable for us. Lift up the brass clip.

    • With the screws removed and the clip detached the display is now free

    • Be careful not to rip the other flex connector, we have to detach in the next steps.

  8. Lenovo ThinkPad X1 Yoga Display Assembly Teardown, Disconnecting the display: passo 8, immagine 1 di 3 Lenovo ThinkPad X1 Yoga Display Assembly Teardown, Disconnecting the display: passo 8, immagine 2 di 3 Lenovo ThinkPad X1 Yoga Display Assembly Teardown, Disconnecting the display: passo 8, immagine 3 di 3
    • Pull the display up about an inch just so that you can detach the flex cables with the levers / clips.

  9. Lenovo ThinkPad X1 Yoga Display Assembly Teardown, Disconnect pt.2: passo 9, immagine 1 di 3 Lenovo ThinkPad X1 Yoga Display Assembly Teardown, Disconnect pt.2: passo 9, immagine 2 di 3 Lenovo ThinkPad X1 Yoga Display Assembly Teardown, Disconnect pt.2: passo 9, immagine 3 di 3
    • With all reachable connectors detached you can now lift up the screen from the cover but we're not quite there yet.

    • Flip over the screen like seen in the second picture.

    • Detach the last connector between cover and screen.

  10. Lenovo ThinkPad X1 Yoga Display Assembly Teardown, Done!: passo 10, immagine 1 di 2 Lenovo ThinkPad X1 Yoga Display Assembly Teardown, Done!: passo 10, immagine 2 di 2
    • With the last connector removed you're done!

    • You could now replace the screen or continue the disassambly.

0 Commenti

Aggiungi Commento

Visualizza Statistiche:

Ultime 24 Ore: 6

Ultimi 7 Giorni: 18

Ultimi 30 Giorni: 82

Tutti i Tempi: 1,869