Introduzione
We figured this machine was right up our alley. How could we resist a device with this kind of introduction: "Introducing the HP Z1, the world's first all-in-one workstation with a 27” (diagonal) display that snaps open to let you swap out parts and make upgrades. No tools required."
So how repairable/upgradeable is the Z1? Join us in this journey as we take apart HP's newest innovation in PCs, the HP Z1 Workstation.
Love these teardowns? Want to be more l33t than your geek counterparts and know about the teardowns as soon as they're live? Follow iFixit on Twitter for the latest updates.
Cosa ti serve
-
-
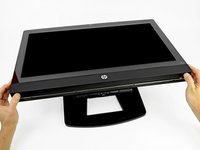
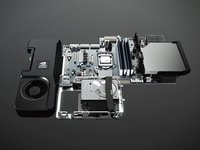
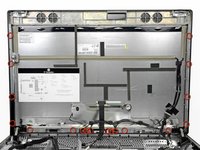
Here it is, the HP Z1 workstation. Collapsed down, the Z1 folds flat for easy-to-access component repairs.
-
Under the hood the Z1 houses:
-
Dual-core Intel® Core™ i3-2120 Processor
-
27" 2560x1440 pixel, diagonal LED-backlit IPS display
-
Four memory slots for up to 32 GB DDR3 RAM
-
SATA 7200 RPM, 500 GB Hard Drive
-
An internal USB port
-
-
-
Although the Z1 bears a strong resemblance to a certain group of molluscs, it is considerably easier to open. We have yet to determine which tastes better.
-
Designed like a briefcase, all you have to do to open this device is release the thumb tabs.
-
-
-
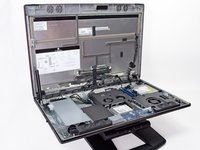
All the major components on the Z1 have awesome release tabs -- no screwdriver required!
-
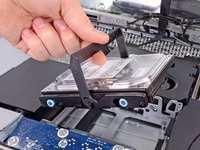
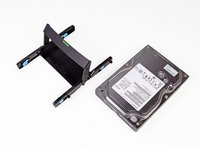
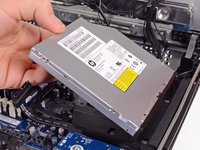
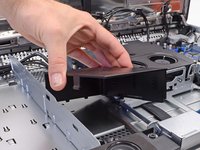
The hard drive bracket, capable of holding either a single 3.5" HDD or two 2.5" drives, bears a striking resemblance to a picnic basket.
-
Simple pins hold the 3.5" HDD in the bracket, eliminating the need for any kind of screwdriver.
-
-
-
Disconnecting the optical drive is only a matter of pulling out the SATA cable.
-
With one of iFixit's optical bay hard drive enclosures, it might be possible to put yet another hard drive inside the Z1.
-
This, of course, would mean a loss of Blu-ray capabilities, but with one of iFixit's hard drives installed, you can fit up to 50 HD movies inside the computer!
-
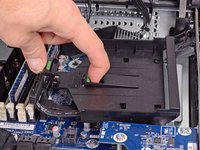
Green means go as the optical drive bracket speeds out of the Z1.
-
-
-
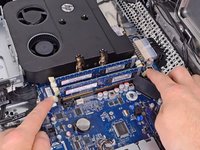
The RAM replacement requires flexing a couple of fingers.
-
We would praise the Z1 for having easy-to-remove RAM modules, but then we remembered that most computers have easy-to-remove RAM modules.
-
The Z1 is capable of supporting up to 32 GB of DDR3 RAM. If you have to ask why you need 32 GB, then you clearly don't need it.
-
-
-
-
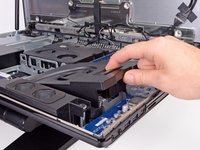
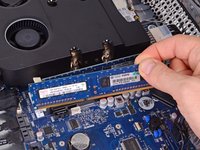
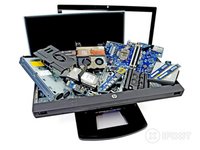
What's under the big black casing? Nothing, at least in our $2,000 "cheapo" machine.
-
If you shell out a few more clams for your Z1, you'll find a fancy schmancy NVIDIA Quadro graphics card here, as seen by HP's artistic rendering in the second image.
-
-
-
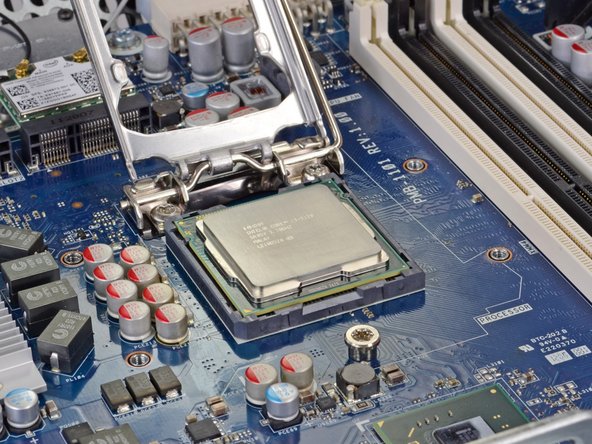
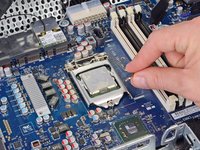
This is almost too easy! A simple flip of a lever and the Intel processor practically jumps off the motherboard.
-
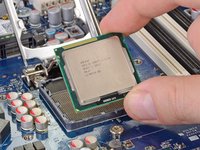
These days we mostly encounter soldered-on CPUs on laptops and smartphones, so it's a bit refreshing to touch and feel a nice hunk of CPU silicon in one's hand. Even though this machine is nothing like the PC beige-boxes some of us built back in the day, there's something comforting about holding a can-be-upgraded CPU and inspecting it up close.
-
Fake rumor confirmed: our Z1 did, in fact, come with an Intel Core i3 2120 processor, running at 3.30 GHz.
-
-
-
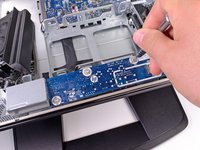
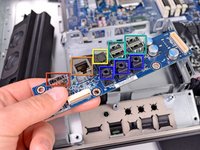
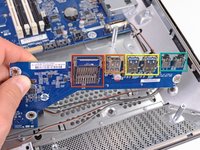
According to the Z1 treasure map, this little button is for resetting the CMOS. No more jumpers to short out. Cool.
-
This connector is where the power button plugs into the motherboard.
-
And, according to the same treasure map, this connector allows you to plug in a second internal USB port, should you need another one inside the device.
-
-
-
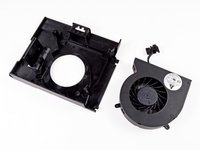
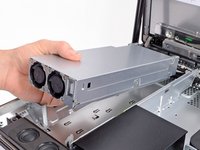
Round two of speaker removal is no sweat for our screwdriver.
-
We're going to guess that removing the speakers probably ruins the nicely engineered SRS Premium Sound.
-
-
-
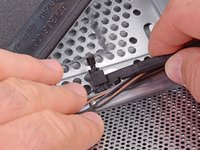
We're getting down to some serious deconstruction now. A few SATA connectors come out and the hard drive bracket is free.
-
These SATA cables connect the single or double hard drives to the motherboard.
-
Next up is the hard drive thermal sensor, which doesn't put up much of a fight.
-
Rather than taking Apple's approach, who changed their SATA connectors to a proprietary 7-pin design and embedded the thermal sensor inside the hard drive, HP is sticking with an upgrade-friendly design with standard SATA sockets and a thermal sensor that's mounted on the computer's internal frame.
-
-
-
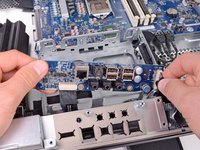
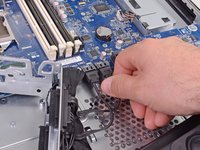
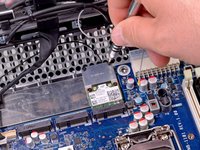
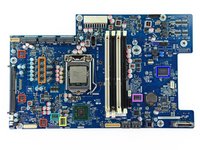
Just a couple more connectors, and the motherboard comes out.
-
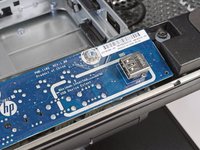
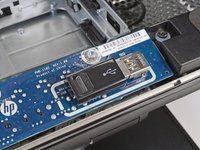
But before we can take out the mobo, we've got to remove Intel's 6230 Bluetooth/WiFi card, which is held in place by two T6 Torx screws.
-
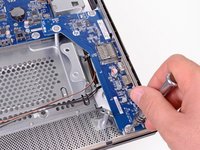
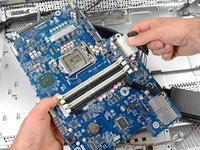
Attached to the power supply by an ATX connector, the motherboard is easier to remove than most logic boards.
-
-
-
So that's it for the bottom half of the computer. Now for the heavyweight LCD and glass.
-
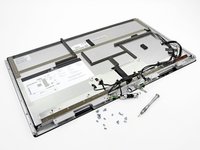
Removing some conveniently-placed T15 screws is all it takes to remove the LCD and glass from the rest of the machine.
-
Despite the pile of screws left on the bench, we are relieved at the absence of our nemesis, adhesive, in HP's design.
-
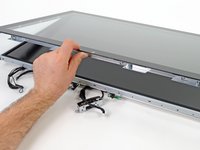
One also has to remove about a dozen more screws to separate the glass and LCD, but hey -- they're the same-sized T15 screws, and the glass comes right off once the screws are removed! It's about as simple of a construction as it can get for a component that's this hefty.
-
-
-
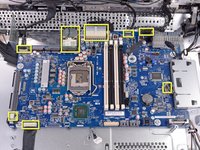
We told HP that we were hosting a party, so they brought the chips:
-
Intel Core i3-2120 Processor with Intel HD Graphics 2000
-
Intel BD82C206 Platform Controller Hub
-
ON NCP6151 CPU & GPU Controller
-
Texas Instruments TUSB7320 SuperSpeed USB xHCI Host Controller
-
IDT 92HD91B Audio Codec
-
Texas Instruments DRV604 Line Driver & Headphone Amp
-
MPS MP3399 LED Drivers
-
-
-
We're going to have to buy some more guacamole to go with all these chips:
-
Parade PS8321 DisplayPort Source 2:1 Multiplexers
-
Alpha & Omega AOZ5006Q1 Synchronous Buck Power Stage Modules
-
Infineon SLB9635TT1.2 TPM Embedded Security Controller
-
NXP 74LVC14AD Hex Inverting Schmitt Trigger
-
Nuvoton NPCD379HAKFX
-
Winbond 250128BVFG
-
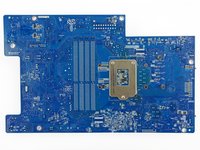
Nothing to see on the back of the board. Whew!
-
-
-
The HP Z1 sets an unprecedented Repairability Score: 10 out of 10! (10 is easiest to repair)
-
Modular construction allows the user to replace most major components in five minutes.
-
Non-modular components inside are held in place by T15 or T6 Torx screws, or by plastic fasteners. No glue or other funny business is used inside, aside from a taped-down thermal sensor.
-
HP offers the user a host of options on how to fix/troubleshoot the device: a helpful diagram on the inside of the machine, a set of PDF manuals on how to service the machine, and even videos for the major repair procedures!
-
The glass and LCD are the hardest to replace, but still not supremely difficult -- just a bit bulky to move around. They're not fused together, and are instead held in place by those wonderful T15 Torx screws. The most difficult repair in this machine should take under an hour to complete.
-


11 Commenti
Seems like it would make a brilliant "example computer" for a Computer Technology lab. It's the device and the textbook in one, easy package.
Also, there is no better place to store a USB flash drive than in a computer, where it can never be lost.