Salta al contenuto principale

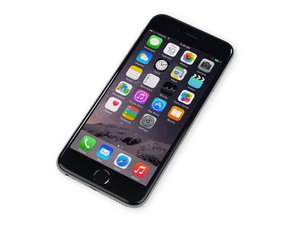
Introdotto il 19 settembre 2014, questo iPhone con schermo da 4,7" è la versione più piccola dell'iPhone 6 Plus. Identificato dai numeri modello A1549, A1586, and A1589.

4994 Domande Visualizza tutte

Stripped screws on the step 13 - alternative options?

Hello,

I was able to follow in the instructions for the Iphone6 Lithium Battery replacement until step 13, where I have to remove a second metal plate that has 5 screws in it. 3 of the screw remove easily, but 2, one of the 1.2 mm screws and the 1.7mm screw, do not move. I tried both screw drivers and it seems as though they may be stripped at this point.

I suspect i am out of luck, but if anyone has ideas on how to loosen the screws or alternative screwdrivers or tools to use, I am all ears.

Thanks

Rispondi a questa domanda Anch'io ho questo problema

Questa è una buona domanda?

Punteggio 0
Aggiungi un commento

2 Risposte

This is my method for stripped screws...

First, I try to find a flat head screwdriver that is just large enough to fit in there but still very tight (maybe even just minutely oversize that I can push in), and try to turn. You can also try flat heads and odd angles to see if this can get a better grip.

Next, I try either tweezers, small needle nose pliers, etc. to try to grip the outside of the screw head, and turn it like a bolt. I like the iFixit blunt nose for this job: Tweezers. Sometimes sandpaper on the teeth of the tweezer will help. This takes patience.

You can also try a small piece of sandpaper on top of the screw, then something flat on top of it, in hopes the friction will turn the screw. Not a high probability of success, but it has worked for me in the past.

There is also this if the above doesn't work: Screw Extracting Pliers

Immagine Tweezers

Prodotto

Tweezers

$4.99

Immagine Screw Extracting Pliers

Prodotto

Screw Extracting Pliers

$19.99

Questa risposta è stata utile?

Punteggio 0
Aggiungi un commento

The display assembly does not need to be removed while replacing. While it's god practice to help prevent damage to the cables, it isn't required. make sure you support the display assembly and do not let it fall all the way back and be careful while removing the adhesive strips. I find it helps if you remove the Taptic engine just below the battery before you pull those strips, It gives them a little more room and less to hang up on.

Do make sure those screws for the display are back in the proper place and set all the way in.

Good luck and happy repairing.

Questa risposta è stata utile?

Punteggio 0
Aggiungi un commento

Aggiungi la tua risposta

Dylan Boynton sarà eternamente grato.
Visualizza Statistiche:

Ultime 24 Ore: 0

Ultimi 7 Giorni: 1

Ultimi 30 Giorni: 5

Tutti i Tempi: 383