prabakaar, see if this step by step works for you:
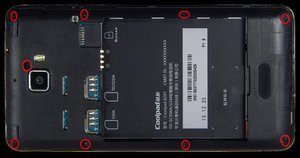
Remove the 9 screws in the back shell
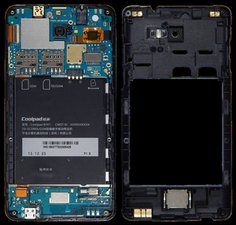
Separate the front shell from the back shell
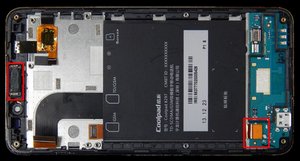
Remove the front Mainboard.
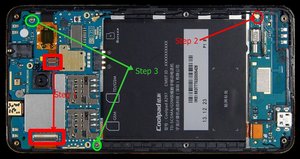
1. Open the connectors for TW and LCD, and use the tweezer to pick out the flat cables;
2. Use the tweezer to remove the RF cable terminal;
3. Remove the two cross-head screws in the mainboard, and take out the mainboard along the arrow.
Remove the materials on the front shell
1. Use the heat gun to evenly heat the back label at 150°C for about 20s to tear off the bottom shell label;
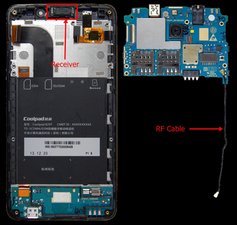
2. Use the tweezer to pick out the receiver;
3. Open the main FPC connector, and tear it off.
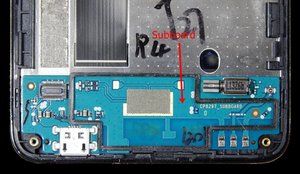
Remove the SUBBOARD
The subboard and the front shell assembly adopt double-sided sticking with conductive cloth; the cloth should be heated evenly with the heat gun before its torn off
The entire unit after disassembly is shown as follows:
The front shell assembly (front shell/TW/LCD) is fused together and can only be replaced as one unit.
Questa risposta è stata utile?
Votato
Annulla
Punteggio
4
Annulla
Scorri questo thread per trovare il posto appropriato per questo commento. Quindi, fai clic su "Allega commento a questo post" per spostarlo.