Salta al contenuto principale

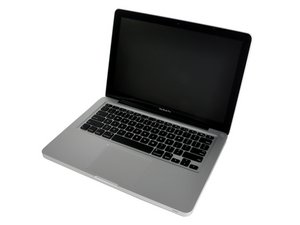
Modello versione metà 2009 A1278 - EMC2326 / processore Core 2 Duo 2,26 o 2,53 GHz

745 Domande Visualizza tutte
Domanda Chiusa

My isight camera, light sensor, and keyboard backlight are working?

Its not my first time opening my laptop. I have change the ram as well as the hard drive on my laptop but this time i wanted to get to the keyboard. I followed every step of the teardown, but stripped the LAST screw for the logic board and have to give up. UGH!!! if someone knows how to take a stripped screw out please tell me. Thats not my problem though, i connected everything back and everything seemed fine except my camera didnt work, my light sensor doesn't either and my keyboard doesn't light up it shows a circle with a line across it. Did I break the connection of the camera, is the camera, light sensor and keyboard all connected?? PLEASE HELP! What can i do to fix this?

Risposto! Visualizza la risposta Anch'io ho questo problema

Questa è una buona domanda?

Punteggio 0
Aggiungi un commento

3 Risposte

Soluzione Prescelta

Look

here stripped screws.

If this answer was helpful please remember to mark it accepted.

Good Luck,

N

Questa risposta è stata utile?

Punteggio 1
Aggiungi un commento

I have this problem too, and could offer you this advice. On 2010 Unibody MacBook Pro models, the iSight camera and ambient light sensors are together on the same cable. I recently switched out my optical drive for another hard drive and in the process accidentally broke this cable, so I know exactly what the issue is. I know this post is old, but I figured I'd respond anyway.

Questa risposta è stata utile?

Punteggio 0
Aggiungi un commento

Hi, Im pretty sure this is a old thread, however, I recently had this problem and just wanted to contribute. Same deal stripped screw, two of them actually on my logic board. (of all the places right? X_X) There are tools that could take the stripped screw out, however, I really did not want to spend that money, plus I didnt have it. So my solution was to take the smallest drill bit I had, and basically drill a little in the head of the screw, then changed the drill bit to the next biggest, and continued that until the top of the screw came off. For me, it took around 10 minutes of careful work, switched at least 3 bits before I was successful. The key to this is to be very patient and to drill lightly so that if you slipped, you would not be drilling through whatever was precious (ie in my case the logic board) So yeah, hope this helped!

Questa risposta è stata utile?

Punteggio 0
Aggiungi un commento
Visualizza Statistiche:

Ultime 24 Ore: 0

Ultimi 7 Giorni: 0

Ultimi 30 Giorni: 0

Tutti i Tempi: 2,594