Salta al contenuto principale

HP Chromebook 11A G8 EE Battery Replacement

Cosa ti serve

  1. HP Chromebook 11A G8 EE Battery Replacement, Keyboard Assembly: passo 1, immagine 1 di 2 HP Chromebook 11A G8 EE Battery Replacement, Keyboard Assembly: passo 1, immagine 2 di 2
    • On the bottom of the laptop, remove four 7 mm screw using a Phillips #1 screwdriver.

    • Using the Phillips #1 screwdriver, remove the two remaining 8 mm screws by the hinges.

  2. HP Chromebook 11A G8 EE Battery Replacement: passo 2, immagine 1 di 3 HP Chromebook 11A G8 EE Battery Replacement: passo 2, immagine 2 di 3 HP Chromebook 11A G8 EE Battery Replacement: passo 2, immagine 3 di 3
    • Flip the laptop over and open up the display.

    • Using the iFixit opening tool, carefully separate the palm rest from the bottom cover by working your way around the perimeter and prying it up.

    • You will hear an audible and tactile click or pop letting you know that you have unclipped a portion of the palm rest from the base enclosure.

    • Lift the palm rest of the laptops towards you, away from the screen.

  3. HP Chromebook 11A G8 EE Battery Replacement: passo 3, immagine 1 di 2 HP Chromebook 11A G8 EE Battery Replacement: passo 3, immagine 2 di 2
    • Carefully, lift the keyboard ribbon lock and disconnect the keyboard ribbon from the motherboard.

    • Disconnect the touchpad ribbon from the motherboard, and remove top cover.

    • Remove the keyboard.

  4. HP Chromebook 11A G8 EE Battery Replacement, Speaker: passo 4, immagine 1 di 3 HP Chromebook 11A G8 EE Battery Replacement, Speaker: passo 4, immagine 2 di 3 HP Chromebook 11A G8 EE Battery Replacement, Speaker: passo 4, immagine 3 di 3
    Attrezzo utilizzato in questo passaggio:
    Tweezers
    $4.99
    Compra
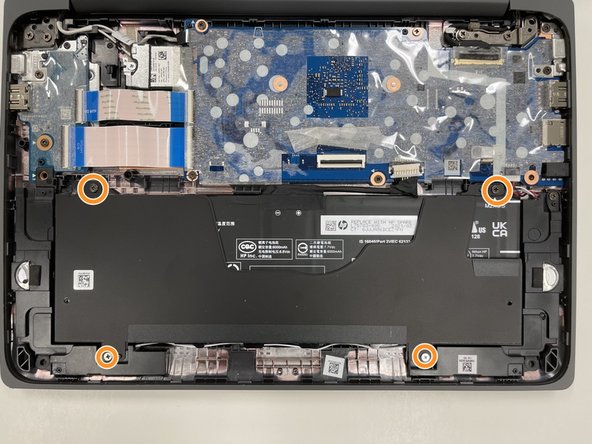
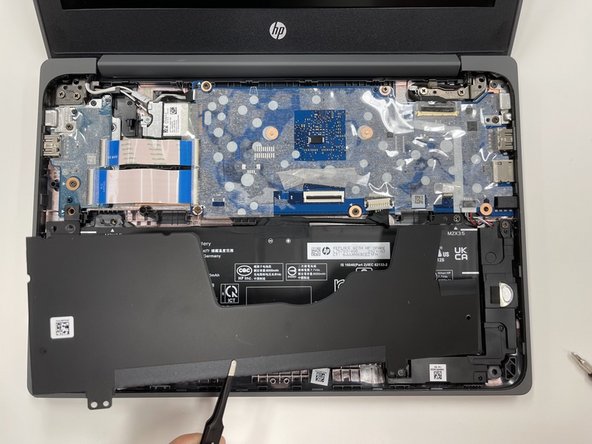
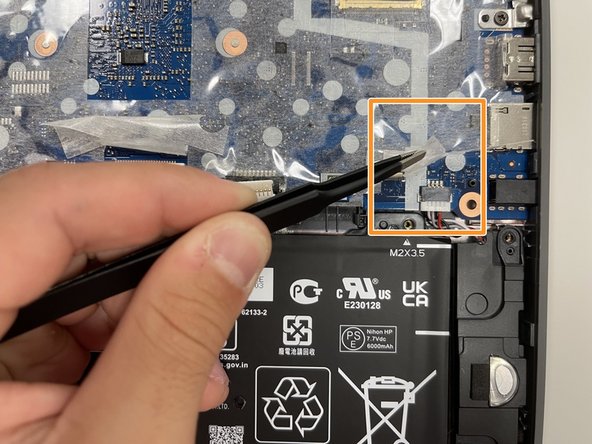
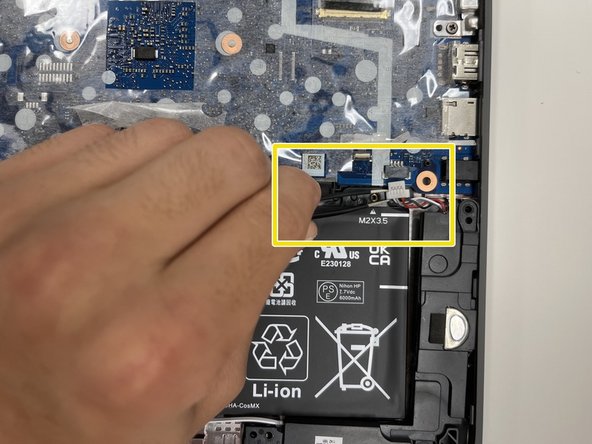
    • Using the tweezers, carefully disconnect the battery cable from the motherboard.

    • Use the Phillips #0 screwdriver, remove the four 3.5 mm screws that secure the battery cover to the battery.

    • Using the tweezers, carefully remove the battery cover.

  5. HP Chromebook 11A G8 EE Battery Replacement: passo 5, immagine 1 di 3 HP Chromebook 11A G8 EE Battery Replacement: passo 5, immagine 2 di 3 HP Chromebook 11A G8 EE Battery Replacement: passo 5, immagine 3 di 3
    • Using the Phillips #1 screwdriver, remove the 3.5 mm screw that secures the speaker to the frame.

    • Peel back the clear sheet.

    • Using the tweezers, carefully disconnect the speaker cable from the motherboard.

  6. HP Chromebook 11A G8 EE Battery Replacement: passo 6, immagine 1 di 2 HP Chromebook 11A G8 EE Battery Replacement: passo 6, immagine 2 di 2
    • Remove the speaker cable from the routing channel on the keyboard.

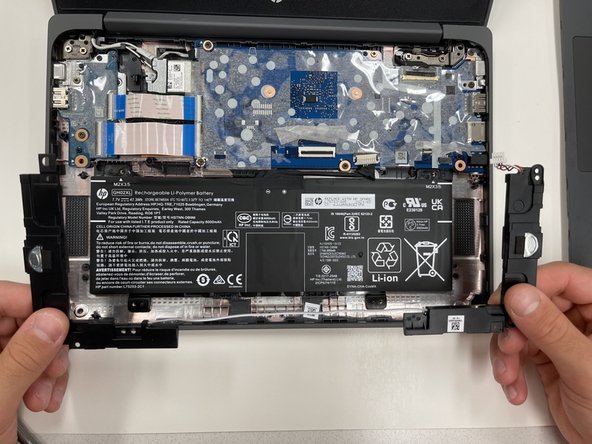
    • Using your hands, carefully lift the speakers out of the alignment pins, and remove.

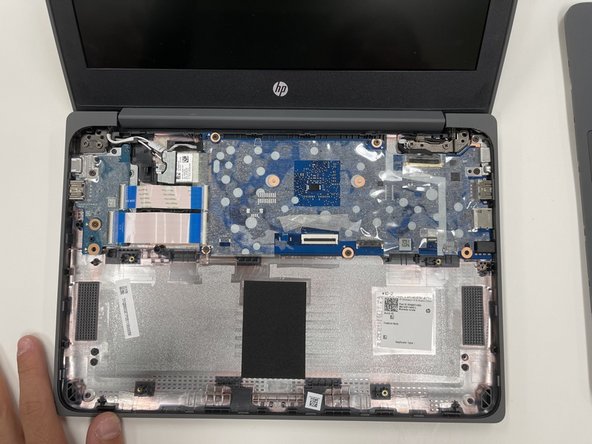
  7. HP Chromebook 11A G8 EE Battery Replacement, Battery: passo 7, immagine 1 di 2 HP Chromebook 11A G8 EE Battery Replacement, Battery: passo 7, immagine 2 di 2
    • Lift the battery out of the case and remove.

Conclusione

To reassemble your device, follow these instructions in reverse order.

Altre 2 persone hanno completato questa guida.

Un commento

I am literally in school rn this is so easy. Great instructions easy to follow. Chromebooks are very easy to take apart in school because of the fact that the keyboard assembly and trackpad are one piece. 10/10 instructions would do this again.

Carter Russell - Replica

Aggiungi Commento

Visualizza Statistiche:

Ultime 24 Ore: 8

Ultimi 7 Giorni: 15

Ultimi 30 Giorni: 55

Tutti i Tempi: 1,831