Salta al contenuto principale

Sostituzione pannello anteriore iPod Touch 5a Generazione

Nota: Stai modificando un prerequisito per la guida che stavi visualizzando. Tutte le modifiche avranno effetto su tutte 21le guide che includono questo passo.

Inglese
Italiano

Traduzione in corso passo 5

Passo 5
iPod Touch 5th Generation Front Panel Replacement: passo 0, immagine 1 di 3 iPod Touch 5th Generation Front Panel Replacement: passo 0, immagine 2 di 3 iPod Touch 5th Generation Front Panel Replacement: passo 0, immagine 3 di 3
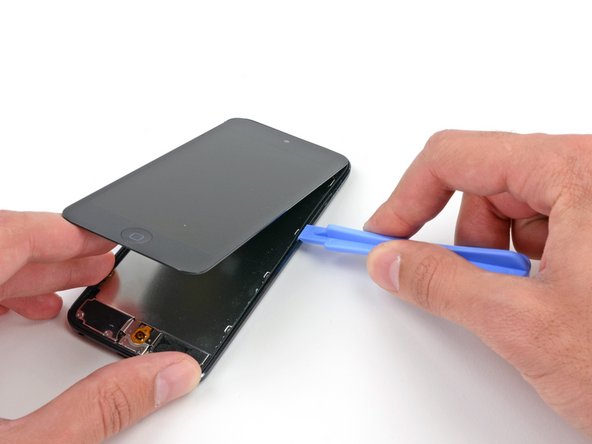
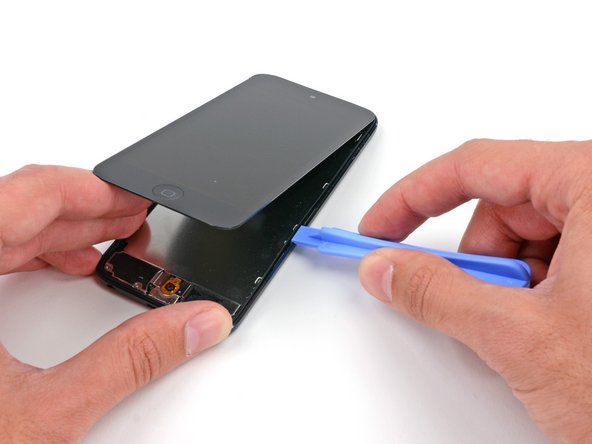
  • In the following steps, you will be loosening and freeing the plastic frame that surrounds the screen. It is connected to the rear case with several clips.

  • Starting at the top right of the device, insert a plastic opening tool into the gap between the plastic frame and the aluminum rear case.

  • Slide the tool down this crack, loosening the frame from the case.

Nei prossimi passi, procederai ad allentare e liberare il telaio in plastica che circonda lo schermo. Questo è collegato al case posteriore con molteplici clip.

Iniziando nella parte superiore destra del dispositivo, inserisci uno strumento di apertura in plastica nello spazio che si trova tra il telaio in plastica e il case posteriore in alluminio.

Fai scorrere lo strumento giù per questa fessura, allentando il telaio dal case.

I tuoi contributi sono usati su licenza in base alla licenza open source Creative Commons.