Salta al contenuto principale

Sostituzione della tastiera dell'HP Mini 311

Inglese
Italiano

Traduzione in corso passo 3

Passo 3
HP Mini 311 Keyboard Replacement: passo 0, immagine 1 di 3 HP Mini 311 Keyboard Replacement: passo 0, immagine 2 di 3 HP Mini 311 Keyboard Replacement: passo 0, immagine 3 di 3
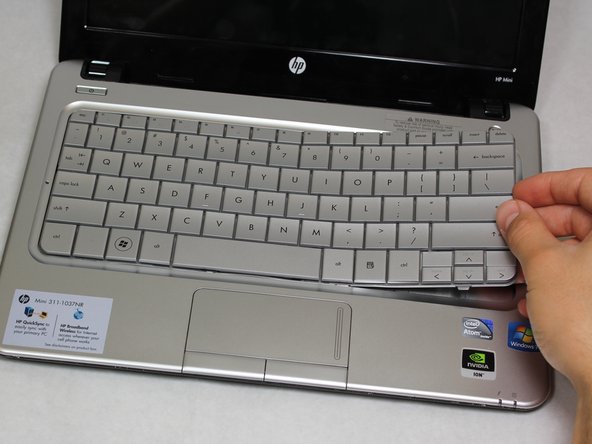
  • Flip the device around and orient it so that the screen and keyboard are facing you.

  • Starting at the right side, work your way towards the left end and remove the keyboard by unhinging the latches attaching it to the base of the device.

  • The right side of the keyboard should be unattached.

  • Be gentle and patient. You don't want to pull the entire keyboard at once, but rather pull by sections.

Capovolgi il dispositivo e posizionalo cosicché, sia lo schermo, che la tastiera, siano di fronte a te.

Partendo dal lato destro, per arrivare poi al lato sinistro: rimuovi la tastiera, levando i fermi che l'attaccano alla base del dispositivo.

Il lato destro della tastiera dovrebbe essere staccato.

Sii paziente e delicato. E' meglio rimuovere la tastiera un po' alla volta, e non tutt'insieme.

I tuoi contributi sono usati su licenza in base alla licenza open source Creative Commons.