Salta al contenuto principale

iPad Mini CDMA LCD Assembly Replacement

Avviso: Stai modificando una guida prerequisita. Tutte le modifiche avranno effetto su tutte le guide che includono questo passo.

Inglese
Olandese

Traduzione in corso passo 5

Passo 5
iPad Mini CDMA LCD Assembly Replacement: passo 0, immagine 1 di 3 iPad Mini CDMA LCD Assembly Replacement: passo 0, immagine 2 di 3 iPad Mini CDMA LCD Assembly Replacement: passo 0, immagine 3 di 3
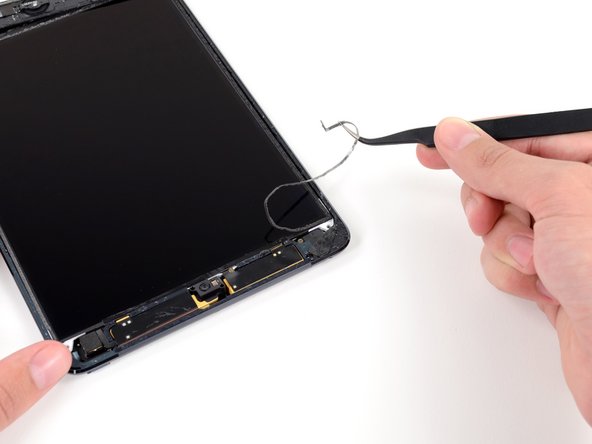
  • A thin strip of foam tape on the LCD frame is covering a piece of tape connecting the LCD to the panel beneath it. To proceed, you'll have to break and peel up some of the foam tape to expose the tape hidden beneath.

  • Use a pair of thin tweezers to pull up the top of the foam tape surrounding the LCD.

  • Be careful not to touch the LCD with the tweezers, as you may damage the display.

  • Use the tweezers to peel the foam tape up to expose the top of the LCD.

Inserisci qui la traduzione

Inserisci qui la traduzione

Inserisci qui la traduzione

Inserisci qui la traduzione

I tuoi contributi sono usati su licenza in base alla licenza open source Creative Commons.