Salta al contenuto principale

2012 Kawasaki Ninja Chain Tightening Replacement

Inglese
Italiano

Traduzione in corso passo 3

Passo 3
2012 Kawasaki Ninja Chain Tightening Replacement: passo 0, immagine 1 di 3 2012 Kawasaki Ninja Chain Tightening Replacement: passo 0, immagine 2 di 3 2012 Kawasaki Ninja Chain Tightening Replacement: passo 0, immagine 3 di 3
  • Notice the location of the slider on each side

  • This is located at the back of the bike on the rear wheel bars

  • Usually after use, the sliders become out of alignment and could be at different marker locations

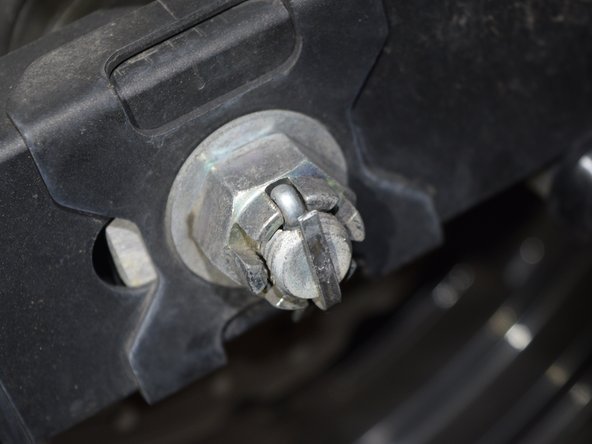
  • Locate the bolt that travels through the hub of the wheel

  • This will be the largest bolt of the back of the wheel

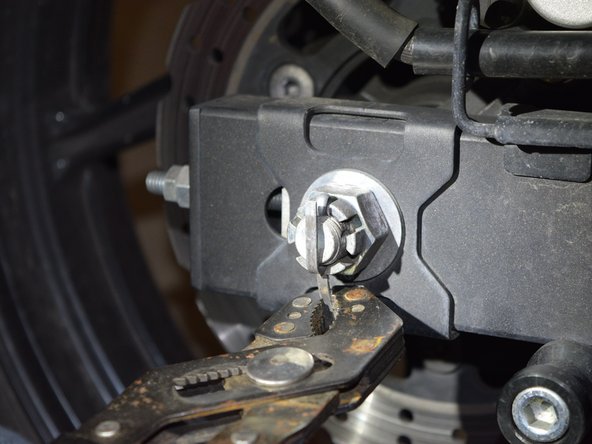
  • Remove the locking pin holding the nut in place

  • Use the grips to bend the pin straight

Inserisci qui la traduzione

Inserisci qui la traduzione

Inserisci qui la traduzione

Inserisci qui la traduzione

Inserisci qui la traduzione

Inserisci qui la traduzione

Inserisci qui la traduzione

I tuoi contributi sono usati su licenza in base alla licenza open source Creative Commons.