Salta al contenuto principale

Replacing the Carriage in the Photosmart All In One Printer

Inglese
Italiano

Traduzione in corso passo 4

Passo 4
Replacing the Carriage in the Photosmart All In One Printer: passo 0, immagine 1 di 2 Replacing the Carriage in the Photosmart All In One Printer: passo 0, immagine 2 di 2
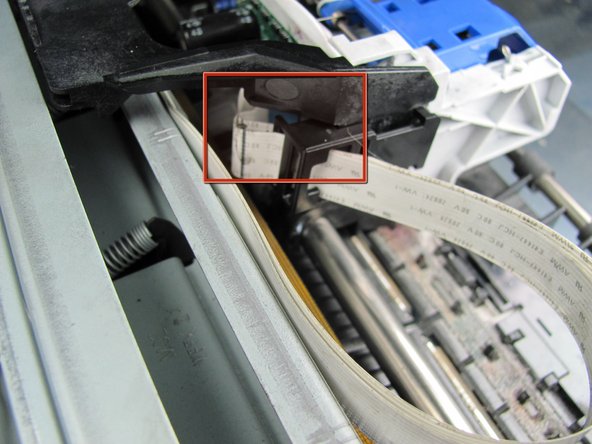
  • Pull on the two white wire strips on the printer carriage to remove which are marked in red.

  • Wire strips are fragile. Do not pull on ribbon directly. Pull from connection to carriage.

Inserisci qui la traduzione

Inserisci qui la traduzione

I tuoi contributi sono usati su licenza in base alla licenza open source Creative Commons.