Introduzione
Restore life to your iPod Touch 3rd Generation by replacing the logic board.
Cosa ti serve
-
-
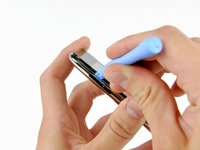
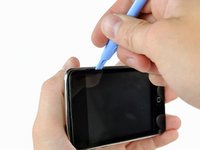
The picture at left (front panel already removed) shows the locations of the metal clips (shown in red) that snap on to the plastic frame. In the next few steps, try to pry the front panel up from the gaps between these clips.
-
-
-
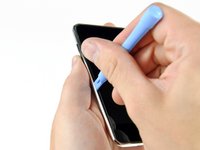
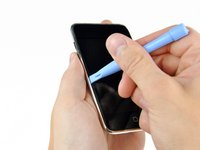
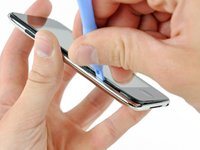
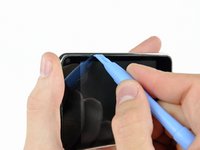
Gently insert an iPod opening tool between the glass front panel and its plastic surround near the volume adjust buttons.
-
Rotate the tool away from the Touch to pry up on the glass panel.
This is a poor place to start. You risk damaging the volume control. It makes more sense to start at the bottom, at the Home button, where there is plenty of room and nothing to damage.
-
-
-
Use the flat end of a spudger (or an opening tool) to very carefully pry the touch screen cable connector up off the upper logic board.
I had a real challenge getting the ribbon cable connected; after 20 minutes of trying while carefully balancing the front panel and trying not to rip the ribbon, I grabbed the old screen, ripped off the connector and practiced getting it on.
I had another challenge of the connector staying on...I had noticed a little piece of rubber had come off when I took the old screen off. That piece of rubber was EXACTLY the same size as the connector; I'd guess it is meant to hold the connector in place when the panel is put back on...So, I put it on top of the connector and closed it up..
Perfect!
Cheers, Rob
This was where I messed up, the adhesive on the digitizer was weak and when I tried to remove the original the bracket stayed in place, I figured that as I was installing the replacement and as I tried to put it into place and it wouldn't go I apparently jerked and broke the ribbon cable on the replacement there went my money now I have a faceless unusable iPod until I can order another, I did replace the LCD with little trouble though, not a completely failed repair.
-
-
-
Insert a small iPod opening tool with the edge angled up toward the underside of the display between the white plastic backlight and the metal shield beneath it.
-
Pry up along the lower edge of the display enough to grab it with your fingers, being careful to not flex the screen.
-
-
-
-
Use the flat end of a spudger to pry the battery off the adhesive securing it to the metal display tray.
-
Remove the metal display tray and set it aside.
-
Lay the battery flat in the rear panel.
-
-
Attrezzo utilizzato in questo passaggio:Tweezers$4.99
-
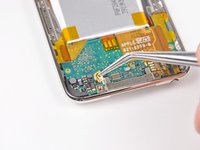
Remove the single Phillips screw securing the gold pressure contact to the logic board.
-
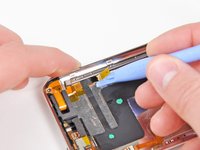
Use a pair of tweezers to lift the Phillips screw out of the logic board.
The golden Contact was broken while my assembling? Is the a possibility to buy the article separately?
-
-
-
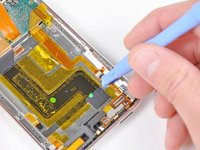
Carefully peel the antenna cable off the adhesive securing it to the rear panel.
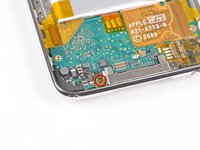
At some point before this (step 27), the ribbon cable from the lower logic board to the volume control switches was disconnected, at the socket near the switches. This can be seen in the lower center of the figure. If it's not eventually disconnected, the logic board assembly cannot be removed in the last step.
-


To reassemble your device, follow these instructions in reverse order.
To reassemble your device, follow these instructions in reverse order.
Annulla: non ho completato questa guida.
Altre 23 persone hanno completato questa guida.

Un commento
is there a way to repair the headphone jack?
mine only gives out a tiny bit of the frequency response, no bass or treble at all, and i can tell it's probably the ribbon cable.
Do be gentle when snapping your replacement front panel back on your iPod. There is potential for the Home button to be “squished” up against the internals and thus unable to be pressed in. If this happens, you must pry the panel up enough to let the Home button clear all the parts behind it and leave room to work.
Matt Rausch - Replica