Introduzione
Questa guida mostra come rimuovere l'hard drive da un iPod Video.
Cosa ti serve
-
-
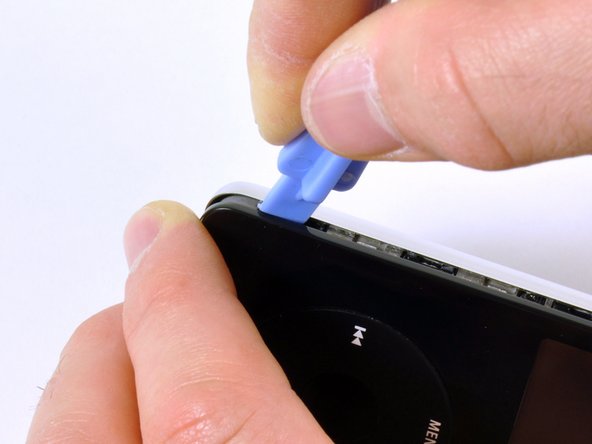
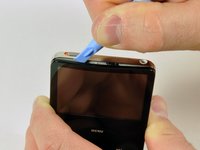
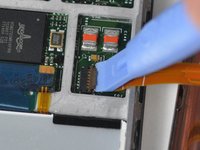
Inserisci lo strumento per l'apertura nel lato sinistro dell'iPod con la punta rivolta verso il retro in metallo.
-
Un plettro può risultare molto utile per aprire l'iPod. Semplicemente inseriscilo e fallo scorrere attorno alla scocca per liberare i ganci per velocizzare la procedura.
-
Allarga delicatamente la fessura creata facendo ondeggiare lo strumento e muovendolo verso sinistra.
-
Continua finché non hai liberato l'intero lato dell'iPod.
-
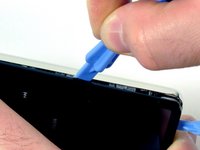
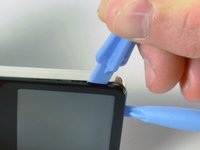
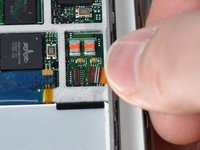
Puoi infilare lo strumento a destra dell'interruttore di bloccaggio. Stai attento mentre infili lo strumento: lo schermo è molto fragile.
-
-
-
-
Fai scorrere delicatamente lo strumento per l'apertura dell'iPod lungo il bordo superiore, assicurandoti di liberare i ganci.
-
Gli altri bordi dell'iPod dovrebbero liberarsi facilmente ora. Se non lo fanno, usa lo strumento lungo il lato destro dell'iPod come fatto per il lato sinistro.
-
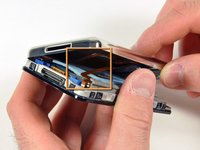
Allontana il fronte dell'iPod dal retro di circa 2 centimetri.
-
-
Attrezzo utilizzato in questo passaggio:Tweezers$3.99
-
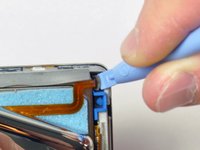
Usa delle pinzette angolate o lo strumento per l'apertura per far scorrere verso l'alto il fermo del connettore marrone. Assicurati di far leva su entrambi i lati del fermo. Devi sollevarlo di 1-2 millimetri per liberare il cavo. Non sollevare oltre o rimuovere l'aletta: potrebbe portare con sé il connettore bianco!
-
Sfila il cavo dal connettore.
-
-
-
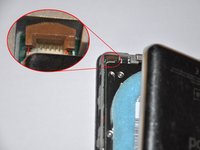
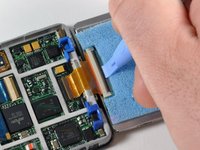
Usa un piccolo attrezzo di apertura per iPod per rilasciare la cerniera nera che tiene il cavo a nastro dell'hard drive. La linguetta ruoterà di 90 gradi verso la scheda logica, rilasciando il cavo a nastro.
-
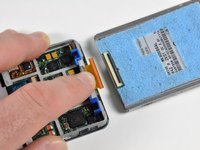
Usa il dito indice per tenere in posizione il cavo a nastro; scollega l'hard drive dal cavo a nastro.
-
Per rimontare il dispositivo, segui queste istruzioni in ordine inverso.
Per rimontare il dispositivo, segui queste istruzioni in ordine inverso.
Annulla: non ho completato questa guida.
Altre 235 persone hanno completato questa guida.
Un ringraziamento speciale a questi traduttori:
100%
Questi traduttori ci stanno aiutando ad aggiustare il mondo! Vuoi partecipare?
Inizia a tradurre ›
9 Commenti
Okay, I apparently did the same thing as Jeff above. When I opened the case, the plastic front came off cleanly, but now I can't figure out how to pry the innards out of the metal casing, which apparently was supposed to just happen by itself, according to the instructions above.
I've tried very gingerly pulling and prying around the edges to see if I can dislodge the metal casing, but no such luck so far. Now what?
Guide was helpfull and well detailed. The screewed on parts from the black cover broke but what the !&&*, it's not like i need them now. I switched the battery without problems, everything from the guide is well detailed.
Buttons wont work now. Re opened it 4 times and buttons still wont work.
Threw this Apple Crap at my wall, now it's all opened up again, permanently!
Guide is perfect tho! Thanks for the help.
I saved myself about $400 (that is on the cheap end of a new iPod 7th gen on Amazon) by buying new hard drive for $25, buying a new battery that came with iPod repair tool for $7.99 (all on Amazon), and used this guide. I had no problems with disassembly and reassembly. This guide is fantastic!
With this guide i managed to save some bacon on my two 5th generation iPods. One black and one white. Just for 25E i managed to find replacement hard disks for them. Now i enjoy the music in both car and living room. Thanks again mate... Cheers from Greece.
I decided to fix my boyfriends ipod video(5th gen 60gb) for his Christmas present. He dropped it a while back and the hard drive went to crap. So I got all my parts and tools today(very quick shipping btw) and decided to go for it. I was a little intimidated at first since I've never done this before but everything was so easy. Had no problem opening or separating the case. Changed the battery while I was in there and that was easy. Got to the hard drive and got it done. Before closing I checked that it was working but it just hung out on the apple screen. Was a little worried that the new hard drive was bad so I disconnected and the reconnected it and it worked perfectly! So proud of myself! All in all, the guide was a huge help, and it only took about 45 minutes to do everything. Easy peasy. Now I know I can change the battery in my ipod with no problem. Thanks!!!


