Introduzione
Use this guide to replace a damaged or worn-down bumper cover on your Xbox Series X|S Controller (model 1914).
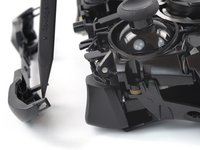
Cosa ti serve
-
-
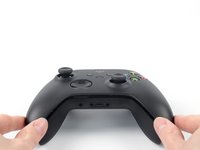
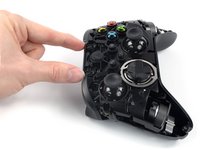
Use your fingers to slide up and remove the battery cover.
-
-
-
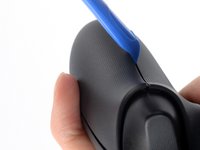
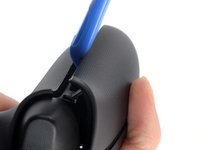
Insert an opening tool between the left handle cover and the bottom inner edge of the back housing.
-
-
-
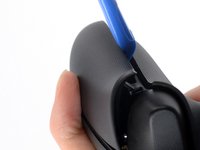
Slide the opening tool along the inner edge of the left handle cover and pry intermittently to release the plastic clips.
-
-
-
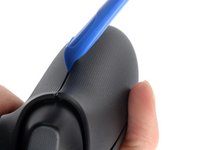
Pry up the middle inner edge of the handle cover with the opening tool to release the remaining clips.
-
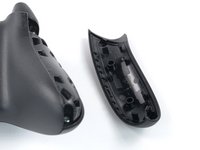
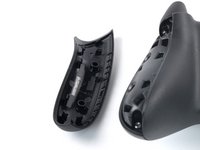
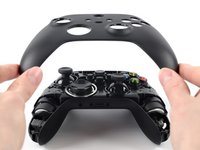
Remove the left handle cover.
-
-
-
Insert an opening tool between the right handle cover and the bottom inner edge of the back housing.
-
-
-
-
Slide the opening tool along the inner edge of the right handle cover and pry intermittently to release the plastic clips.
-
-
-
Pry up the middle inner edge of the handle cover with the opening tool to release the remaining clips.
-
Remove the right handle cover.
-
-
Attrezzo utilizzato in questo passaggio:Tweezers$4.99
-
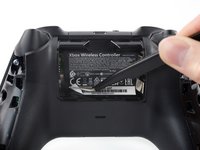
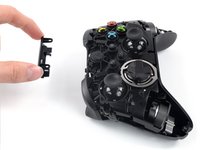
Use a pair of tweezers or your fingers to peel back the sticker to reveal the screw.
-
-
-
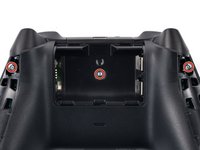
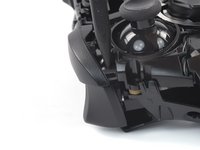
Use a Torx T8 Security driver to remove the five 9.3 mm-long screws securing the top housing, three near the top and two at the bottom.
-
-
-
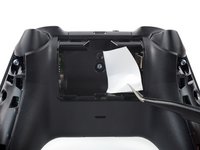
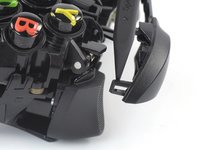
Insert the flat end of a spudger under the right USB-C port cover clip.
-
Pry up with the spudger to release the clip.
-
Repeat the procedure to release the left clip.
-
-
-
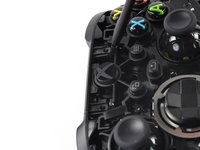
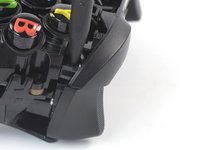
Insert the point of a spudger between the clip on the outer edge of the right bumper and the midframe.
-
Pry out with the spudger to release the right side of the bumper cover.
-
-
-
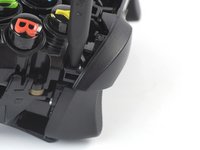
Insert the point of a spudger between the clip on the outer edge of the left bumper and the midframe.
-
Pry out with the spudger to release the left side of the bumper cover.
-


To reassemble your device, follow these instructions in reverse order.
Repair didn’t go as planned? Try some basic troubleshooting, or ask our Answers community for help.
To reassemble your device, follow these instructions in reverse order.
Repair didn’t go as planned? Try some basic troubleshooting, or ask our Answers community for help.
Annulla: non ho completato questa guida.
Altre 10 persone hanno completato questa guida.


4 Commenti
The left bumper button broke for me. The plastic post that presses the button just snapped. This helped me replace the bumper. Good guide.
Removing the handle covers was the hardest part, largely because I was afraid I would break them if I asserted too much pressure. Once I got those off, it was pretty easy. The opening tool and spudger recommended in the tools section were useful--they did their jobs very well--but I suspect this could have been accomplished with any kind of replacement tool(s) you might have on hand; however, since I bought them I'm sure they'll come in handy in future projects. I would argue the TR8 Torx Security Screwdriver is really the only piece of equipment that is specifically required.
£50 for a new controller, cost but £26 for the tools and spare part, took maybe 10 minutes, and you cannot tell one bit that my controller has been tampered with or fixed
feel truly accomplished, saved money - and now i have the tools for the next challenge, be it my own, or a friends'
I just broke the bumper cover while following steps 14 and 15 - the guide failed to mention the little plastic posts that actually press the RB/LB buttons are easily snapped while using the spudger to pry the bumper clips. The posts are visible in the picture for step 16 - the long protruding parts nearest the centre of the cover. Maybe consider adding a warning. I'm going to try to glue the posts back on but otherwise will have to just buy a replacement bumper cover part. Excellent guide otherwise.