Salta al contenuto principale

Wacker Pump PST2 400 2008 Impeller Replacement

Cosa ti serve

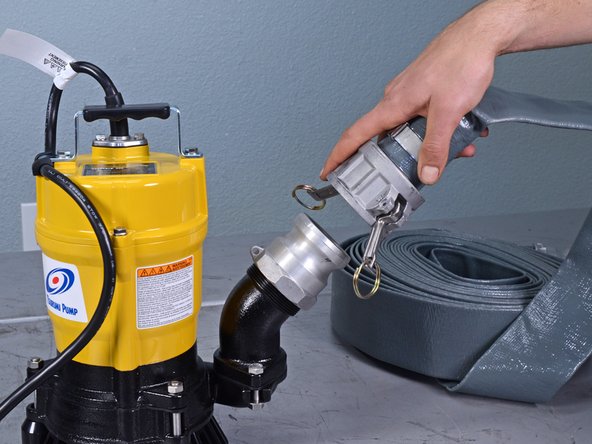
  1. Wacker Pump PST2 400 2008 Impeller Replacement, Remove the cotter pins: passo 1, immagine 1 di 3 Wacker Pump PST2 400 2008 Impeller Replacement, Remove the cotter pins: passo 1, immagine 2 di 3 Wacker Pump PST2 400 2008 Impeller Replacement, Remove the cotter pins: passo 1, immagine 3 di 3
    • Before starting, ensure the device is unplugged from power.

    • Pull to remove the two cotter pins securing the hose's locking arms, one on either side.

  2. Wacker Pump PST2 400 2008 Impeller Replacement, Unlock the collar arms: passo 2, immagine 1 di 3 Wacker Pump PST2 400 2008 Impeller Replacement, Unlock the collar arms: passo 2, immagine 2 di 3 Wacker Pump PST2 400 2008 Impeller Replacement, Unlock the collar arms: passo 2, immagine 3 di 3
    • Flip the two locking arms down to unlock the hose collar.

  3. Wacker Pump PST2 400 2008 Impeller Replacement, Remove the hose: passo 3, immagine 1 di 2 Wacker Pump PST2 400 2008 Impeller Replacement, Remove the hose: passo 3, immagine 2 di 2
    • Lift the hose away from the collar on the pump body to remove it.

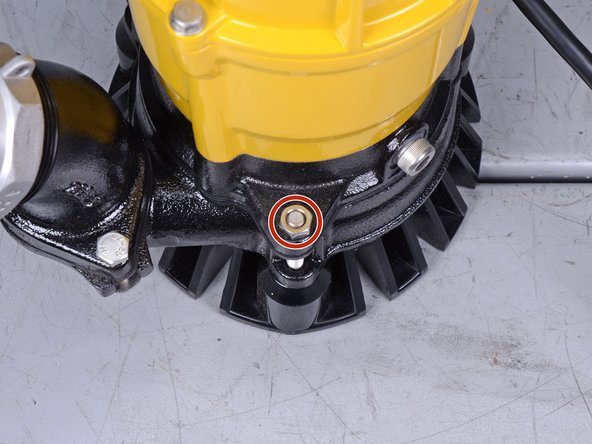
  4. Wacker Pump PST2 400 2008 Impeller Replacement, Remove the strainer assembly nuts: passo 4, immagine 1 di 2 Wacker Pump PST2 400 2008 Impeller Replacement, Remove the strainer assembly nuts: passo 4, immagine 2 di 2
    • Use a 13 mm socket to remove the three nuts securing the strainer assembly to the main body.

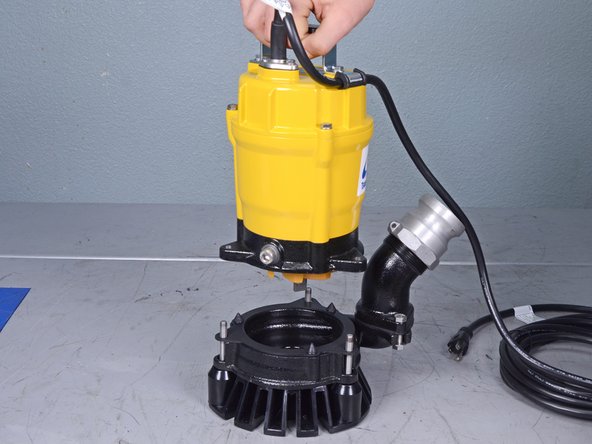
  5. Wacker Pump PST2 400 2008 Impeller Replacement, Lift the body off of the strainer: passo 5, immagine 1 di 2 Wacker Pump PST2 400 2008 Impeller Replacement, Lift the body off of the strainer: passo 5, immagine 2 di 2
    • Lift the main body up and off of the strainer assembly.

    • If the gasket between the body and the strainer comes off with the body, remove it and leave it with the strainer assembly.

    • If the gasket is cracked or excessively dirty, replace it.

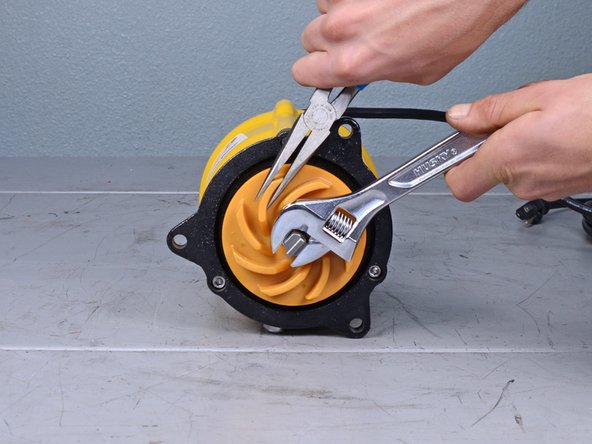
  6. Wacker Pump PST2 400 2008 Impeller Replacement, Remove the stirrer nut: passo 6, immagine 1 di 3 Wacker Pump PST2 400 2008 Impeller Replacement, Remove the stirrer nut: passo 6, immagine 2 di 3 Wacker Pump PST2 400 2008 Impeller Replacement, Remove the stirrer nut: passo 6, immagine 3 di 3
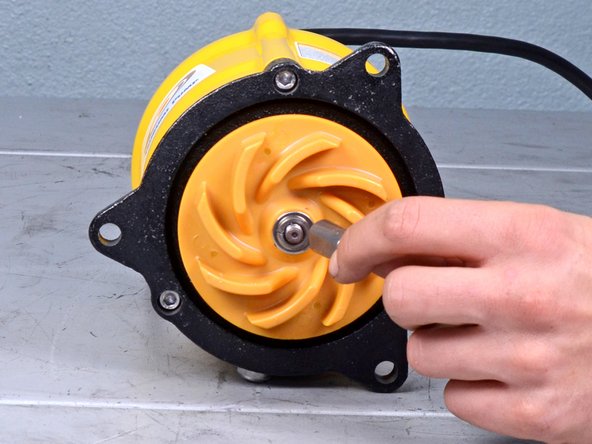
    • Grip one of the impeller blades with a pair of needle nose pliers.

    • With the impeller held in place, use an adjustable wrench to loosen the stirrer nut securing the impeller to the main body.

    • Remove the stirrer nut.

  7. Wacker Pump PST2 400 2008 Impeller Replacement, Remove the impeller washers: passo 7, immagine 1 di 2 Wacker Pump PST2 400 2008 Impeller Replacement, Remove the impeller washers: passo 7, immagine 2 di 2
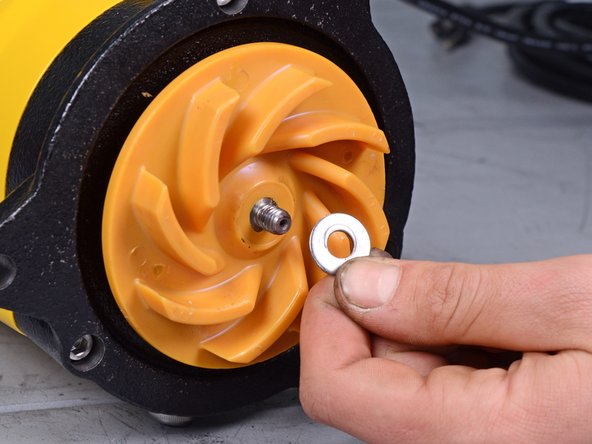
    • Remove the lock washer from the face of the impeller.

    • Remove the flat washer.

  8. Wacker Pump PST2 400 2008 Impeller Replacement, Remove the impeller: passo 8, immagine 1 di 2 Wacker Pump PST2 400 2008 Impeller Replacement, Remove the impeller: passo 8, immagine 2 di 2
    • Remove the impeller.

    • If the dust seal behind the impeller is cracked or shows excessive wear, replace it.

Conclusione

To reassemble your device, follow these instructions in reverse order.

Un'altra persona ha completato questa guida.

Carsten Frauenheim

Membro da: 03/10/20

115.285 Reputazione

339 Guide realizzate

Team

iFixit Membro di iFixit

Staff

136 Membri

17.430 Guide realizzate

0 Commenti

Aggiungi Commento

Visualizza Statistiche:

Ultime 24 Ore: 0

Ultimi 7 Giorni: 12

Ultimi 30 Giorni: 43

Tutti i Tempi: 752