Salta al contenuto principale

Vtech Kidizoom Smart Watch DX Battery Replacement

Cosa ti serve

  1. Vtech Kidizoom Smart Watch DX Battery Replacement, Master Switch: passo 1, immagine 1 di 1
    • Make sure the master switch is "OFF" before disassembly, to avoid an electric shock.

    • Flip the watch over with the back facing up.

  2. Vtech Kidizoom Smart Watch DX Battery Replacement: passo 2, immagine 1 di 1
    • Remove the four 6.0 mm screws on the back plate with the Phillips #00 screwdriver.

  3. Vtech Kidizoom Smart Watch DX Battery Replacement: passo 3, immagine 1 di 1
    • Gently pull the back plate from the watch casing.

  4. Vtech Kidizoom Smart Watch DX Battery Replacement: passo 4, immagine 1 di 2 Vtech Kidizoom Smart Watch DX Battery Replacement: passo 4, immagine 2 di 2
    • Lift the master switch from the circuit board.

  5. Vtech Kidizoom Smart Watch DX Battery Replacement, Circuit Board: passo 5, immagine 1 di 2 Vtech Kidizoom Smart Watch DX Battery Replacement, Circuit Board: passo 5, immagine 2 di 2
    • The speaker wires are fragile. They may break if excessive force is used to remove the circuit board.

    • Removal of the circuit board requires soldering.

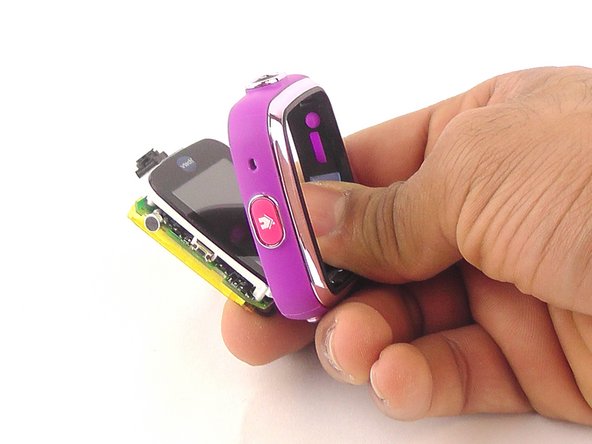
    • Gently push on the display from the front, near the camera. The circuit board and display will pop out through the back.

  6. Vtech Kidizoom Smart Watch DX Battery Replacement: passo 6, immagine 1 di 1
    • Lift the circuit board carefully from the casing, without breaking or detaching the speaker wires at the bottom of the circuit board.

  7. Vtech Kidizoom Smart Watch DX Battery Replacement: passo 7, immagine 1 di 1
    • Note which wire is connected to which lead before continuing. There are no markers on the circuit board to indicate where each wire belongs.

    • De-solder the black speaker wire from the circuit board.

  8. Vtech Kidizoom Smart Watch DX Battery Replacement: passo 8, immagine 1 di 1
    • De-solder the red speaker wire, as in the previous step.

  9. Vtech Kidizoom Smart Watch DX Battery Replacement: passo 9, immagine 1 di 1
    • Wait for the solder to cool down and solidify, then remove the circuit board from the casing.

  10. Vtech Kidizoom Smart Watch DX Battery Replacement, Battery: passo 10, immagine 1 di 2 Vtech Kidizoom Smart Watch DX Battery Replacement, Battery: passo 10, immagine 2 di 2
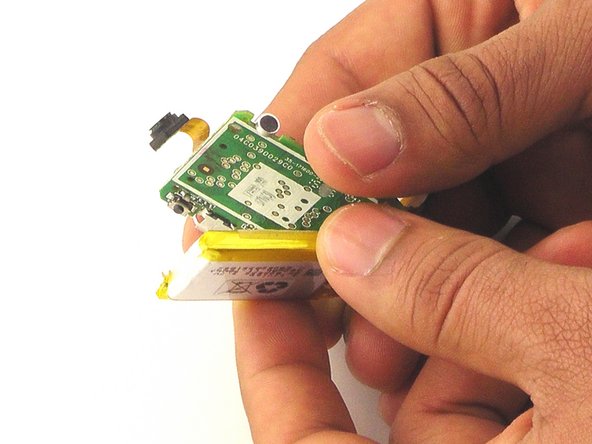
    • Using the plastic opening tool, gently pry the edges of the battery away from from the circuit board.

    • There is a thin layer of adhesive holding the battery to the circuit board. This will remain sticky after prying.

  11. Vtech Kidizoom Smart Watch DX Battery Replacement: passo 11, immagine 1 di 1
    • De-solder the red battery wire from the circuit board.

  12. Vtech Kidizoom Smart Watch DX Battery Replacement: passo 12, immagine 1 di 1
    • Repeat the de-soldering for the black (ground) wire.

  13. Vtech Kidizoom Smart Watch DX Battery Replacement: passo 13, immagine 1 di 1
    • Pull the battery free, and wait for the solder to cool before handling further.

Conclusione

To reassemble your device, follow these instructions in reverse order.

Altre 4 persone hanno completato questa guida.

Team

USF Tampa, Team 10-6, Remmell Spring 2016 Membro di USF Tampa, Team 10-6, Remmell Spring 2016

USFT-REMMELL-S16S10G6

4 Membri

12 Guide realizzate

Un commento

Where did you bought the battery?

funkysoulbrother - Replica

Aggiungi Commento

Visualizza Statistiche:

Ultime 24 Ore: 5

Ultimi 7 Giorni: 14

Ultimi 30 Giorni: 42

Tutti i Tempi: 8,982