Salta al contenuto principale

Visual Land Prestige Pro 7D Battery Replacement

Cosa ti serve

  1. Visual Land Prestige Pro 7D Battery Replacement, Back Panel: passo 1, immagine 1 di 1
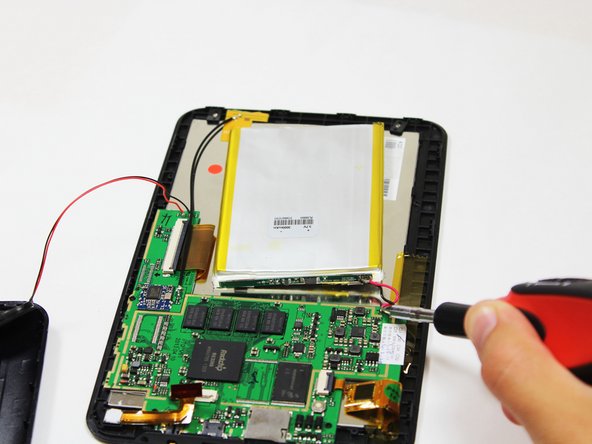
    • Unscrew the two 4.0mm Phillips head screws found near the ports at the bottom of the device using a PH #00 screwdriver.

  2. Visual Land Prestige Pro 7D Battery Replacement: passo 2, immagine 1 di 1
    • Be careful when taking the back panel off. The speaker is connected to both the front and back panels, and may get pulled out if you are not gentle when lifting the back panel away.

    • Slide the plastic prying tool in between the front and back panel and pry them apart on all 4 sides.

    • It may be easiest to start on one of the sides, and work your way around the device. The bottom, with the ports, is the most difficult side and can be saved for last.

    • There are small latches that make this difficult. Moderate force may be required to separate the two panels.

  3. Visual Land Prestige Pro 7D Battery Replacement, Battery: passo 3, immagine 1 di 1
    • Pry a thin tool under the battery.

    • Be gentle and try not to bend the battery.

    • Slide the tool around all sides of the battery. Separate it evenly on all sides for the best result.

  4. Visual Land Prestige Pro 7D Battery Replacement: passo 4, immagine 1 di 2 Visual Land Prestige Pro 7D Battery Replacement: passo 4, immagine 2 di 2
    • Soldering guns are hot and can easily damage the device.

    • Desolder the two connections between the red and blue wires where the battery connects to the circuit board.Soldering guns are hot and can easily damage the device.

    • For soldering information, see our guide: Come saldare e dissaldare componenti elettrici.

    • If you are removing the LCD display this step is unnecessary.

Conclusione

To reassemble your device, follow these instructions in reverse order.

Altre 3 persone hanno completato questa guida.

Max Hudson

Membro da: 10/14/14

422 Reputazione

2 Guide realizzate

Team

Cal Poly, Team 10-41, Amido Fall 2014 Membro di Cal Poly, Team 10-41, Amido Fall 2014

CPSU-AMIDO-F14S10G41

4 Membri

12 Guide realizzate

Un commento

My tablet shows the icon battery What that mean

paularslay - Replica

Aggiungi Commento

Visualizza Statistiche:

Ultime 24 Ore: 0

Ultimi 7 Giorni: 0

Ultimi 30 Giorni: 3

Tutti i Tempi: 6,082